Allow chatbot users to download their conversation transcripts
Last update: 05 December 2023
As they wrap up their interaction with your chatbot, some users may want to download a copy of their conversation. Whether you want to allow them to do so is up to you.
If you do decide to allow your users to download their conversation transcript, follow these steps.
There are two ways to enable users to receive their chat transcript: a download button inside the chat widget and an automated Action. For third-party channels, only the Action route is possible.
All dates in conversation transcripts are exported in UTC timezone.
Downloading chat transcripts from the chat widget
If you are using one of our propriety chatbot channels (widget, embed, full page), follow these steps.
Step 1: Enable the conversation transcript downloads
Go to Engage → Channels.
Pick one of the platform-owned channels, such as Converse. Click Options.
Scroll down to the bottom of the page to find Settings page. Unfurl this accordion to reveal four settings you may turn on or off for your chatbot.
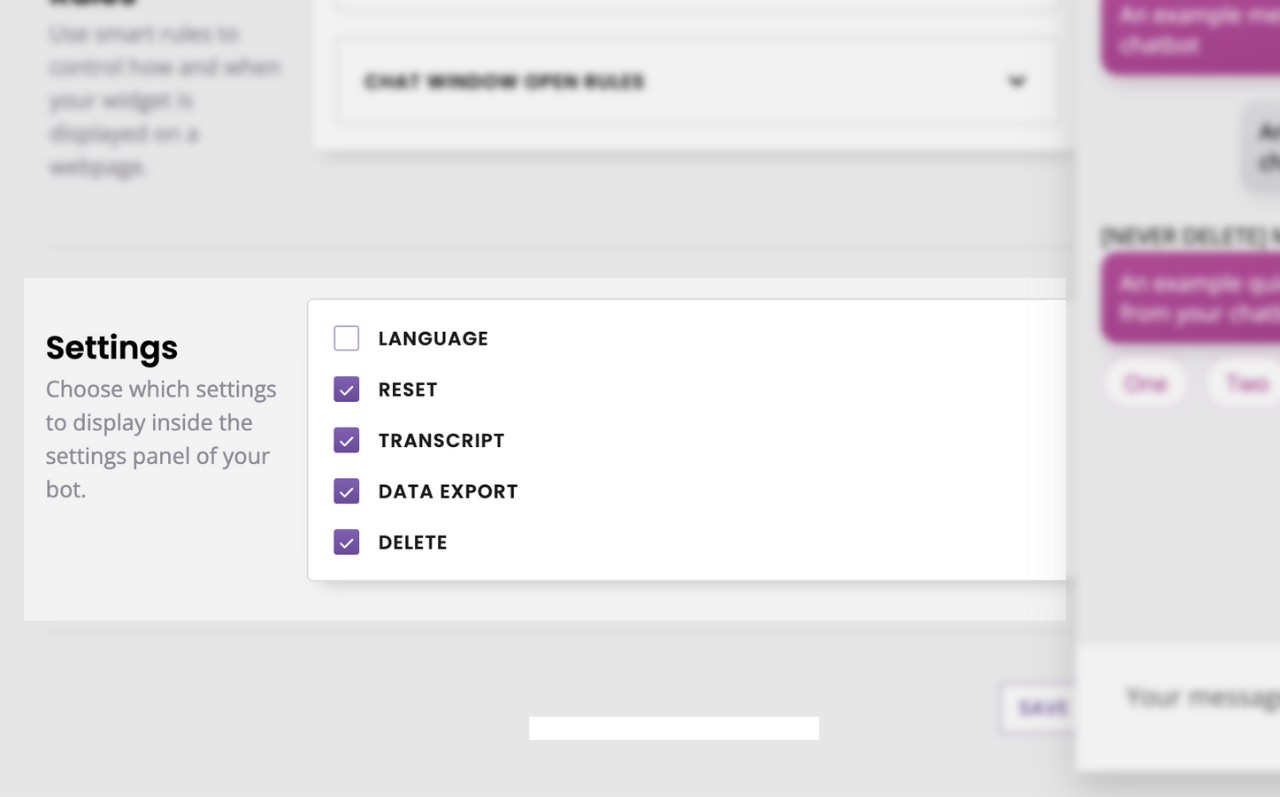
Click the Transcript checkbox.
Hit Save.
Step 2: Test your new setting
As soon as you hit Save, the setting is available to your users.
To give it a test, go to your chatbot. If you don’t have a live chatbot, you may test this in Demo.
Click the cog icon in the top right corner. You should see your new transcript setting.
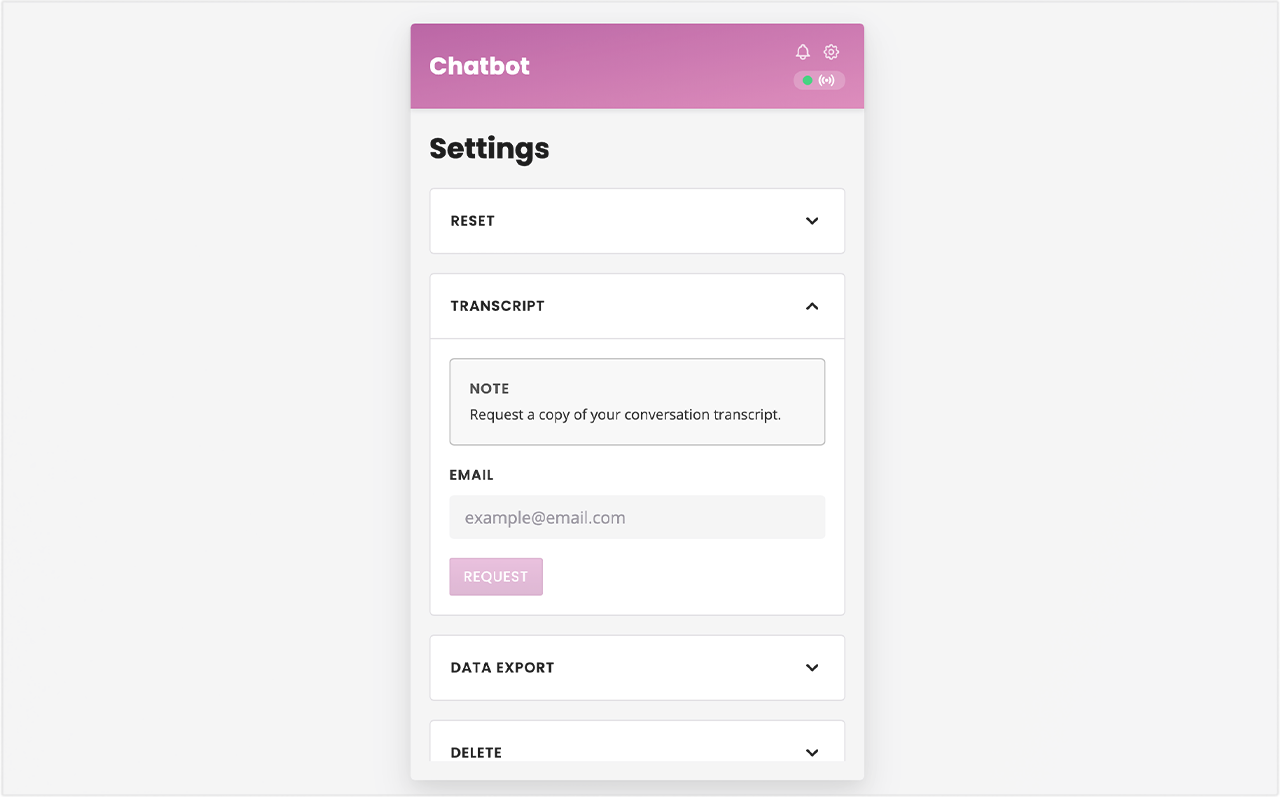
To download their conversation transcript, a chatbot user would simply have to enter their email address and hit Request.
The transcript setting is tied to the channel. This allows you to turn it on for, say, Converse but not the other channels.
Downloading chat transcripts via Actions
On third-party channels such as Facebook Messenger or Telegram, we have no control over the chat interface and therefore no way of adding a ‘download transcript’ button.
But don’t worry; with Actions, there is still a way.
Step 1: Create your conversation
Actions are attached to a specific part of a conversation.
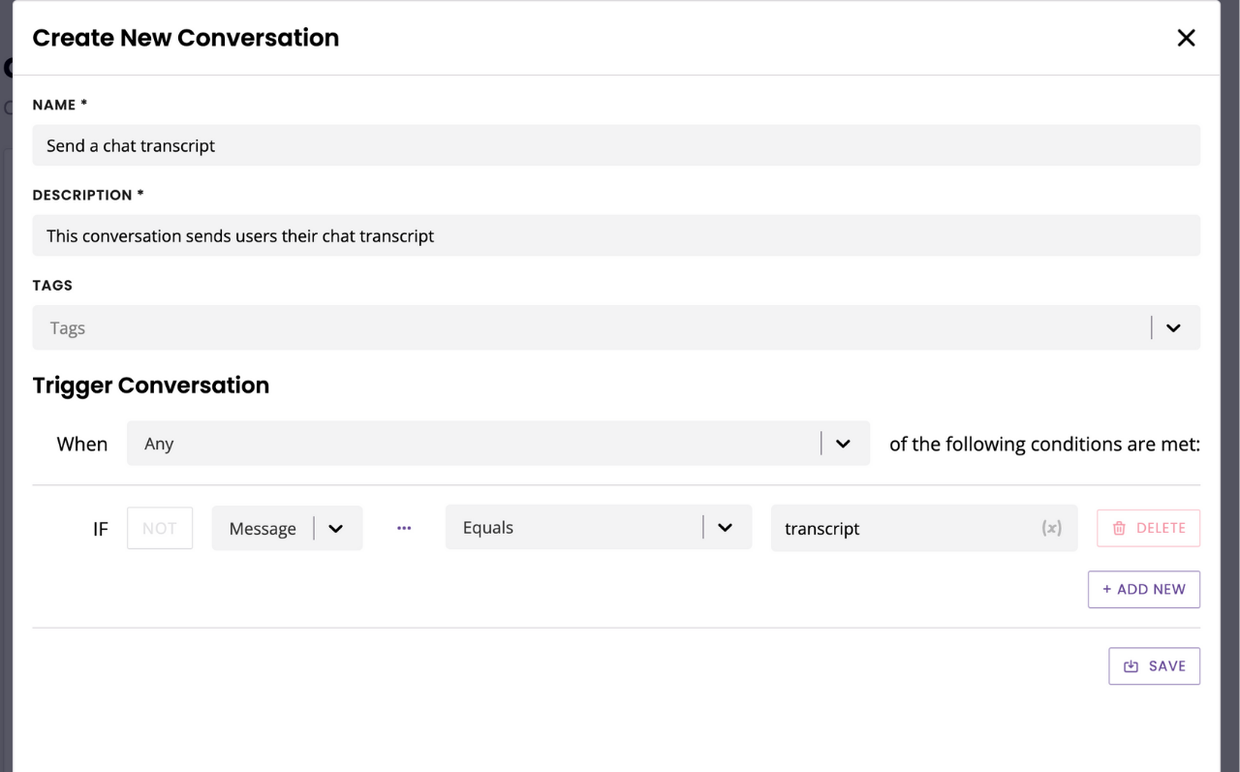
Go to the Builder. Create a new conversation, give it a name, description, and trigger.
For example, set up a trigger like 'message equals transcript'.
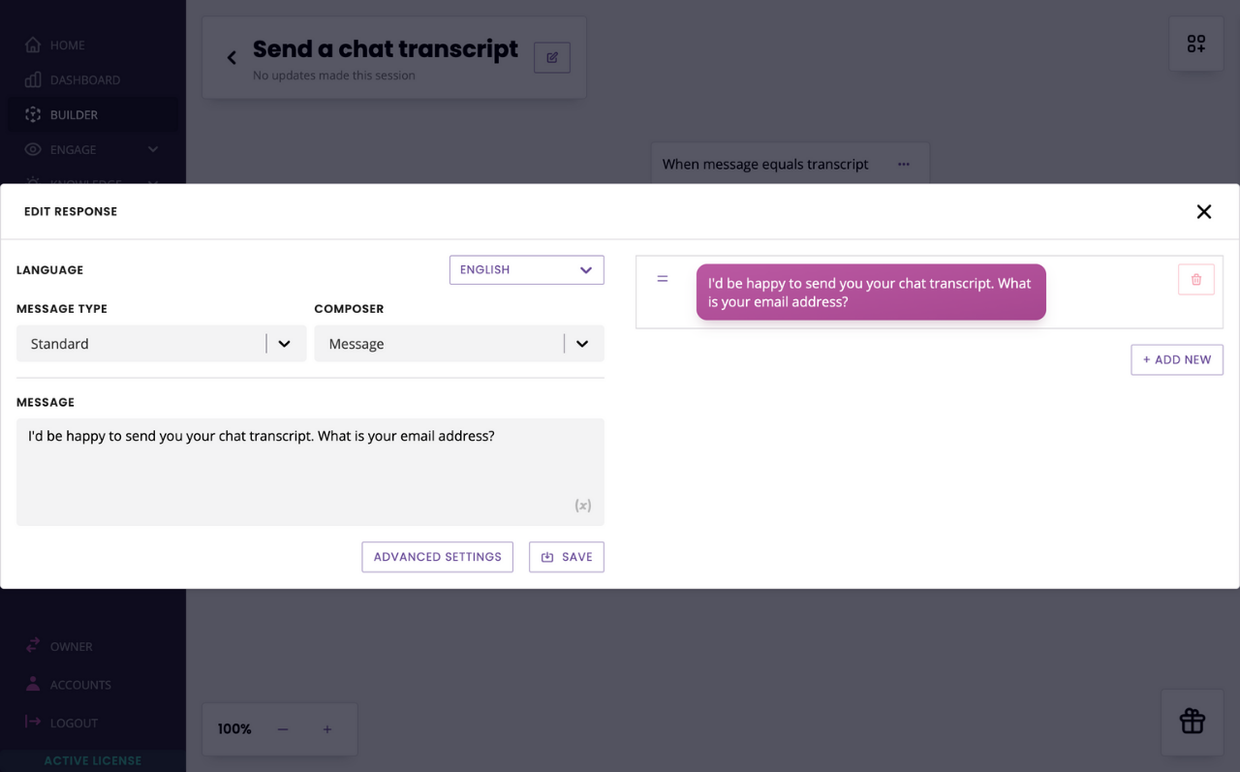
The chat transcript will eventually be sent via email. So, the first step is to ask the user for their email address. Click the three dots on the pre-set message and click Edit response. Write your copy and hit Save.
Create a new step by dragging & dropping it from your block bank onto the canvas.
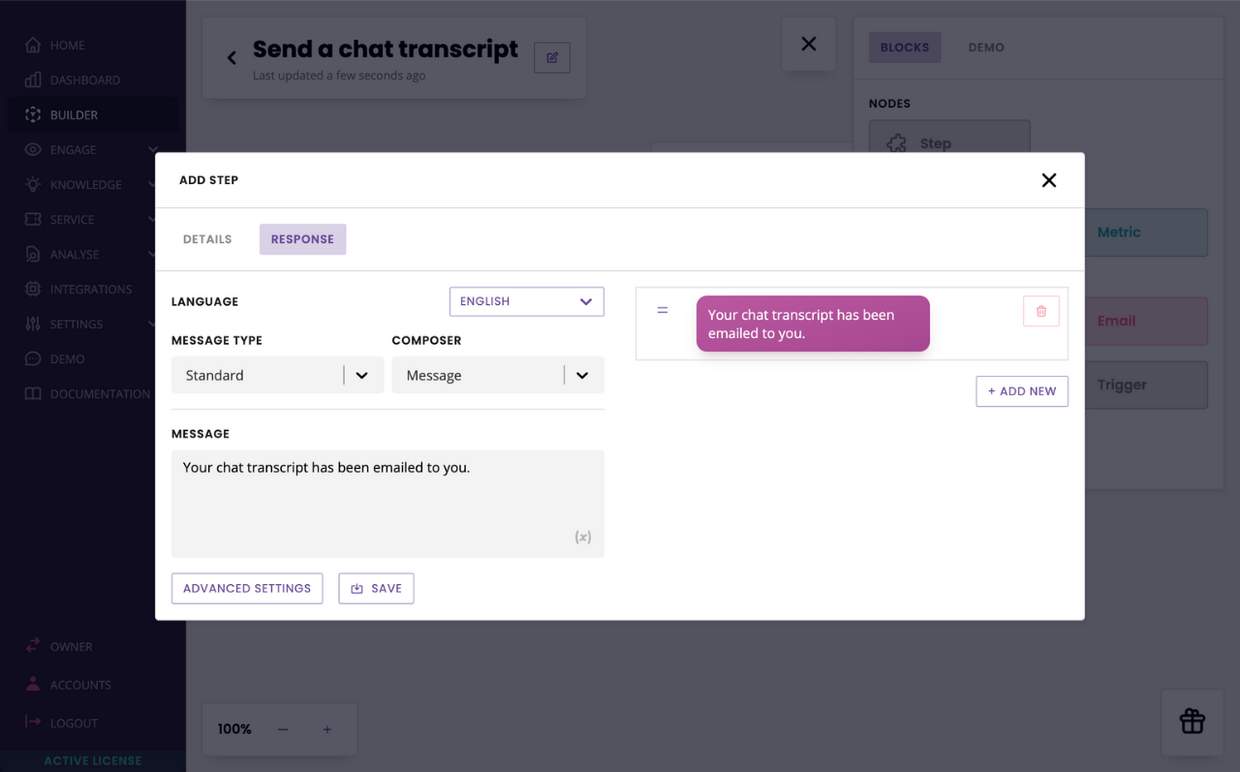
When a user reaches this step, they will automatically receive the email. Write a short copy to let them know, then hit Save.
From your block bank, drag & drop an action onto the last step. In the list of actions, select Export transcript.
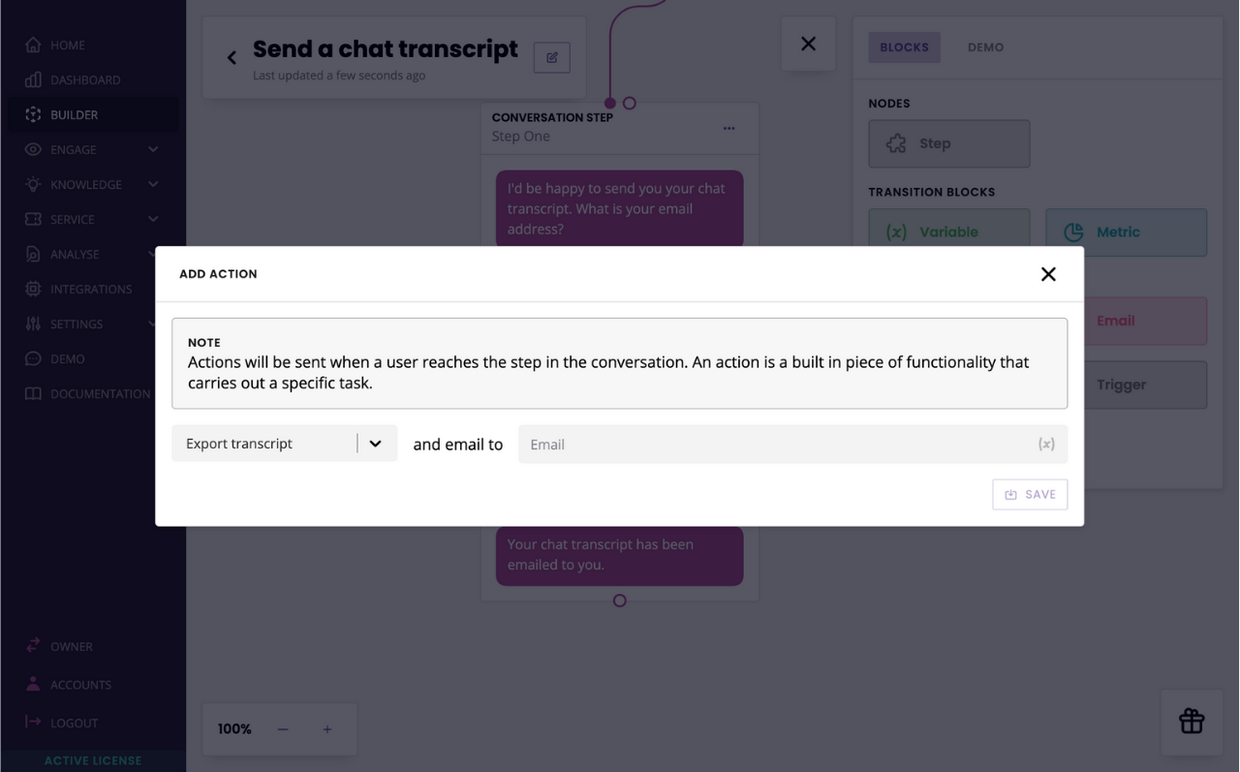
Finally, in the email field, enter {{message.message}}. This built-in variable stores the last message sent by the user to the chatbot.
Step 2: Test your conversation
With your conversation set up, you can now test it.
Go to your live chatbot on a third-party channel. Trigger your conversation as per the rules you’ve set up and follow the flow.