
Create a multi-lingual chatbot
Last updated: 28 April 2025
You can create chatbots that are fluent in 60+ languages. A single chatbot can speak multiple languages, engaging with users from all over the world.
Here is a list of the languages available:
Arabic | Bengali | Bulgarian |
Catalan | Czech | Danish |
German | Modern Greek | English |
Spanish | Estonian | Persian |
Finnish | French | Galician |
Gujarati | Hebrew | Hindi |
Croatian | Hungarian | Armenian |
Indonesian | Italian | Japanese |
Georgian | Korean | Kurdish |
Lithuanian | Latvian | Macedonian |
Mongolian | Marathi | Malay (macrolanguage) |
Burmese | Norwegian (Bokmål) | Dutch |
Polish | Portuguese | Romanian |
Russian | Slovak | Slovenian |
Albanian | Serbian | Swedish |
Thai | Turkish | Ukrainian |
Urdu | Vietnamese | |
Step 1: Activate a language
Go to Settings → Languages.
Flick a language on to activate it. Please note, some languages may require you to contact your account manager to activate.
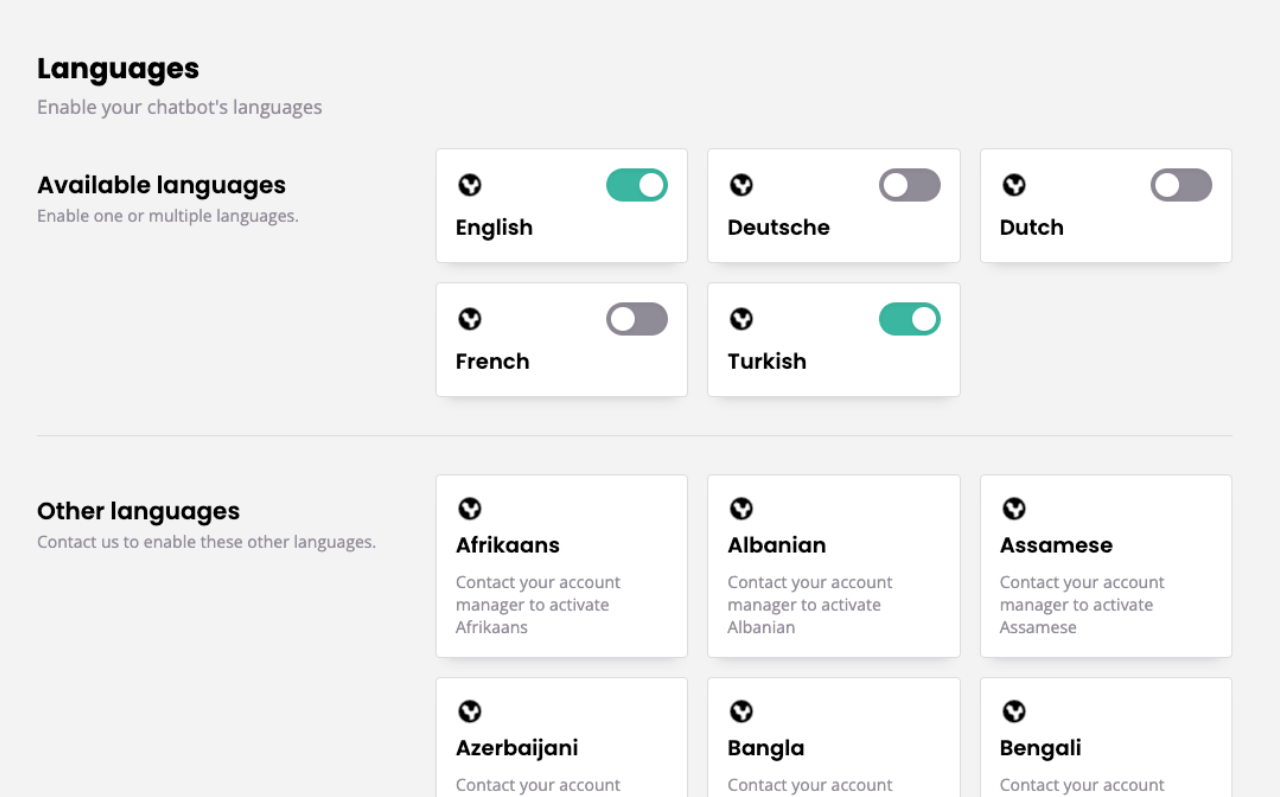
Now your chatbot is ready to start communicating in your newly activated language.
While you can turn a language on manually, turning languages off will require an intervention from your account manager. Please ensure you only activate languages you absolutely require.
Step 2: Create multi-lingual chatbot responses
Every piece of copy within your chatbot – every message it can send – now has to be programmed in both languages. To illustrate, we will focus on FAQs. To create multi-lingual chatbot conversations, follow step 3 onwards for each step within a conversation.
Go to Knowledge → FAQs.
Click Questions on a pre-existing FAQ.
Use the language dropdown in the top right to switch between your current language and your newly activated language.
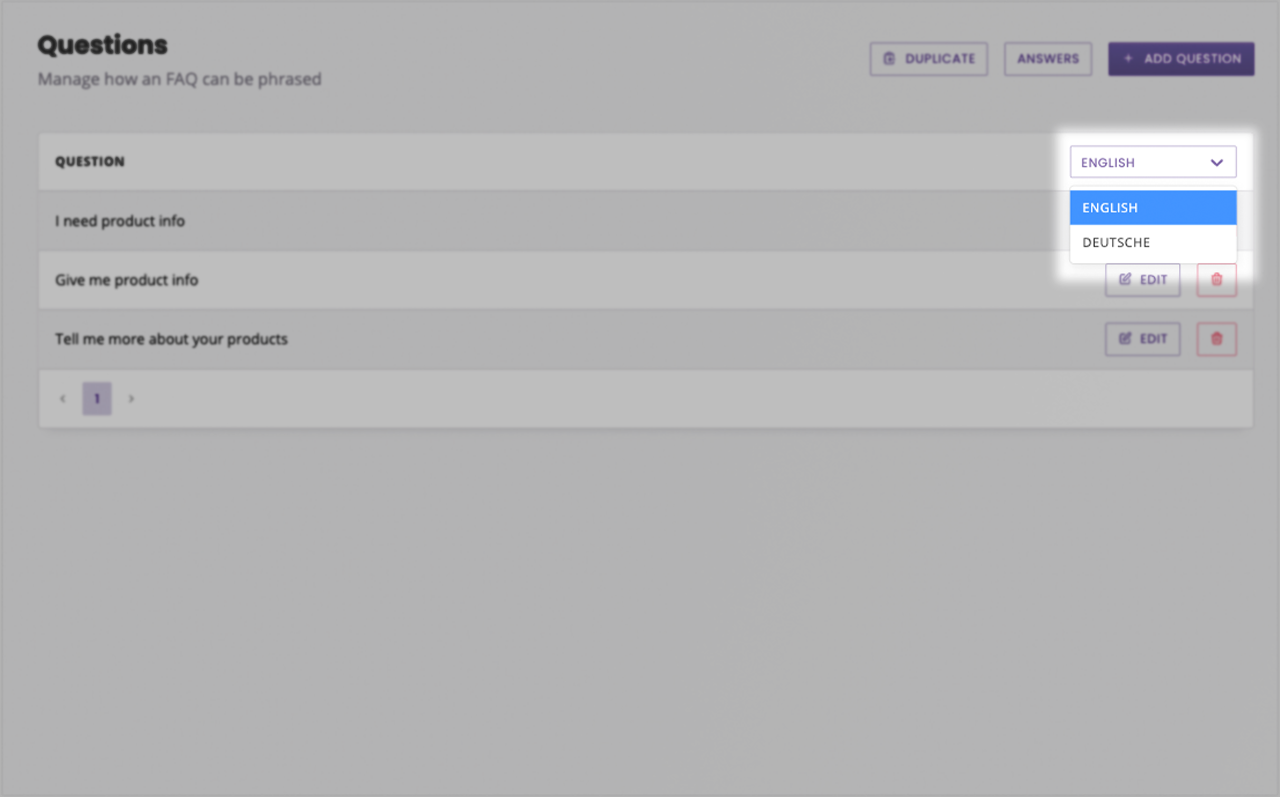
Add a series of question variants in your newly activated language (it's recommended to create a minimum of three question variants).
Now, to translate the answer go to Answers.
Repeat step 3 and 4 to create a response in your newly activated language.
Click Save.
Step 3: Let users set their language
Now, you've created a range of multi-lingual chatbot responses. It's recommended you create a conversation that allows the user to set their preferred language. Ideally, this will take place when the user first engages with the chatbot.
To do this, we can repurpose the default 'Welcome to your chatbot' conversation. This conversation will trigger the first time a user engages with your chatbot.
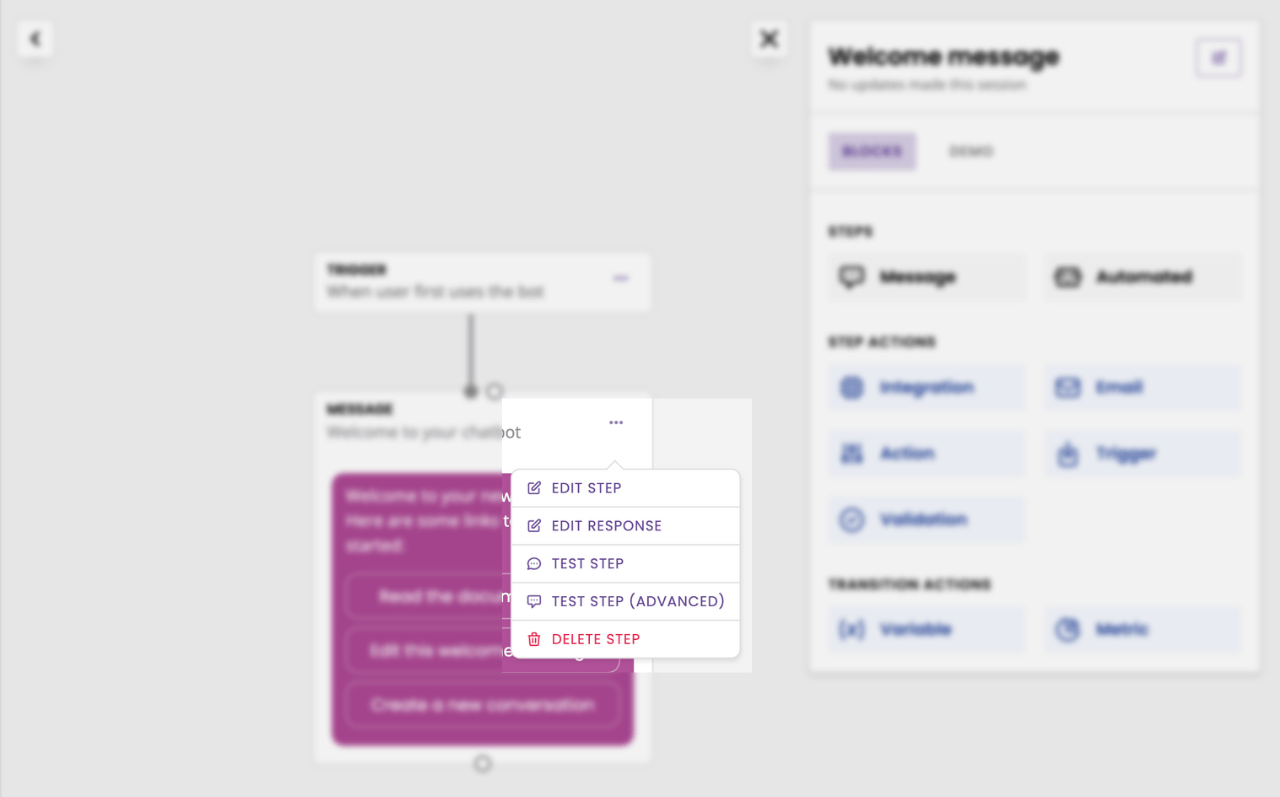
Go to Builder.
Find the Welcome to your chatbot conversation and click View.
On the first step, click the three dots and Edit response.
Change the Message type to Quick reply.
Customise the Message area to include text that adds the user to set their language.
Add options for the user to choose between languages by clicking + Postback (each postback button will be a single language choice).
The first field is what the user sees. The second field is what the chatbot sees when the user clicks a button. As we are telling the chatbot to set the users' language, we can use the same text in both fields.
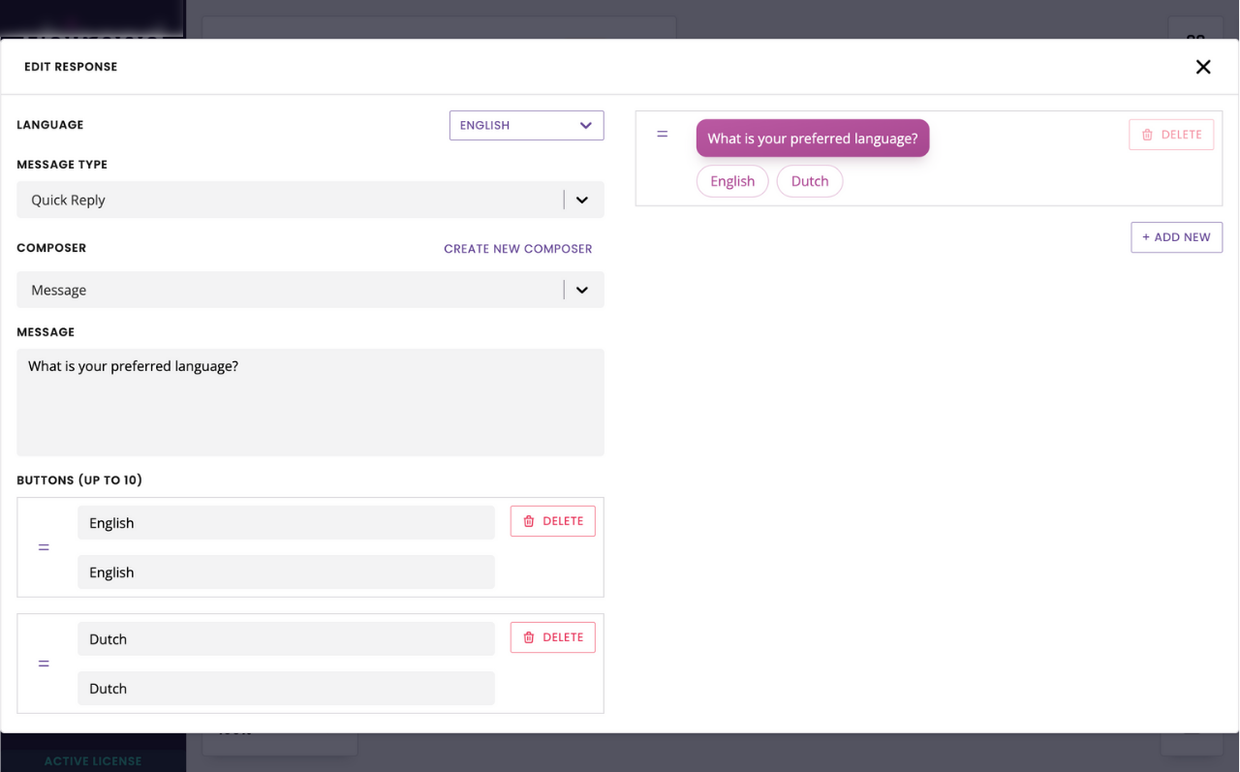
You may enter either the full language name (e.g. English) or its code (e.g. en).
Click Save.
Step 4: Thank you message
We’re going to send our subscriber their first message in their preferred language!
Create a new conversation step and write your copy in every language you’ve activated. For example, if you’ve set up English and French, you could say “Thank you, let’s continue chatting in English” and “Merci, on continue en français”.
Save the message. For the transition, simply put a message is sent.
Step 5: Set up the action
Open the Block bank. Click, drag, and drop an Action into the last step.
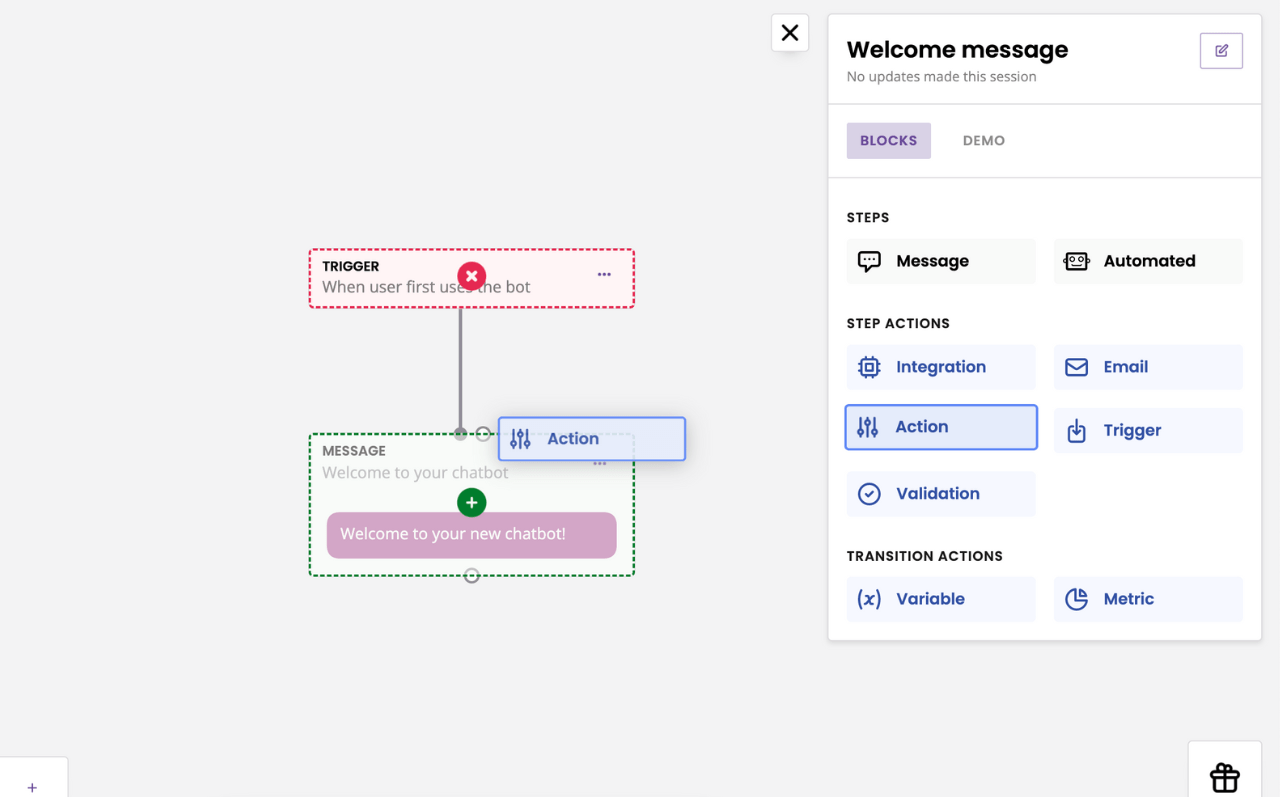
In the dropdown, choose Set subscriber language.
Type {{message.message}} in the using field. This tells the chatbot to set the users' language to the last message they sent.
Click Save.
You've now created a multi-lingual chatbot! The chatbot will ask users for their preferred language before responding to them in their language of choice.
Frequently asked questions
How do I translate every message?
Once you’ve enabled a different language, all existing messages (steps, FAQs, etc.) must be individually translated.
To translate a step, edit the step message and use the dropdown in the top right to swap language.
To translate an FAQ, edit the FAQ questions & answer using the dropdown in the top right to swap language.
My step integration works in English but not in my new language. What happened?
It’s quite likely you’ve set up the integration using the advanced settings in the English version, but didn’t attach the same (or a different!) integration to the translated version(s).
You should think of a translated step as its own step.