Create a new API integration
Last updated: 05 December 2023
Integrations allow you to connect your chatbot with other services and software. This opens up the opportunity to send and receive data from other services as part of your conversation flow.
Here are a couple of examples of how powerful integrations can be:
When a user falls back to human, create a support ticket in Zendesk.
When a user leaves their email address, create them as a lead in your custom CRM.
When a user asks about a particular product, look up the description using the Shopify API and send it back to them.
To create an integration, head to Integrations.
Step 1: Create your new integration
Under the Active integrations section, click + New integration.
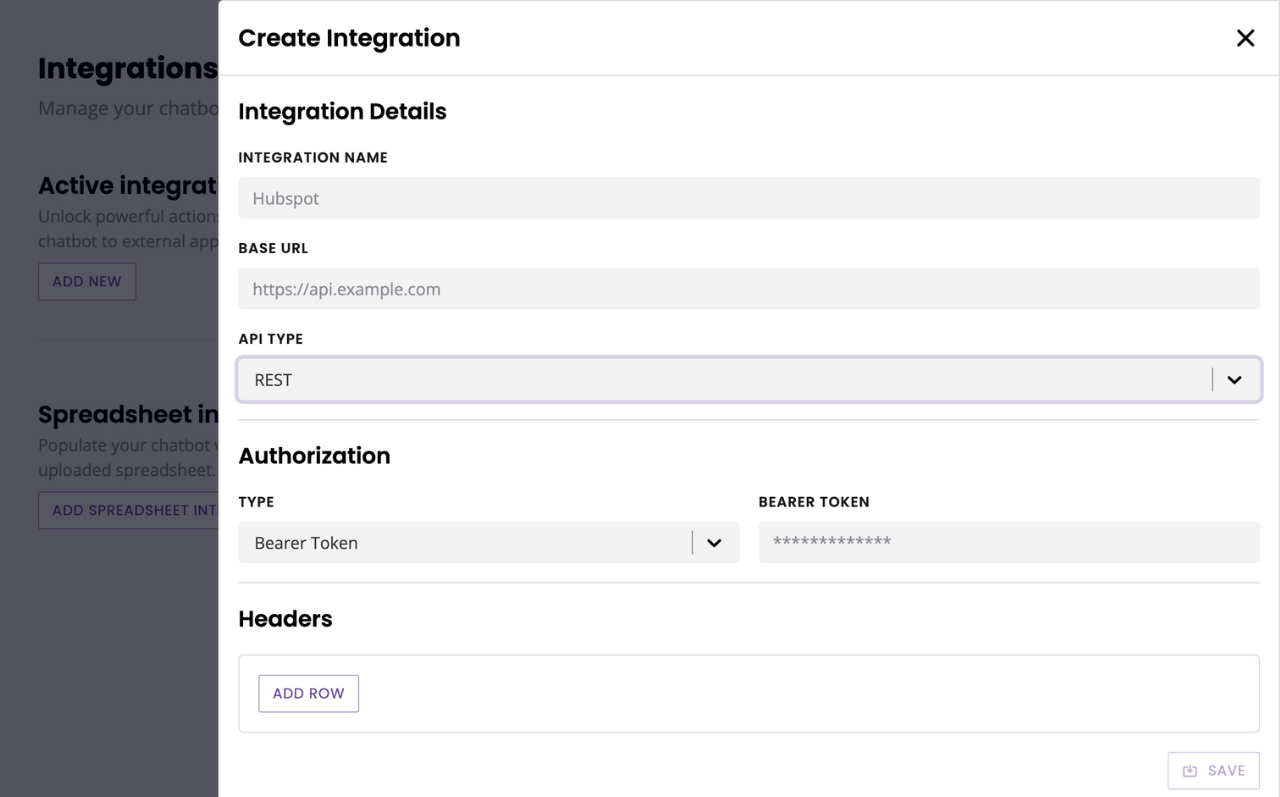
Give your integration a name.
Give your integration a descriptive name. This will make it easier to manage, edit, or remove later on.
Enter your integration's base URL. This URL will be consistent across all your endpoints.
Pick an API type. The platform supports both REST and SOAP APIs.
Select your authorization method. There are four available:
API key -- requires a
key,value, and header / body.Basic auth -- requires a user name and password.
Bearer token -- requires a bearer token.
No auth -- does not require any credentials.
If your integration requires it, add global HTTP headers and their corresponding values. You may pick one of the seven available headers or type your own custom one in the field.
Hit Save.
Your integration is now available.
Step 2: Create your endpoint(s)
Now that you've created the connection between the chatbot platform and your external piece of software, it is time to create your endpoints.
Endpoints send and receive the data you need from the integration. You can create as many endpoints as you need per integration.
Click Endpoints on the integration you need and open the Add a new endpoint dropdown.
Depending on the API type you picked, creating your endpoint will be slightly different.
Step 2 (a): REST endpoint
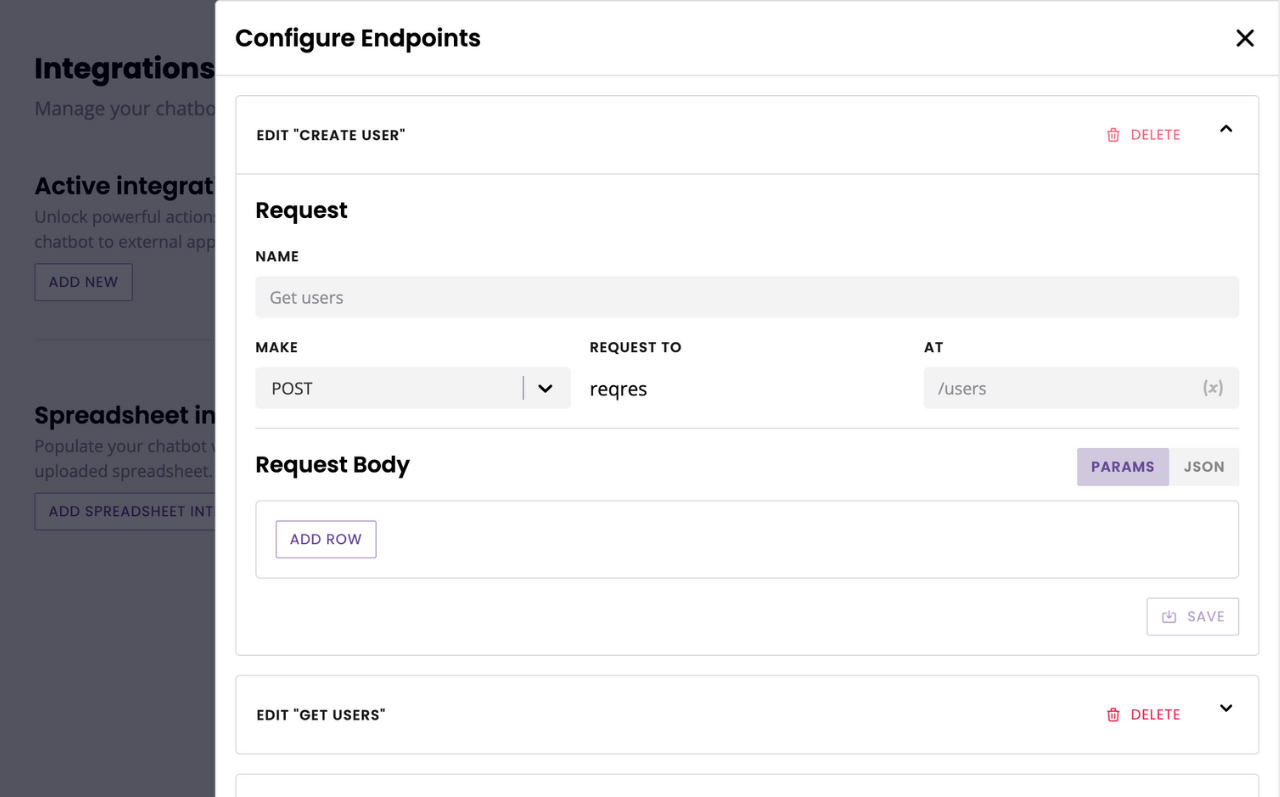
Give your endpoint a name. A single integration may have several endpoints, so it’s important to be specific. Avoid ‘Integration #1’, for example. Instead, try to write exactly what this endpoint will do (e.g. 'Submit a lead to HubSpot'.
Under Make, select the type of request you would like to make with this endpoint: GET, PUT, POST, or DELETE.
If needed, enter the folder you will send the request to under At. This folder will be appended to the integration's base URL.
There are two methods to send data with the request:
Params: perfect to send form data or simple, single-level JSON object data. You can use this method to send key => value parameters with the request.
JSON: ideal for more complex requests
Once you’ve entered all the data you need to capture or send, hit Save.
Step 2 (b): SOAP endpoint
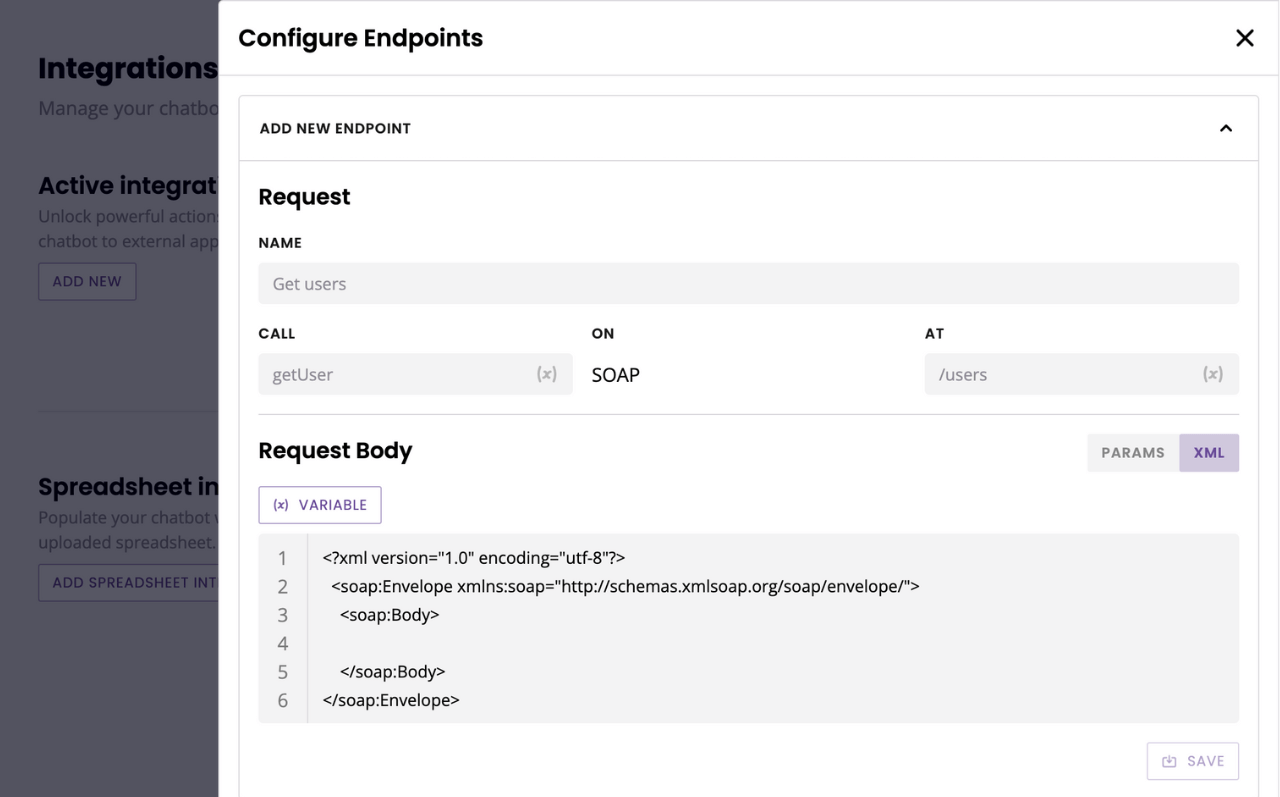
Give your endpoint a name. A single integration may have several endpoints, so it’s important to be specific. Avoid ‘Integration #1’, for example. Instead, try to write exactly what this endpoint will do (e.g. 'Submit a lead to HubSpot'.
In the XML tab, notice your integration already has the bare bones of a SOAP endpoint template.
Under Call, enter the XML value you’d like to call and under At enter the folder you’d like to reach.
You may also use Params to define your values.
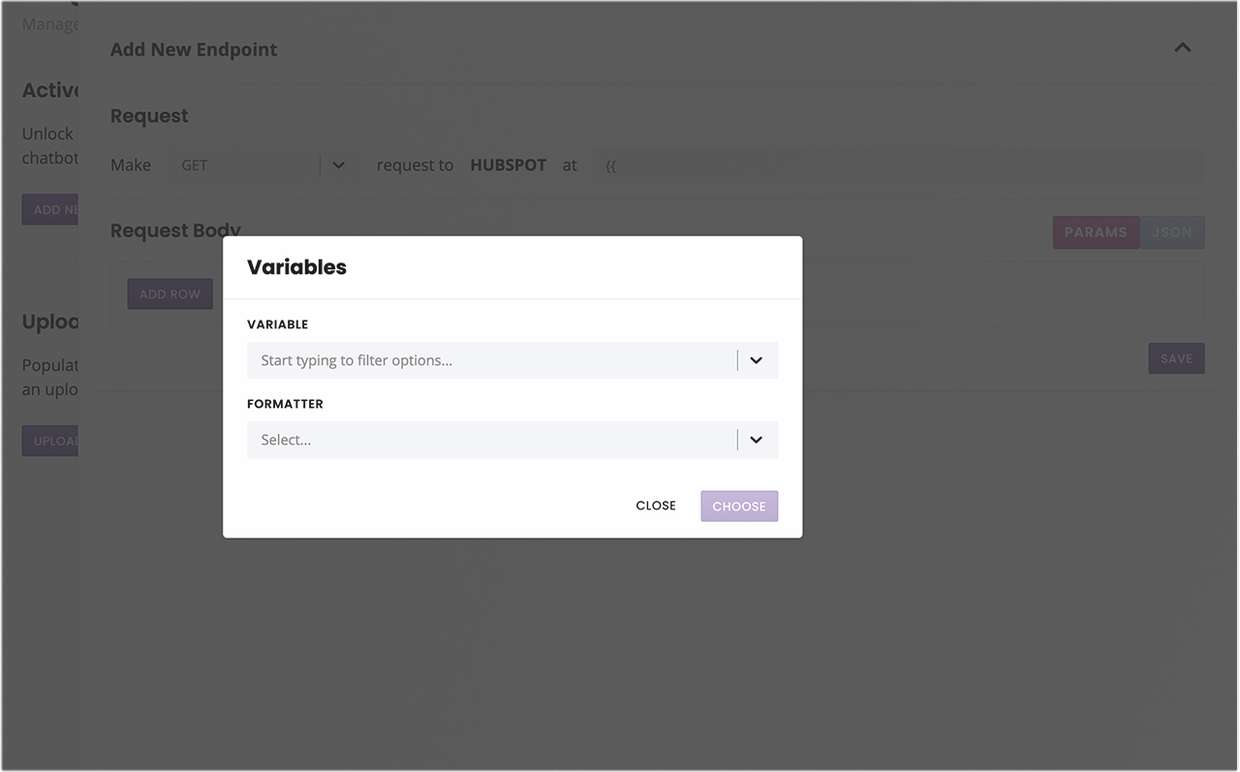
Using variables in integrations
Both methods enable you to send data using variables. To enter a variable, simply start typing {{. Using the popup up to find and choose the variable you'd like to use.