
How to create a custom support ticket capture conversation
Last updated: 05 December 2023
Your chatbot platform has a native ticketing system. It allows you to conversationally capture tickets, assign them to specialised agents, and, eventually, solving your users' requests.
Your platform comes with a conversation that allows users to raise tickets (Builder → Raise a support ticket).
If you wanted to re-build this conversation or simply understand how it works, the steps below take you through the process of setting up this conversation from scratch.
Step 1: Create variables
Support tickets are composed of two sections:
Name: a few words about the issue (e.g. ‘Broken computer').
Description: a more in-depth breakdown about the issue (e.g. ‘I updated my OS to the latest version and since then I can’t turn my computer on') .
We will need to capture information from the user to fill these two sections before we can create a ticket.
To do so, first we will create two variables.
Go to Settings → Variables.
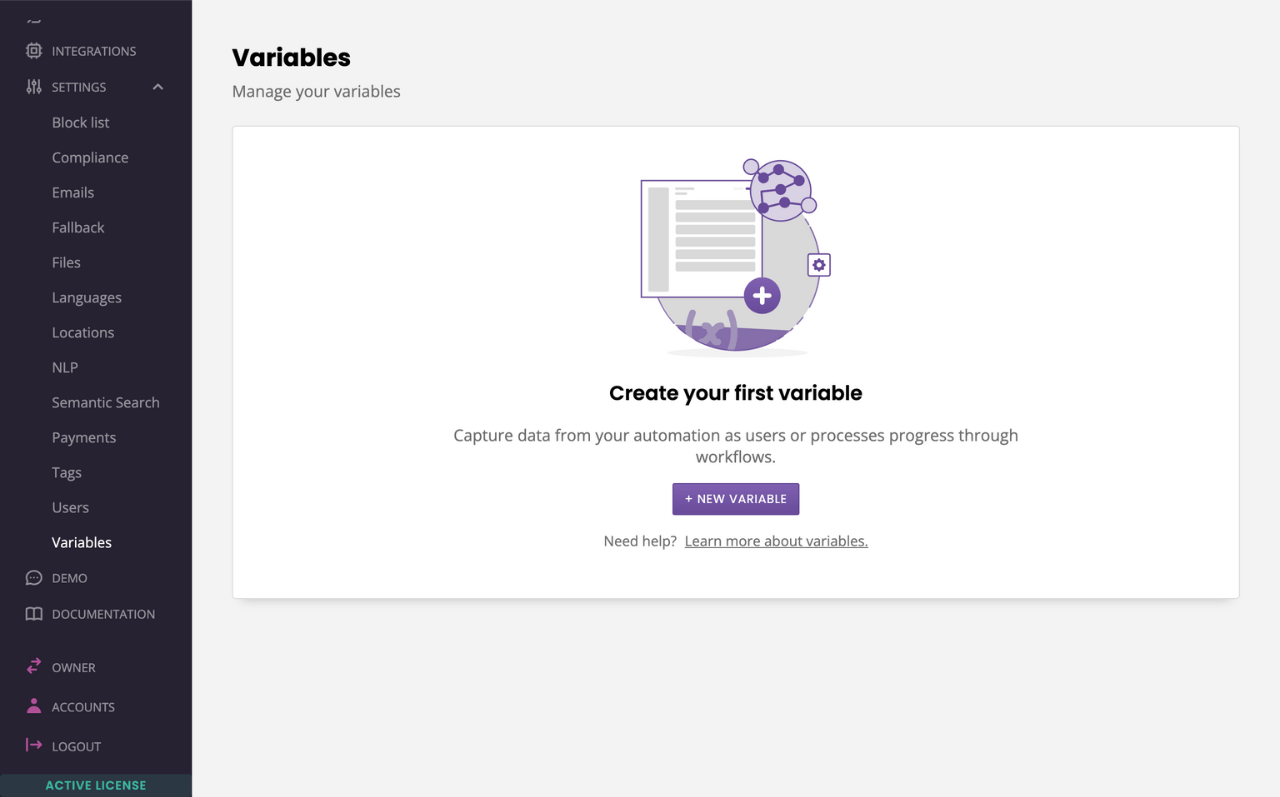
Click + New variable.
Create a first variable for the ticket name. You may call it whatever you’d like. Let’s go with ticket_name.
Create a second variable for the ticket description. Again, name is up to you. We’ll go with ticket_description.
Step 2: Create a ticket capture conversation
Now, we need to create a conversation to capture the tickets raised by your users.
The value of the chatbot, here, comes from being able to smoothly transition from automatically answering questions to conversationally capture further information and raise a ticket.
To create the conversation, go to Builder.
Hit Create conversation in the top right.
Give your conversation a name.
Give your conversation a description.
Give your conversation a Message starting step.
Give your conversation a trigger. For now, make the trigger
Message equals raise_ticket
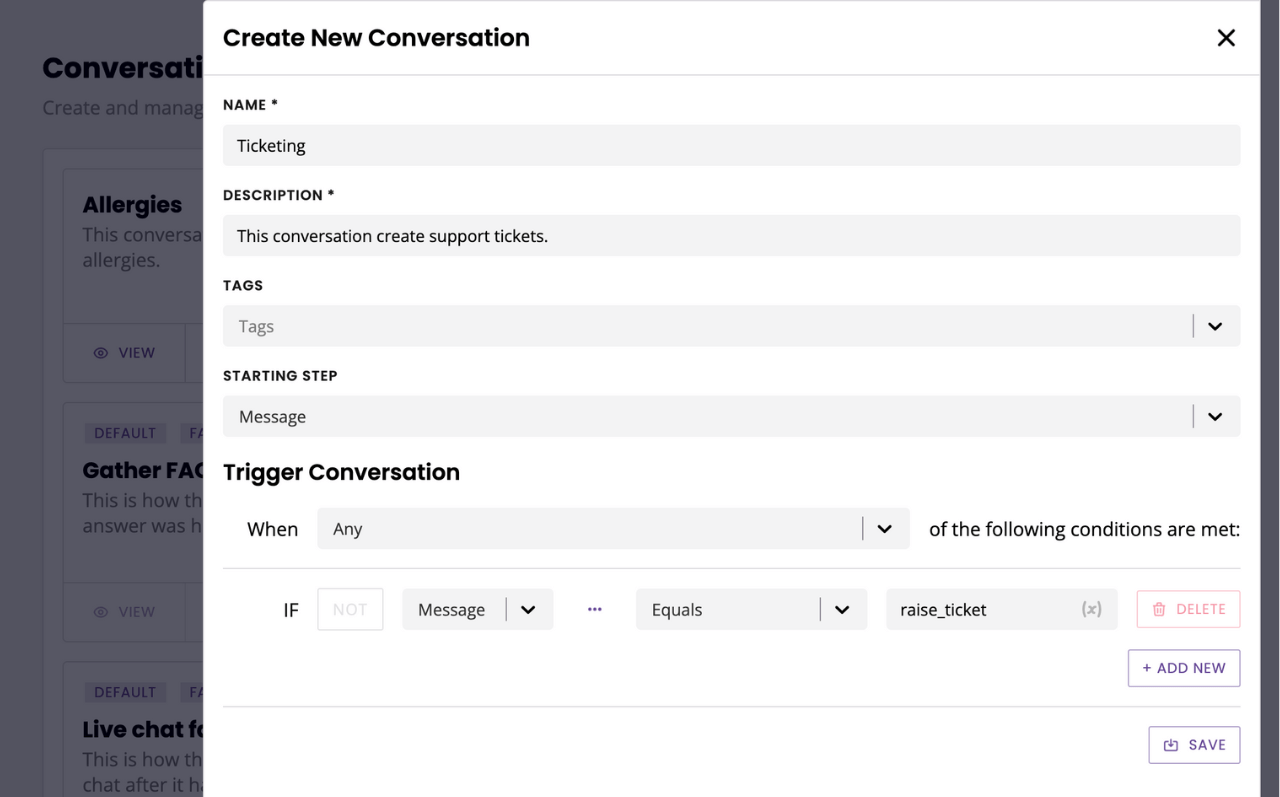
Hit Save.
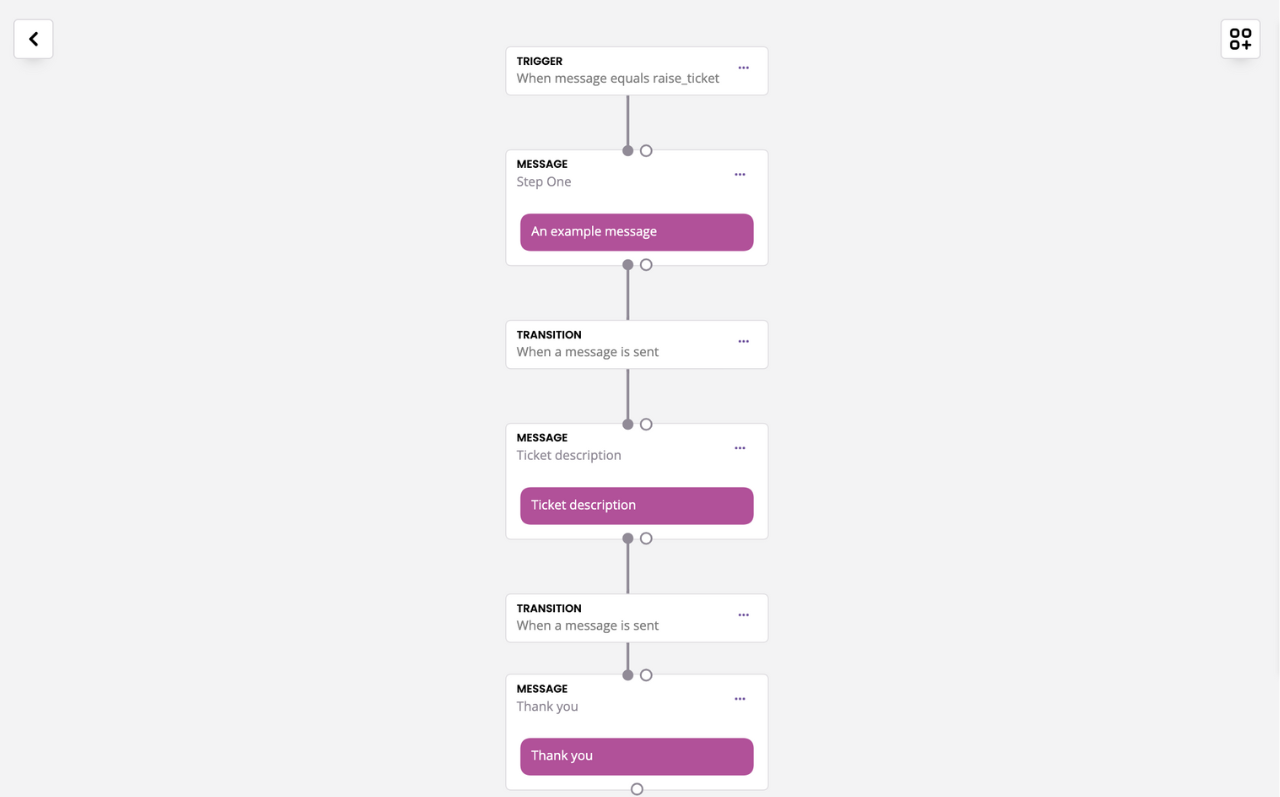
We’re going to create a three-step conversation.
Ask the user to summarise their issue (the ticket name).
Ask the user to describe their issue (the ticket description).
Thank the user.
The first step is already created by default. Let’s quickly add the two additional steps:
Open your Block bank.
Drag and drop two message steps into the canva.
Name the new steps (e.g.
ticket descriptionandthank you).Connect each step with the next by connecting their dots.
Between each step, create a
A message is senttransition.
Great, you should now have a 3-step conversation.
Let’s go and edit each step to make their copy more relevant and capture the information we need from the user.
Summary
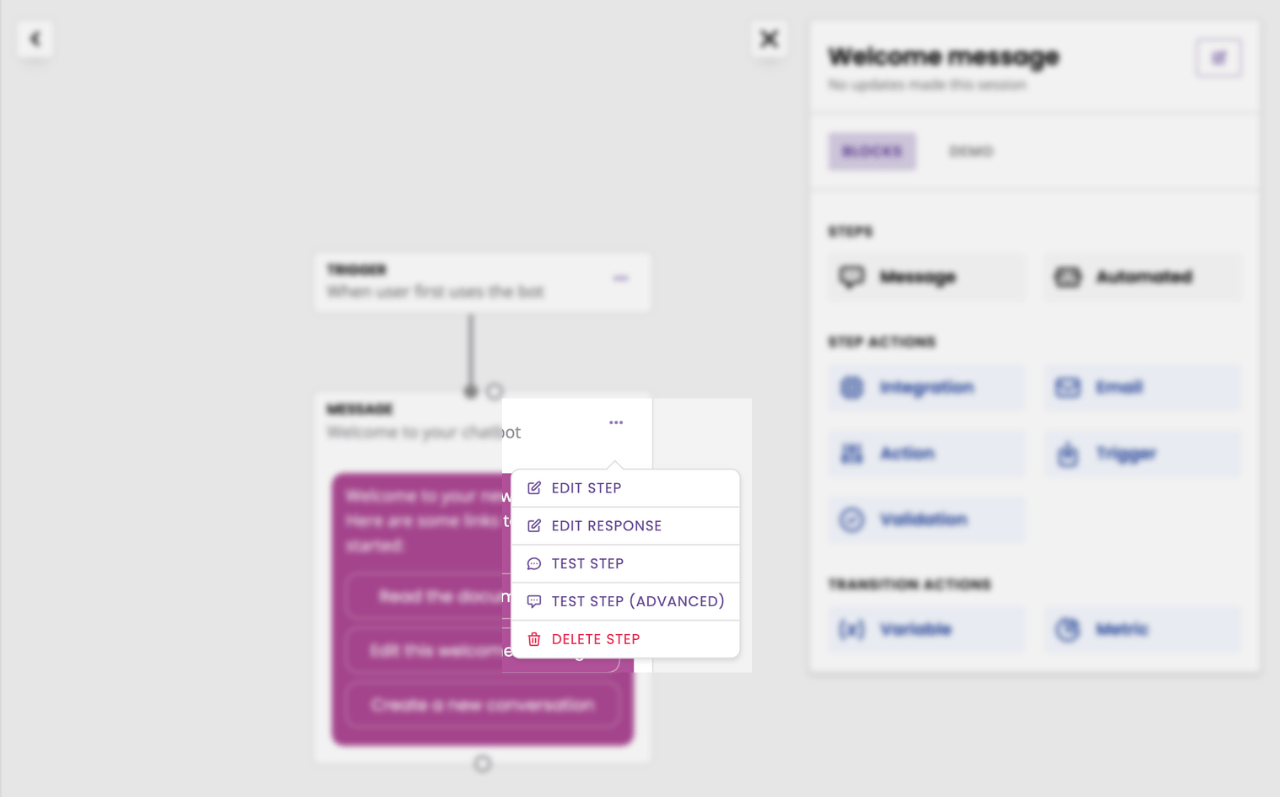
Edit the first step of the conversation by clicking the three dots and Edit response.
In Message content, write the copy of your message. For example: What appears to be the issue?
Hit Save.
Open your Block bank. Click, drag, drop a variable inside the transition between that step and the next.
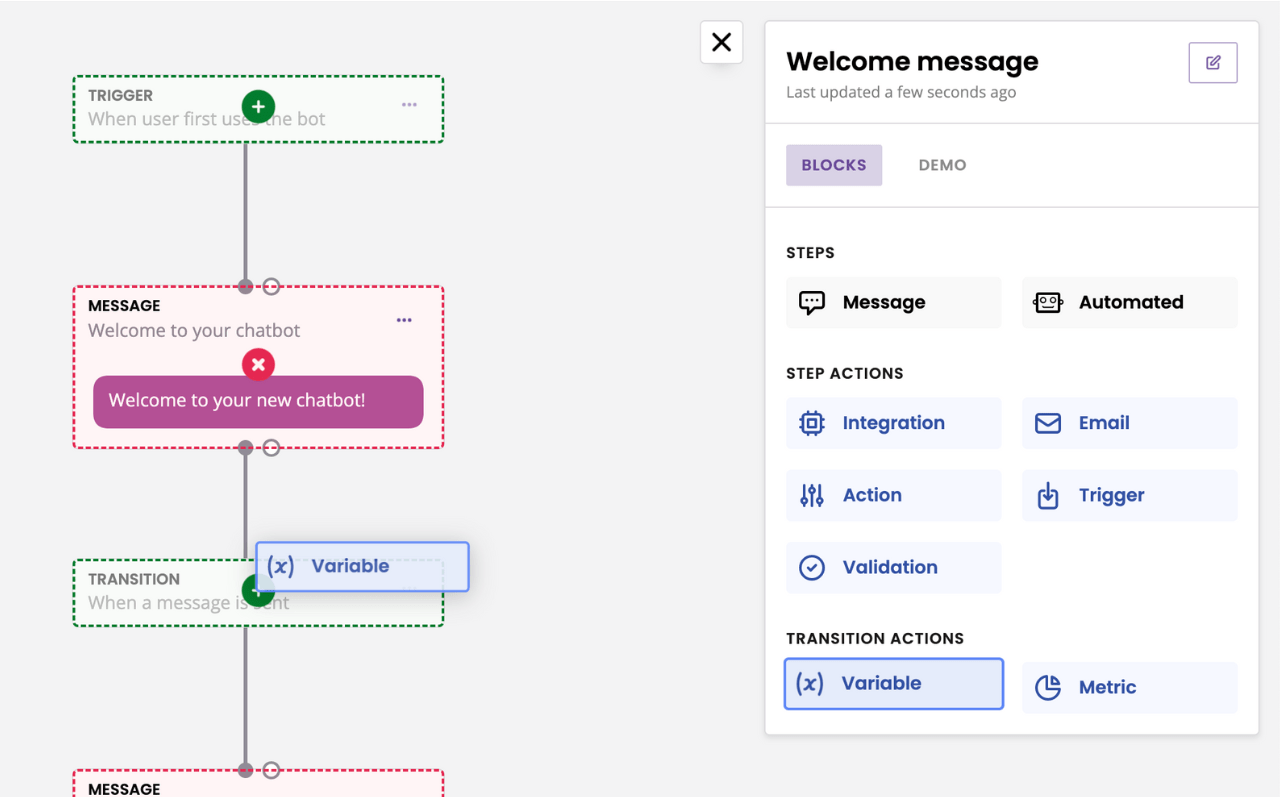
Select ticket_name and Save.
Description
Follow the same process for step two of the conversation. Click the three dots and Edit response. Write some copy such as Please provide more details surrounding the issue.
Hit Save.
Drag and drop a variable in transition between this step and the final step.
Select ticket_description and Save.
Thank you
The final step has two purpose:
Thanking the user for their ticket
Creating the ticket
Open the Block bank. Click, drag, and drop an Action onto your last step.
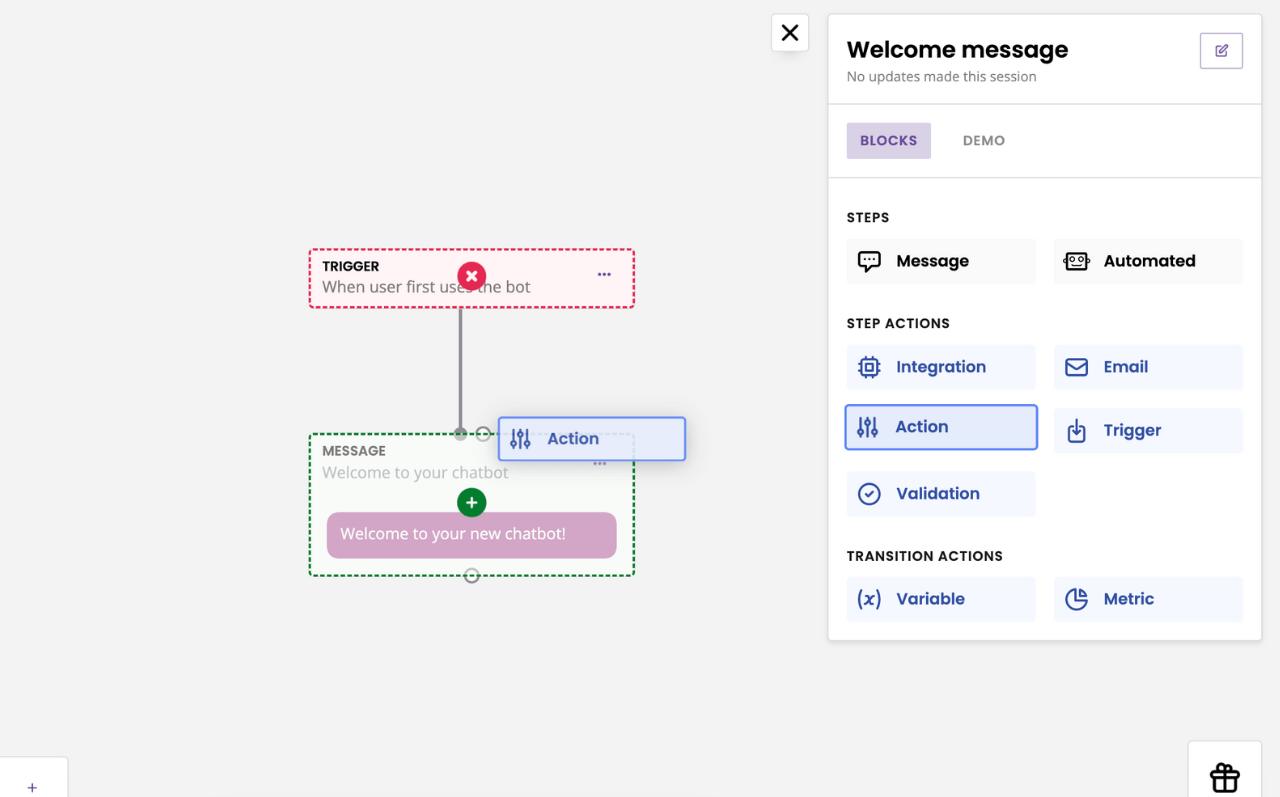
In the first drop down, select Create ticket.
In the Ticket name field, start typing {{ to bring up your variable. Select ticket_name from the list.
In the Ticket description field, start typing {{ to bring up your variable. Select ticket_description from the list.
Step 3: Test your ticket capture conversation
Go to Demo.
Send the conversation trigger you set earlier (raise_ticket if you followed this step-by-step).
Answer each question of the conversation until you hit the thank you message.
Go to Service → Ticketing. Click Tickets at the top of the page.
You should see your freshly created ticket in the list of submitted tickets.
