Create call-to-actions
Last updated: 16 May 2024
The call-to-action is the equivalent of your chatbot waving and saying “Hey, need a hand?”
When enabled, a call-to-action appears as a speech bubble alongside your minimised converse widget launcher.
Our research shows that enabling call-to-action improves the number of interactions with chatbots.
To get started, go to Engage → Channels. In the list of channels, find Converse and hit Options.
Step 1: Enable your call-to-action
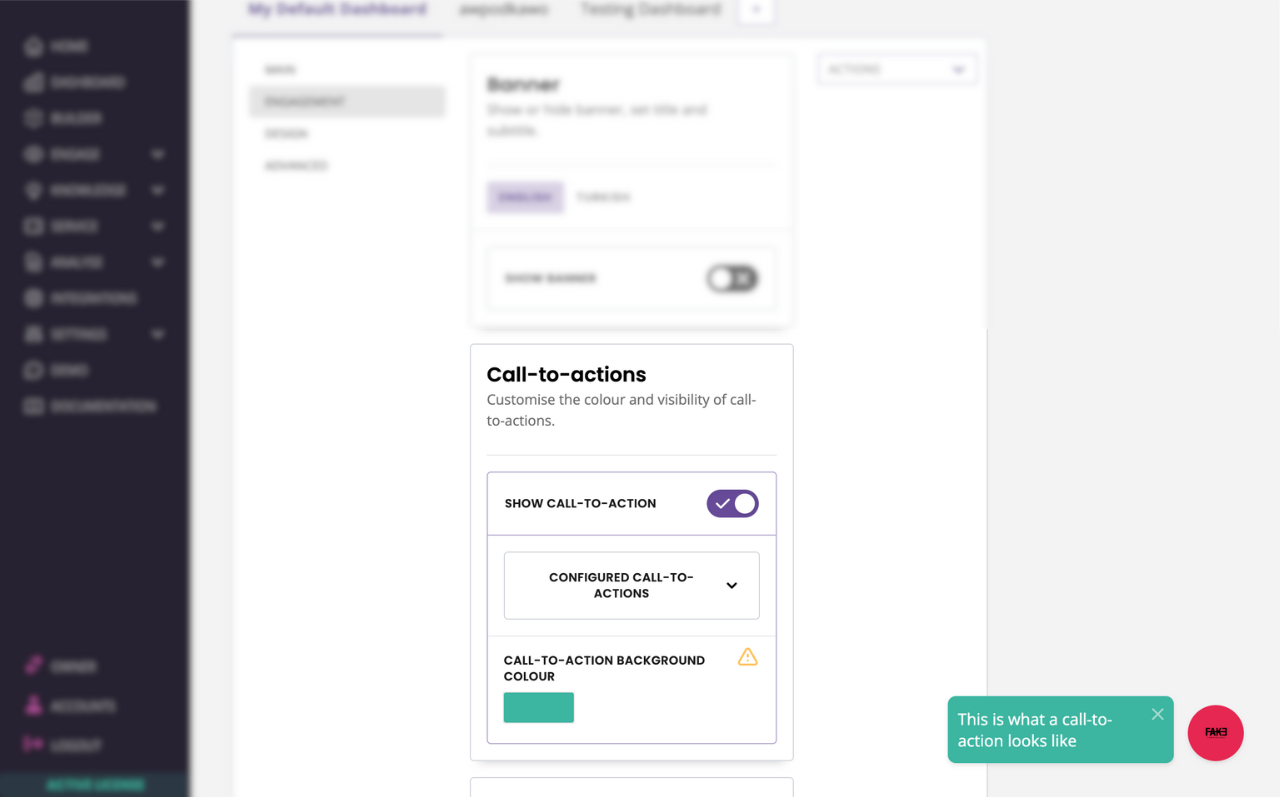
In the Engagement tab, toggle Call-to-actions on.
This activates the additional options and will generate a generic preview of how your call to action will appear on the right-hand side.

Step 2: Change your call to action background colour
Customise your call-to-action’s background colour by choosing one of the preset colours or adding your own hex code. The preview launcher will update on the right-hand side to show your changes in real-time.
Step 3: Configure your call-to-action text
You can create and configure multiple call-to-actions that can be triggered at different times.
For an optimal call-to-action experience, limit your text to two lines.
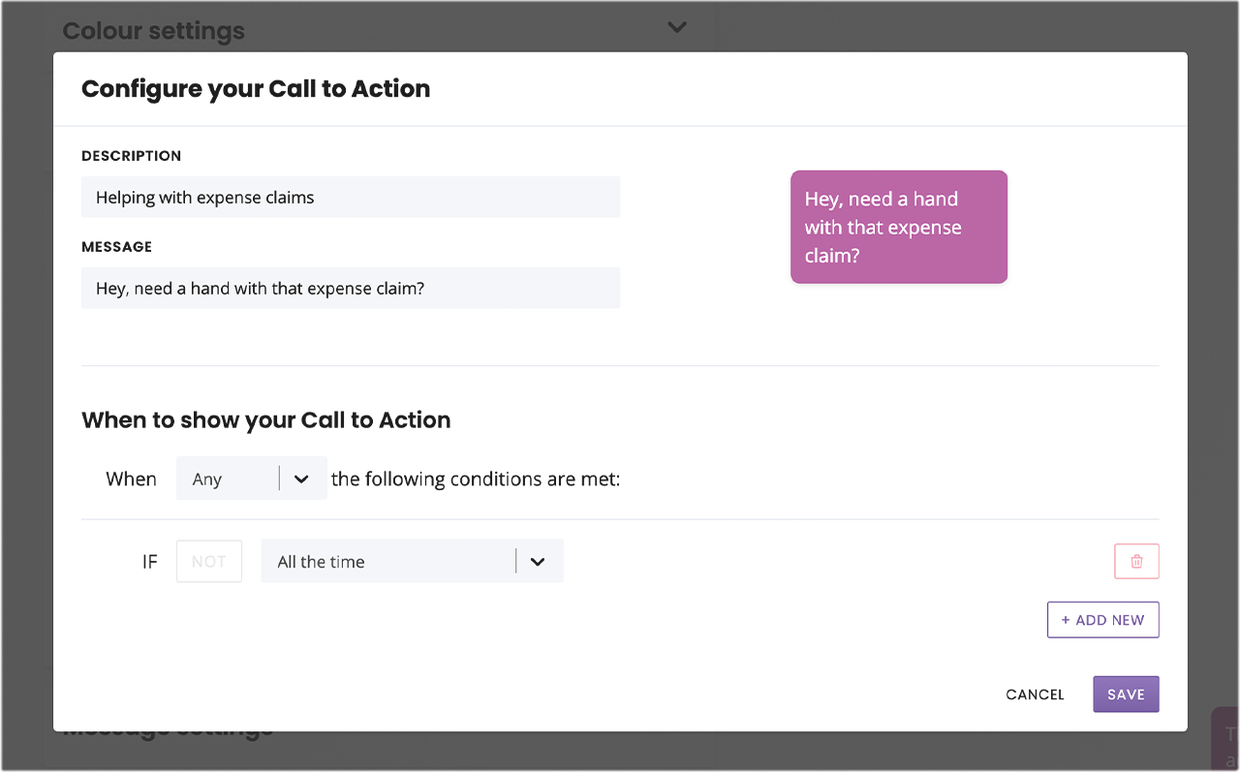
To create your first call-to-action, click the + Add New button in the Configured Call to Actions area.

Give your call to action a description. This helps you differentiate between call-to-actions should you choose to create more than one.
Next, write the message you would like to show. A preview of this will generate in real-time.
Finally, choose when to show your call-to-action by creating a trigger. If you are using a single call to action and would like to show this all of the time, use the all the time trigger (as displayed above).
Once complete, simply click Save.
Step 4: Edit or delete a call-to-action
All your call-to-actions are listed in the Call-to-actions area.
To edit existing call-to-actions, click Edit.
To delete a call-to-action, click the Delete button.