
How to send a push notifications from your chatbot
Last updated: 18 October 2023
With a little bit of ingenuity and a simple integration, your chatbot can automatically send push notifications to a users of your mobile app.
Let’s dive right in.
Step 1: Pick a push notification provider
To send your push notifications, you will need a provider. We recommend Soprano Design, our parent company and CPaaS platform. While for the remainder of this tutorial we will use Soprano Design as our provider, you should be fine using any provider you want; as long as they provide an API.
Make sure you have an active license and purchased the push notification product.
Step 2: Grab your API details
Before we set up the integration in your chatbot platform, we need to grab some details from Soprano Design.
Log into your MEMS account and head over to Company Setup → Manage Users → API Keys.
Generate a new API key, which should come along with an API ID.
Step 3: Set up your integration
Go to your chatbot platform, into Integrations and click Add new.
Give your integration a name, enter your Soprano Design base URL (e.g. https://uk.sopranodesign.com), and select REST.
No authorization needed, we will authenticate using the headers.
In the Headers section, enter the values you saved from Step 1:
X-MEMS-API-IDX-MEMS-API-KEYContent-Type: application/json;charset=UTF-8
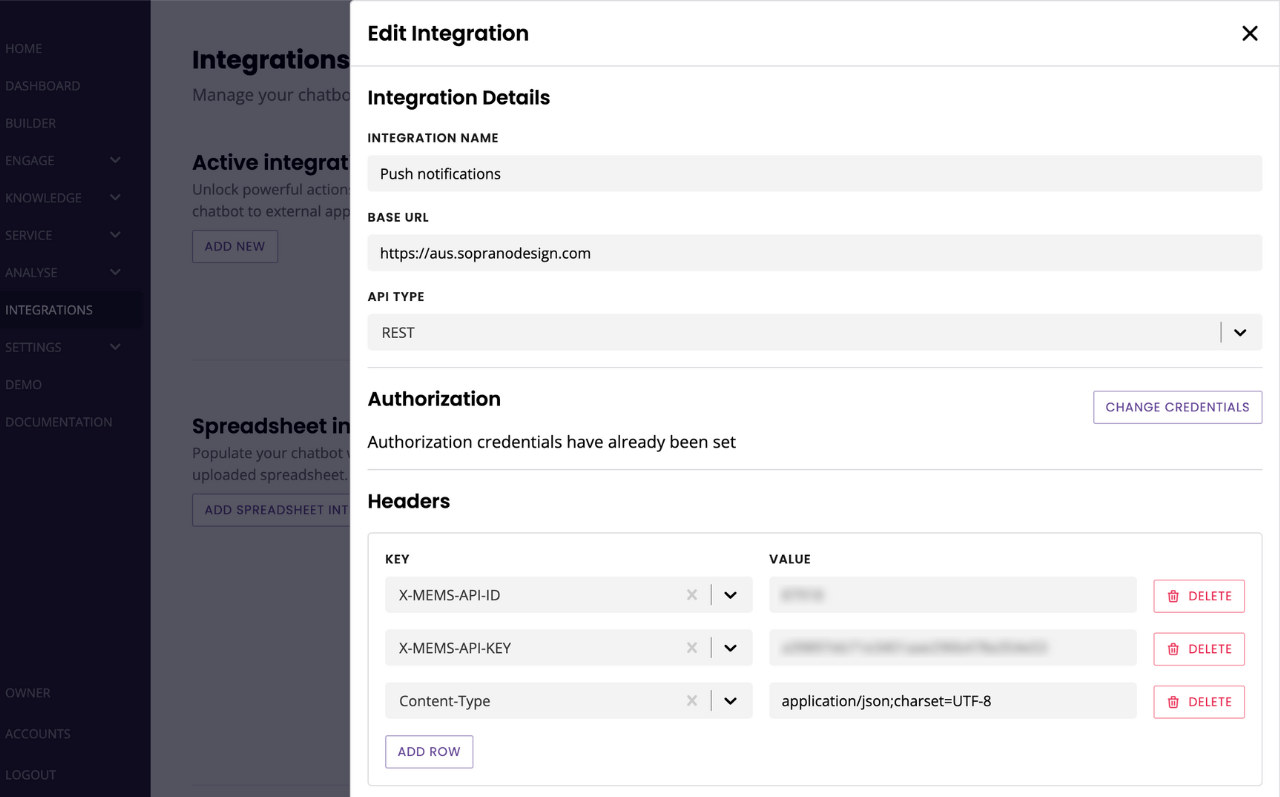
Hit Save.
The integration between your chatbot platform and Soprano Design is now set.
Next, we will create the endpoint.
Endpoint
The endpoint will contain the actual copy of the push notification you wish to send. This body can contain all sorts of information, including variables picked up from your conversation.
In your new integration, click Endpoints.
Give your request a name.
Make a POST request to /cgpapi/messages/pushnotification.
For this tutorial, we will create a simple example. We will send a notification to the chatbot user to thank them for being one of our app users. Here’s the body:
{
    "destination" : "...",
    "messageType" : "pushnotification",
    "pushNotification" :
    {
        "notification" : {
            "title" : "My First Push Notification",
            "body" : "Thanks for being a great customer!"
        }
    }
}
Where:
destinationis the end-user’s device ID.titleappears at the top of the push notification.bodyis the body of the notification.
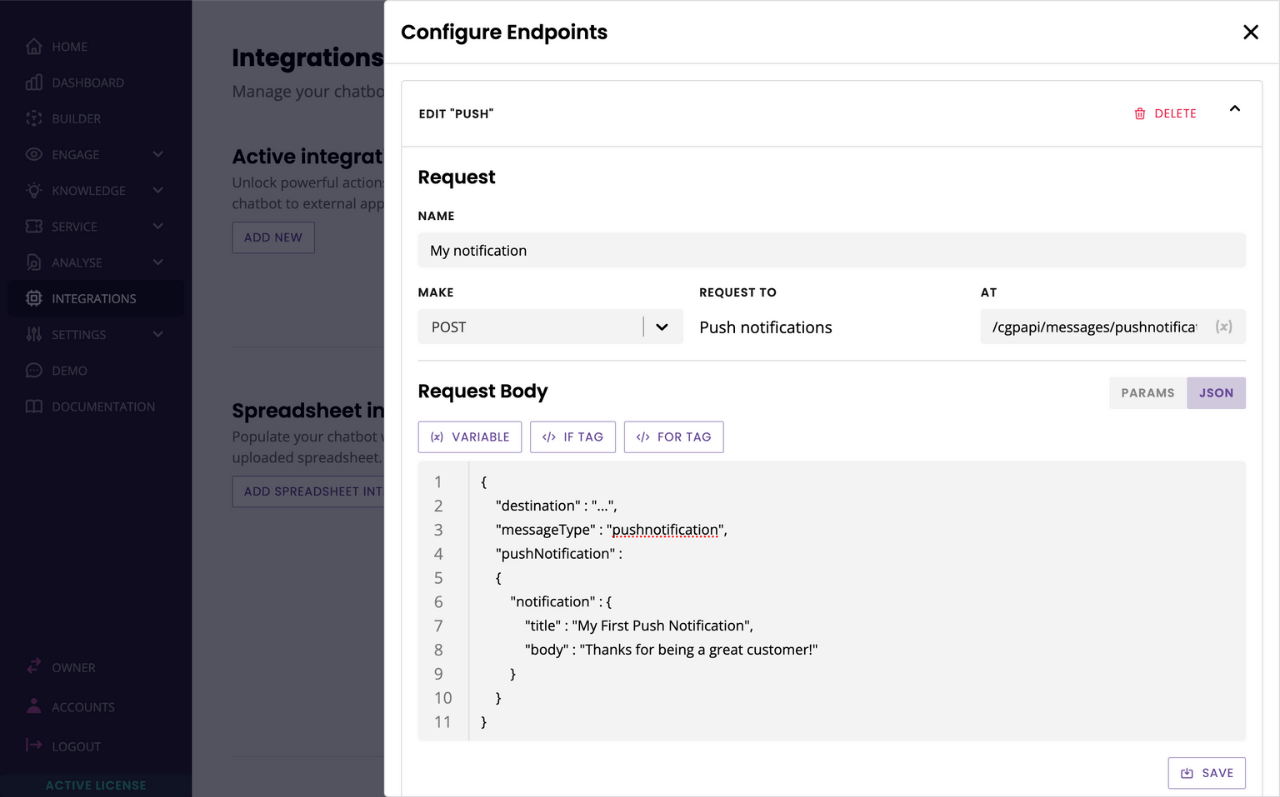
Hit Save.
Step 4: Trigger your integration
We’re basically there!
Go to your Workflow and, from the Block bank, click and drag an integration onto the last step of the conversation. Find your integration and hit Save.
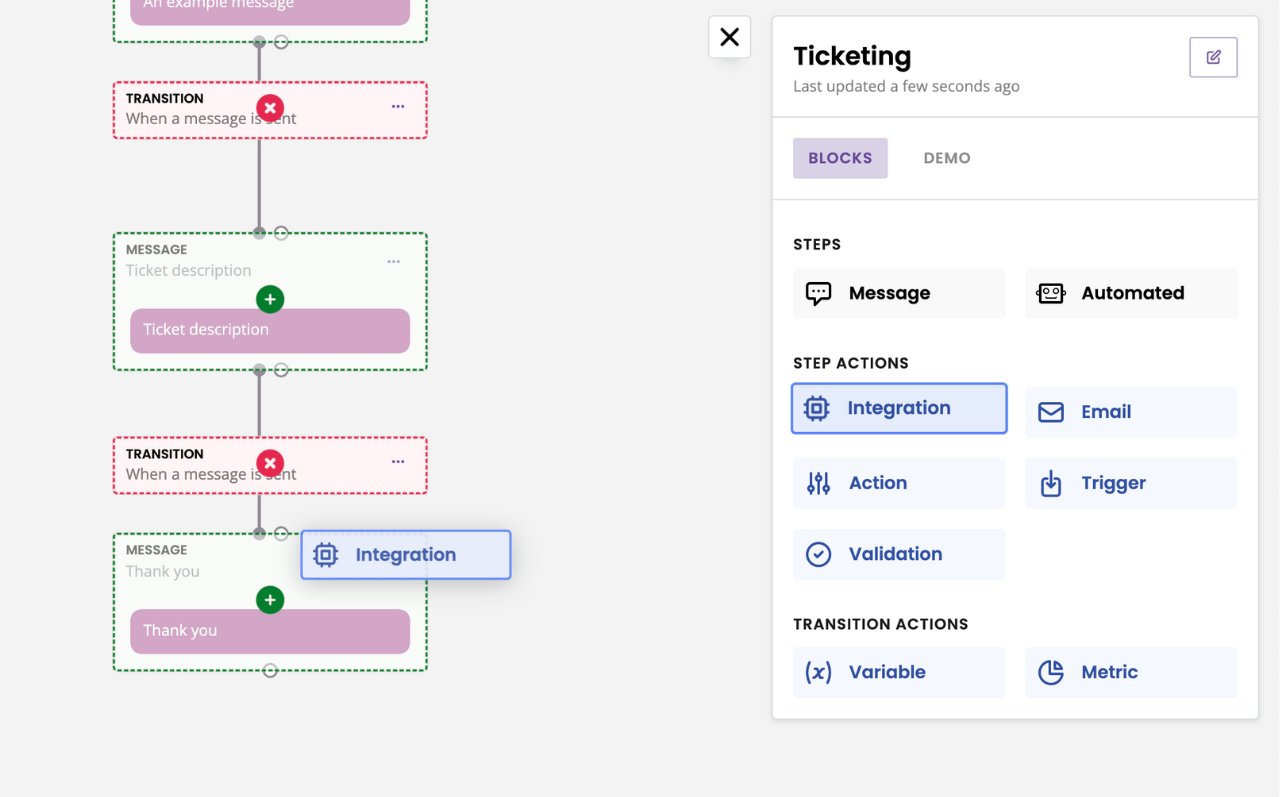
All done! When a user reaches that step, a push notification will be sent to your destination.