
Create your first workflow
Last updated: 04 December 2023
Turn any flow, step-by-step, repeatable and predictable process -- no matter how complex -- into an automated conversation with the process mapping tool.
To get you started, we will create a simple conversation.
A simple use case
In this scenario, we are creating a chatbot to help a restaurant deal with repetitive enquiries. One of the repetitive enquiries is around suitable food for individuals suffering from allergies.
Let's automate the process of asking the user for their particular allergies, then showing a set of suitable food options according to it.
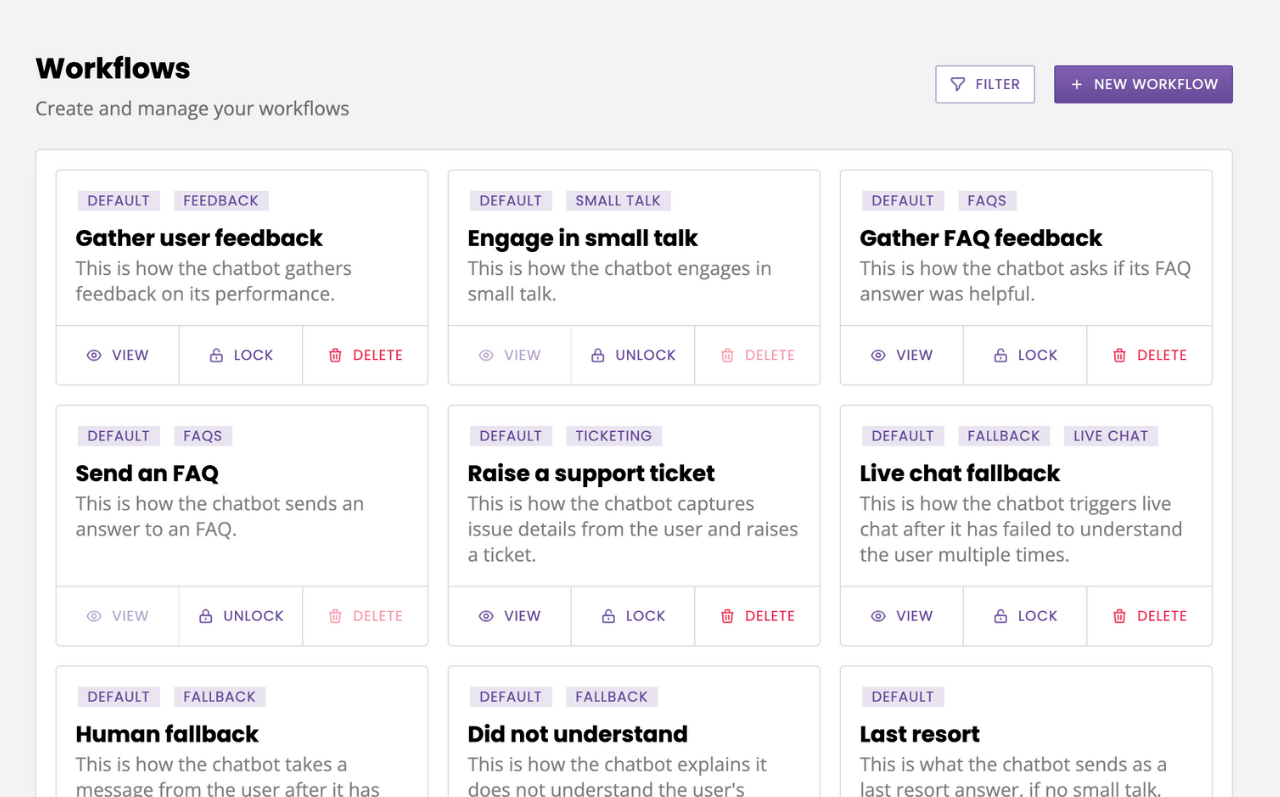
Head to Builder.
Step 1: Trigger the conversation
The chatbot management system allows you to trigger conversations using over 1,000 events. For simplicity, we will use a simple one: the user says 'allergies'.
Hit + New workflow in the top right.
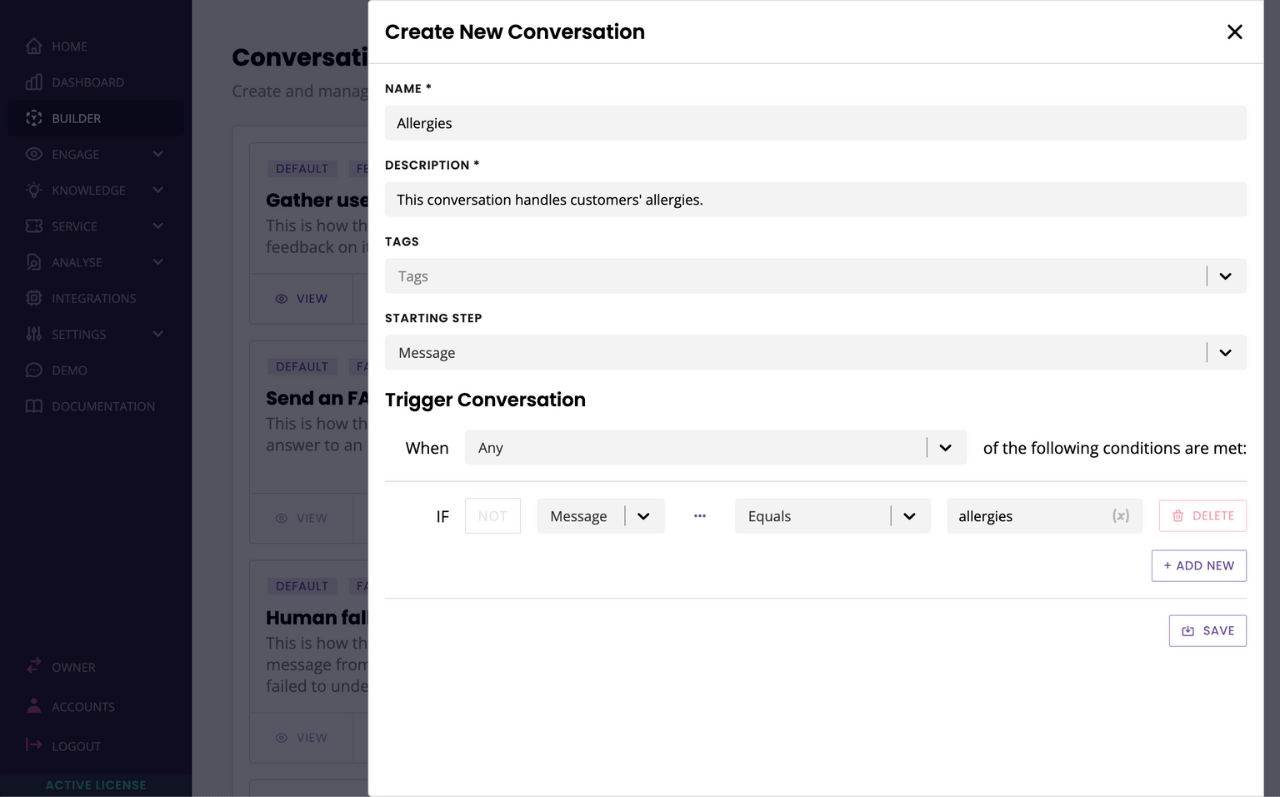
Give your workflow a name.
Describe the purpose of your workflow.
In the Starting step dropdown, select Message.
In the Trigger dropdown, select Message.
In the follow-up dropdown, select Equals.
In the field, type allergies.
Hit Save.
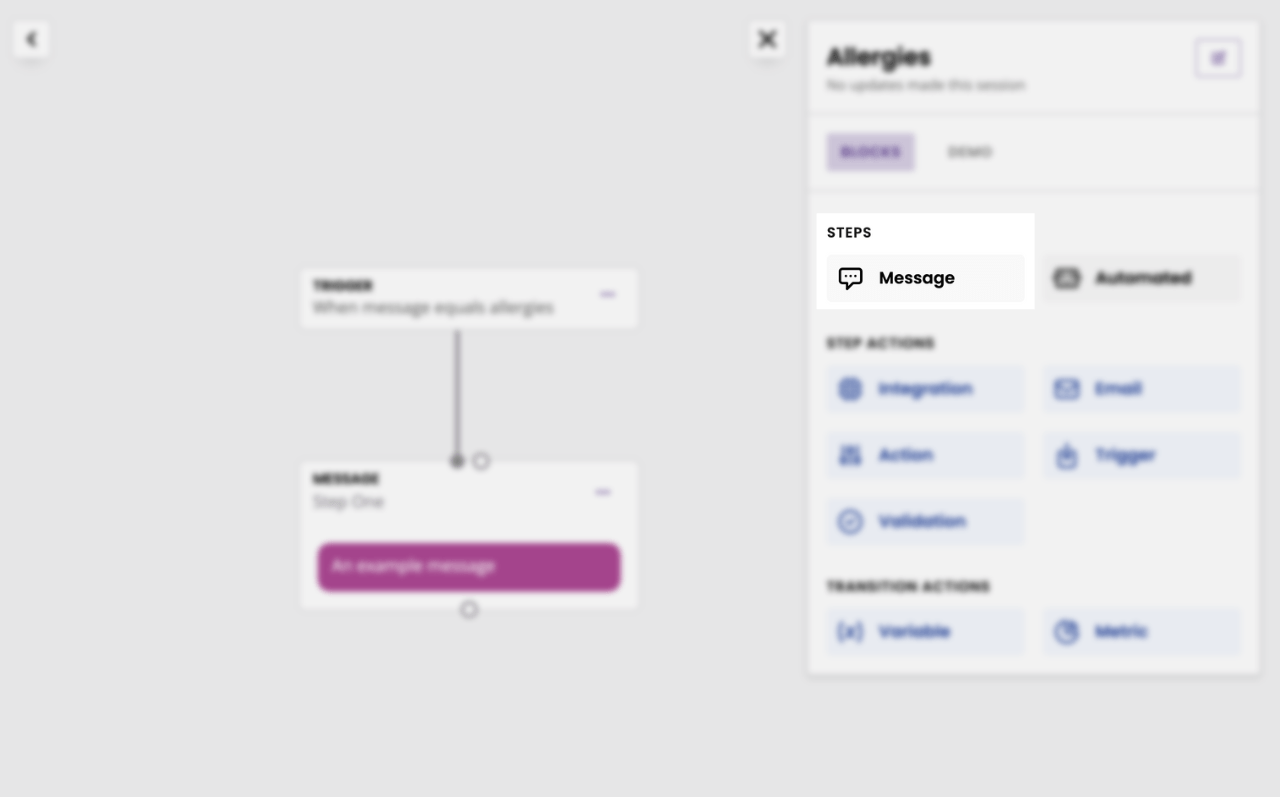
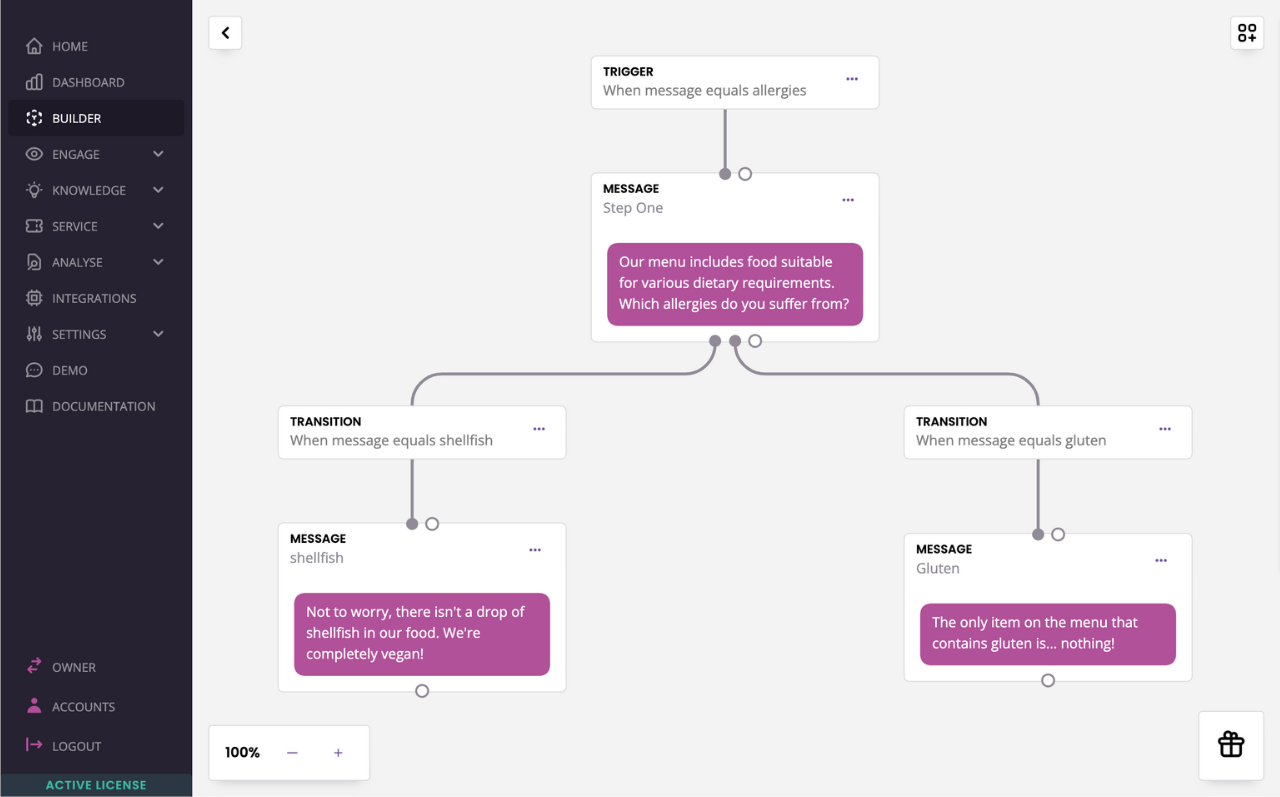
As you hit save, the conversation is created. Along with the trigger you set up, it has an example first step called 'Step One'.
Step 2: Edit your first step
At the moment, your first step says 'An example message'. Not exactly what we're after!
Edit the content of this message:
Click the three dots in the top right.
Click Edit response.
Rewrite the content of the message to fit our scenario.
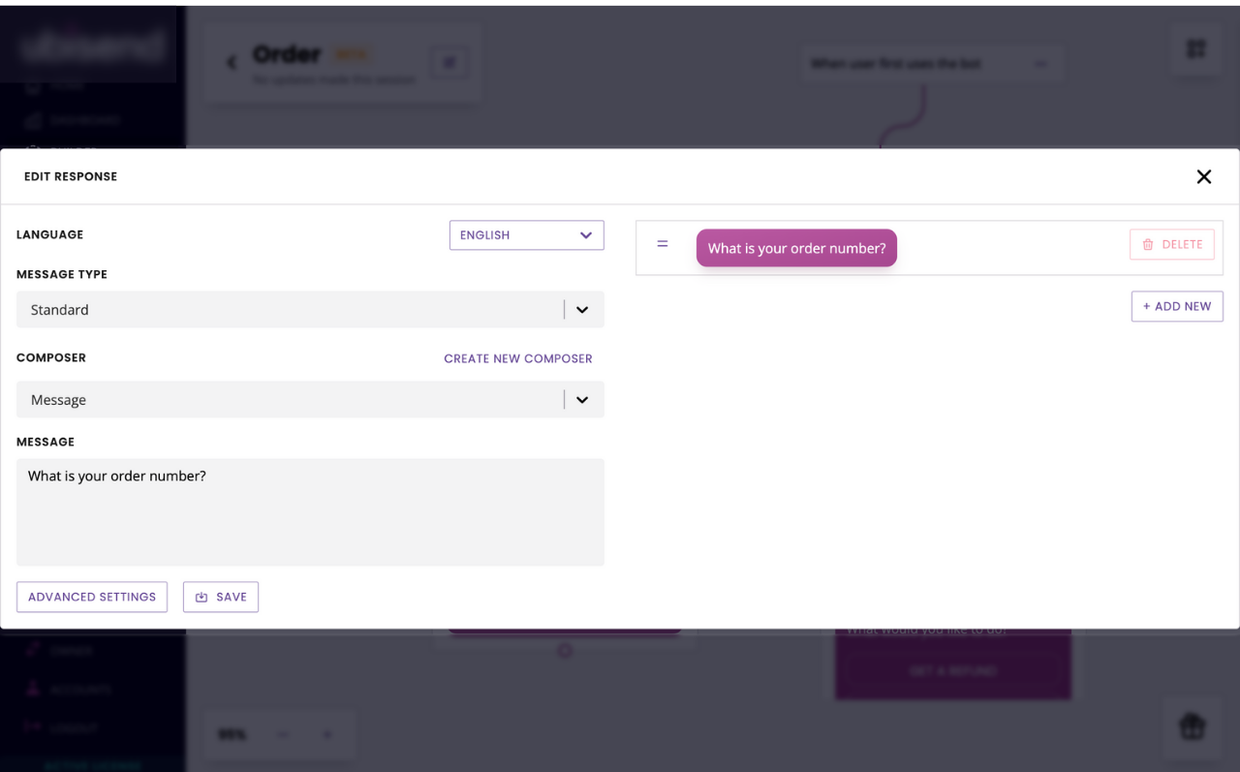
For example: ‘Our menu includes food suitable for various dietary requirements. Which allergy do you suffer from?’
Hit Save.
Step 3: Create the next step
It's now time to wrap the process up.
We've asked our users about their allergies. Depending on their answer, the chatbot needs to send a different message.
For simplicity, let's focus on two allergies for now: shellfish and gluten.
Open the Block bank. Drag and drop a Message step into the conversation.
Give the step a name (for internal use), click Continue.
Write a short message about the amazing shellfish-free food you have on your pretend menu.
Hit Save.
Go back to your conversation's overview. You will notice your step is free-floating, disconnected from everything else. To connect your step:
Click the dot at the bottom of the previous step.
Drag the dotted line across to the top of the new step.
Click once more.
Set up your transition rule. For now, use
When message equals gluten.
Perfect! You now have a two-step conversation. Let’s have some fun and create a branch.
Step 4: Add a simple branch
So far, we've only programmed the chatbot to answer the shellfish allergy concern. We need to programme a slightly different answer if the user has a gluten allergy.
On the first step of your conversation, once more click the dot and drag the dotted line. Click anywhere on the canvas to automatically create a new step.
Congrats, you’ve learned to create a new step in two different ways: from the bank or by drag & dropping!
Give your step a name and click Continue.
Write a short message about the amazing gluten-free food you have on your pretend menu.
Hit Save.
Create your transition,
When message equals shellfish.
Go back to your conversation overview. It is now clear that, depending on what the user will respond to the allergy question, they will go down a slightly different route in this process.
Step 5: Test your conversation
On paper, this looks great. What does the experience feel like in the actual chatbot? Let's find out.
In the main platform menu, head to Demo.
Inside your demo chatbot, send the keyword you've programmed (if you've followed this step-by-step, it should be allergies).
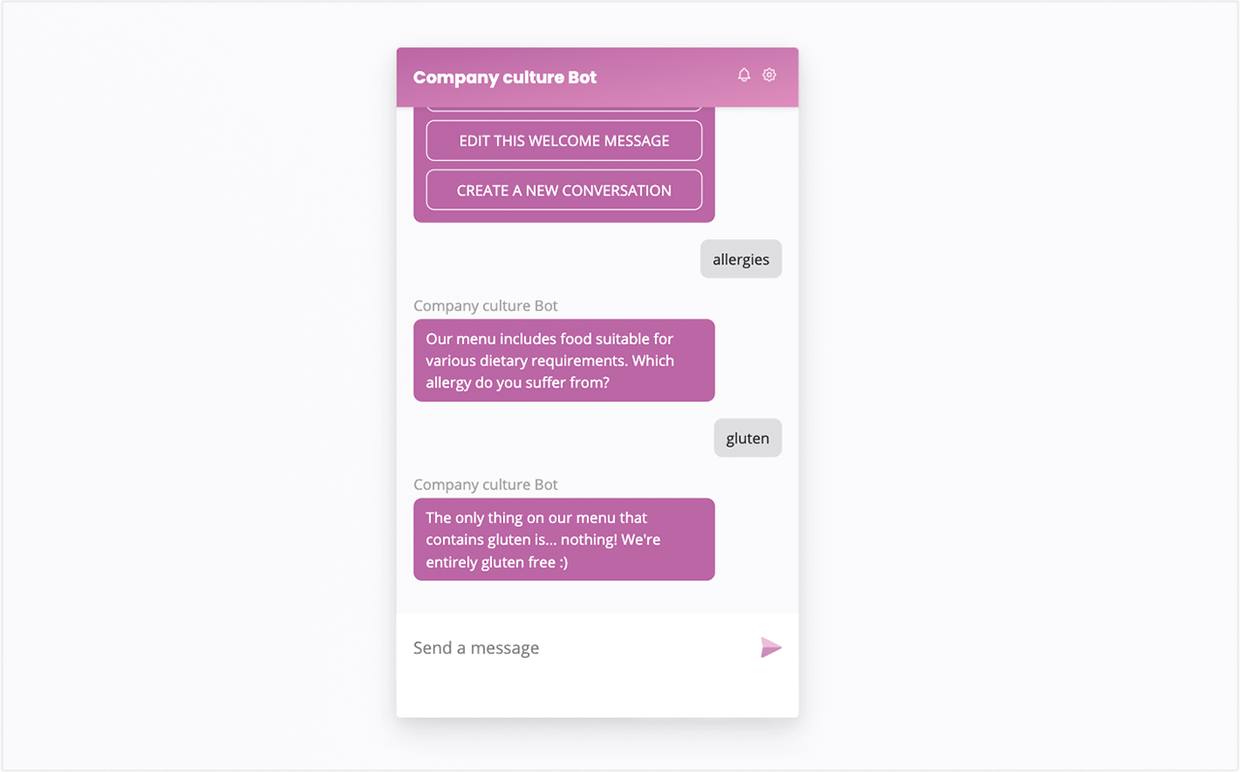
Go through the conversation. Test both branch by answering either ‘shellfish’ or ‘gluten’ to the first question.
Congratulations, you’ve just created your first chatbot conversation!