Overview of tags
Last updated: 05 December 2023
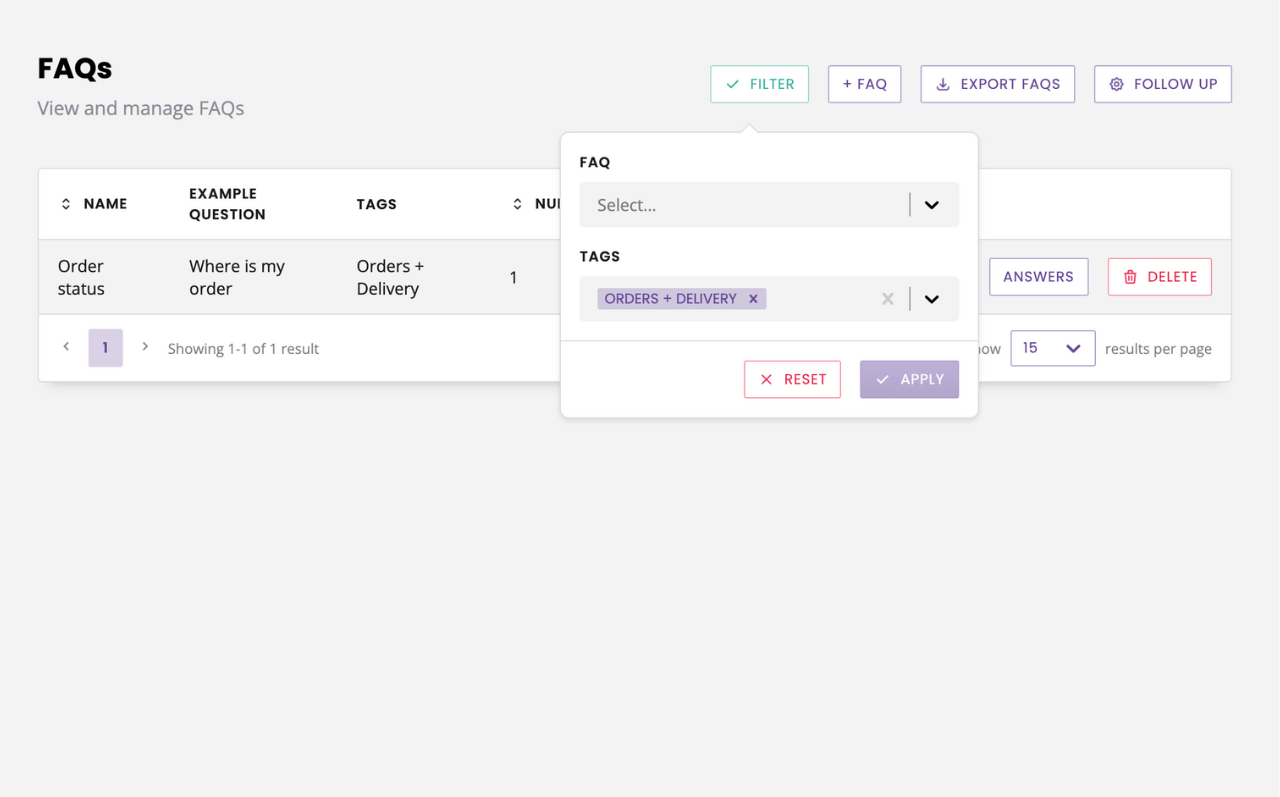
Tags are your chatbot’s filing and storage system. A tag can be assigned to multiple items, allowing you to filter by tag name, such as filtering all FAQs tagged as “Orders + Delivery”.

Tags are not mandatory.
Different types of tags
Your chatbot platform supports four different types of tags:
FAQ tags
Conversation tags
Ticket tags
Link tags
Despite each type of tag being its own entity, they all serve a similar purpose; to help you keep your chatbot organised.
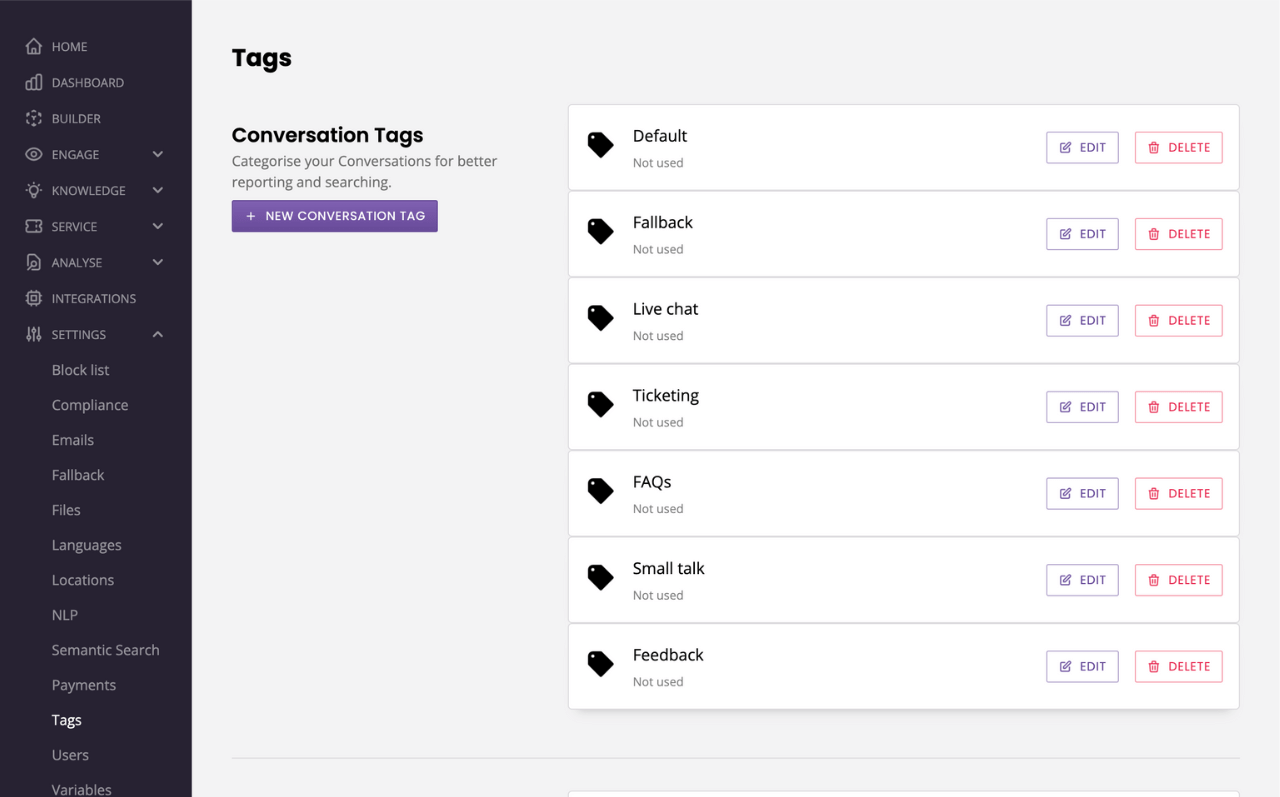
To view all the tags you’ve created, navigate to Settings → Tags.

This page displays every tag you’ve created within the platform, split by their type. Clicking + Tag enables you to create a new tag.
Creating a new tag
Tags can be created in two different ways:
Clicking + Tag within the main tags page of your chatbot platform.
Typing the name of your new tag when editing an FAQ, Conversation, Ticket, or Link.
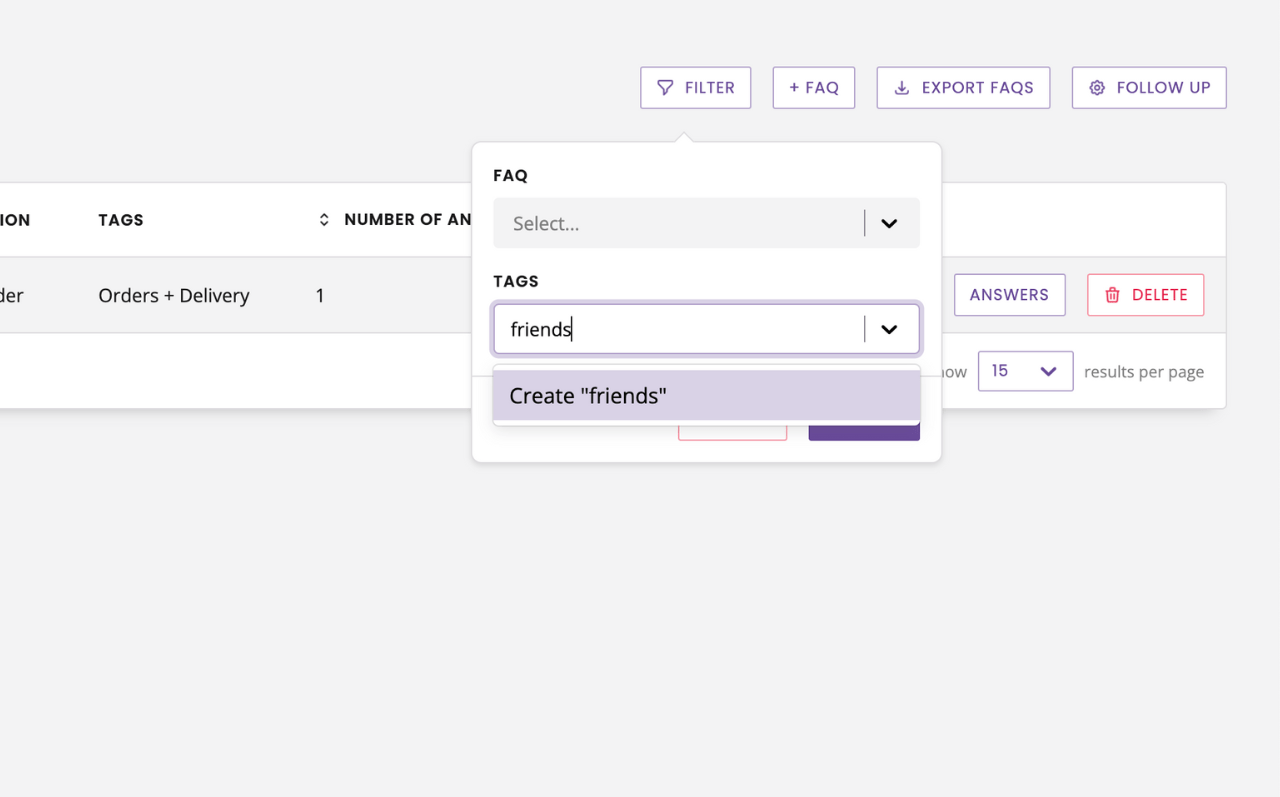
For the second option, you’ll notice each area of the platform that supports tags has a Tags dropdown in the filters.
To create a new tag, simply click within the dropdown and type the name of your new tag. Once finished, press enter.
This will create your new tag.

Assigning a tag to an element
Assigning a tag to an element, such as an FAQ or conversation, is simple.
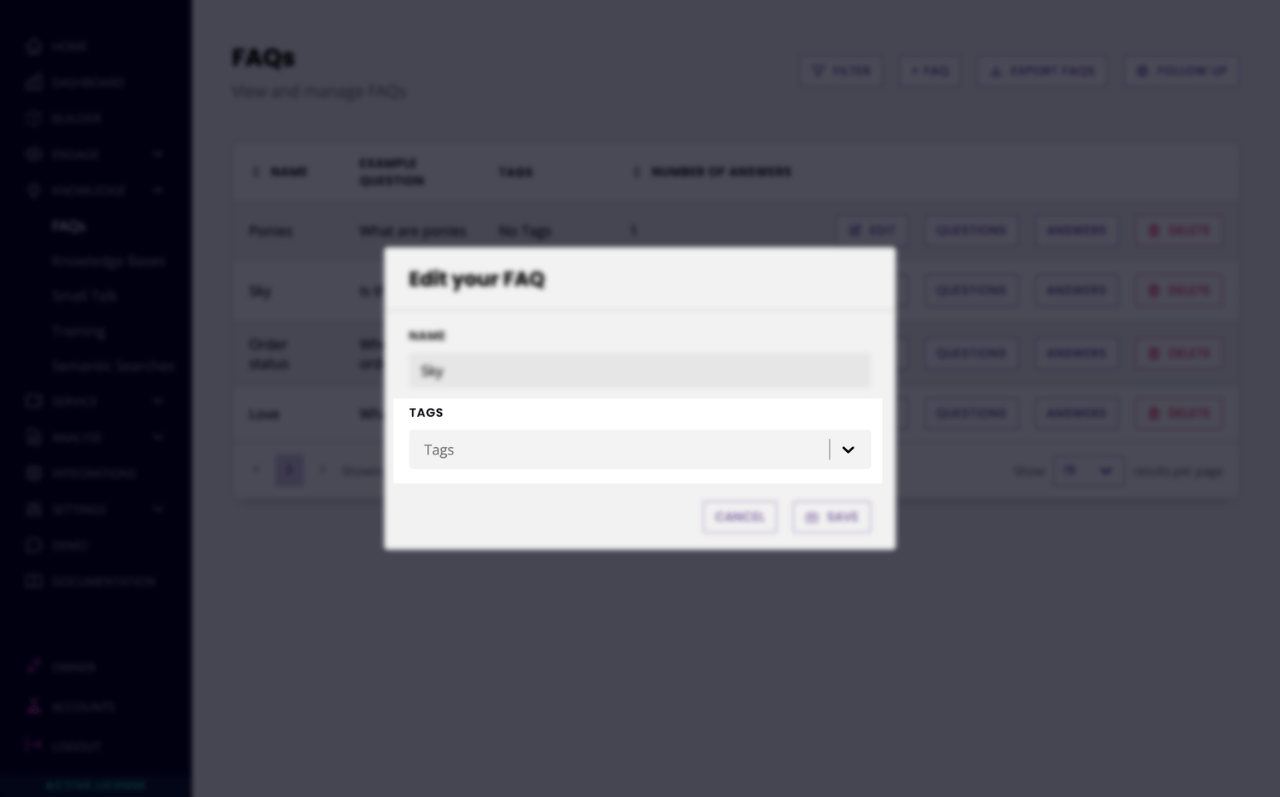
Click Edit and then choose your tag from the dropdown, or type to create a new tag.

You can assign multiple tags to the same element.
Filtering by tags
Need to view a specific group of FAQs or conversations?
Click the filter and select the relevant tag(s) from the dropdown.

This will display all the elements with the assigned tag(s) you have chosen. You can filter by a single tag or multiple tags.