Create custom chatbot metrics
Last updated: 05 December 2023
Creating custom metrics gives you the ability to track exactly what you need to monitor the performance of your chatbot.
Step 1: Create a custom metric
Go to Analyse → Custom Metrics.
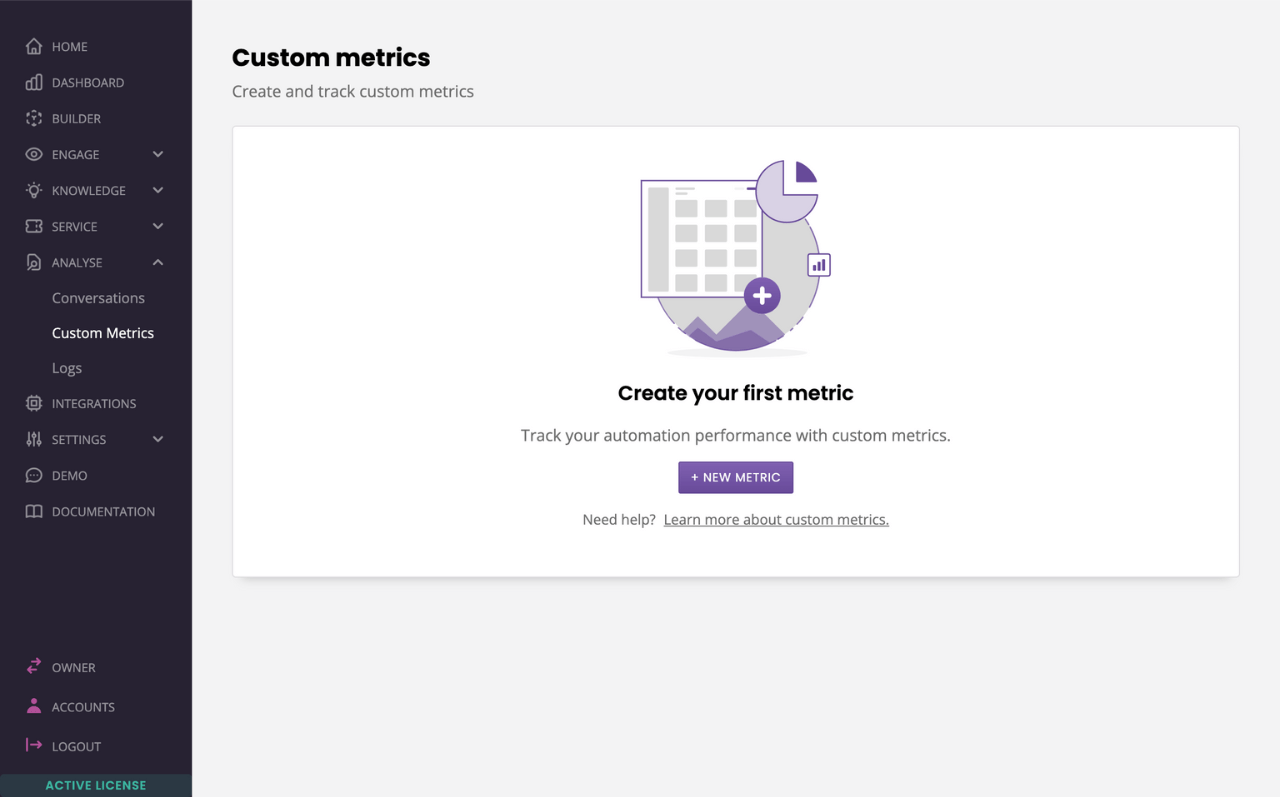
Click + New metric.
Give your custom metric a name.
Click Save.
Step 2: Apply your custom metric to a conversation step
To use your newly created metric, you must tie it to a conversation step. When a user reaches that step in the conversation, the metric’s value will increment by one.
Head to Builder.
Select a conversation.
Open your Block bank. Click, drag, and drop a Metric in transition between the two steps.
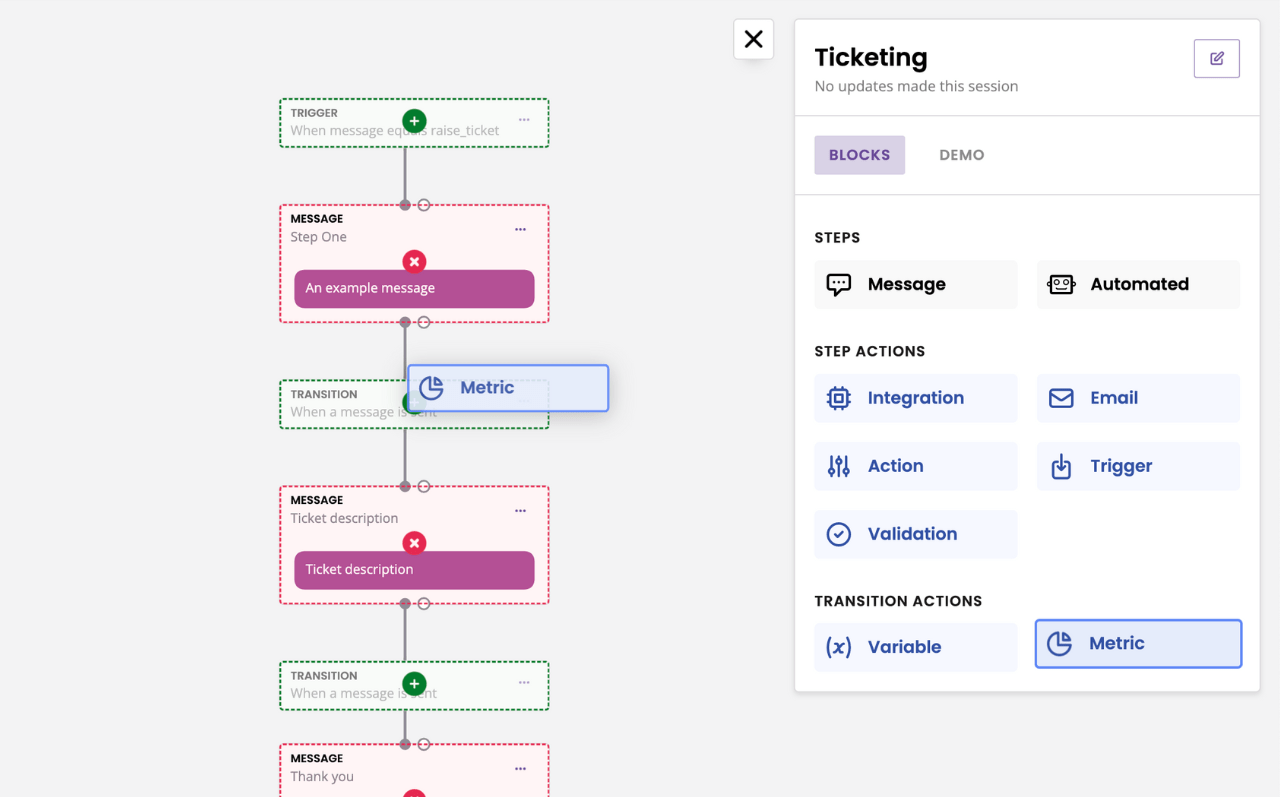
Choose your custom metric from the available list and then click Save.
Metrics can also be tied to a conversation’s trigger, using the same process.
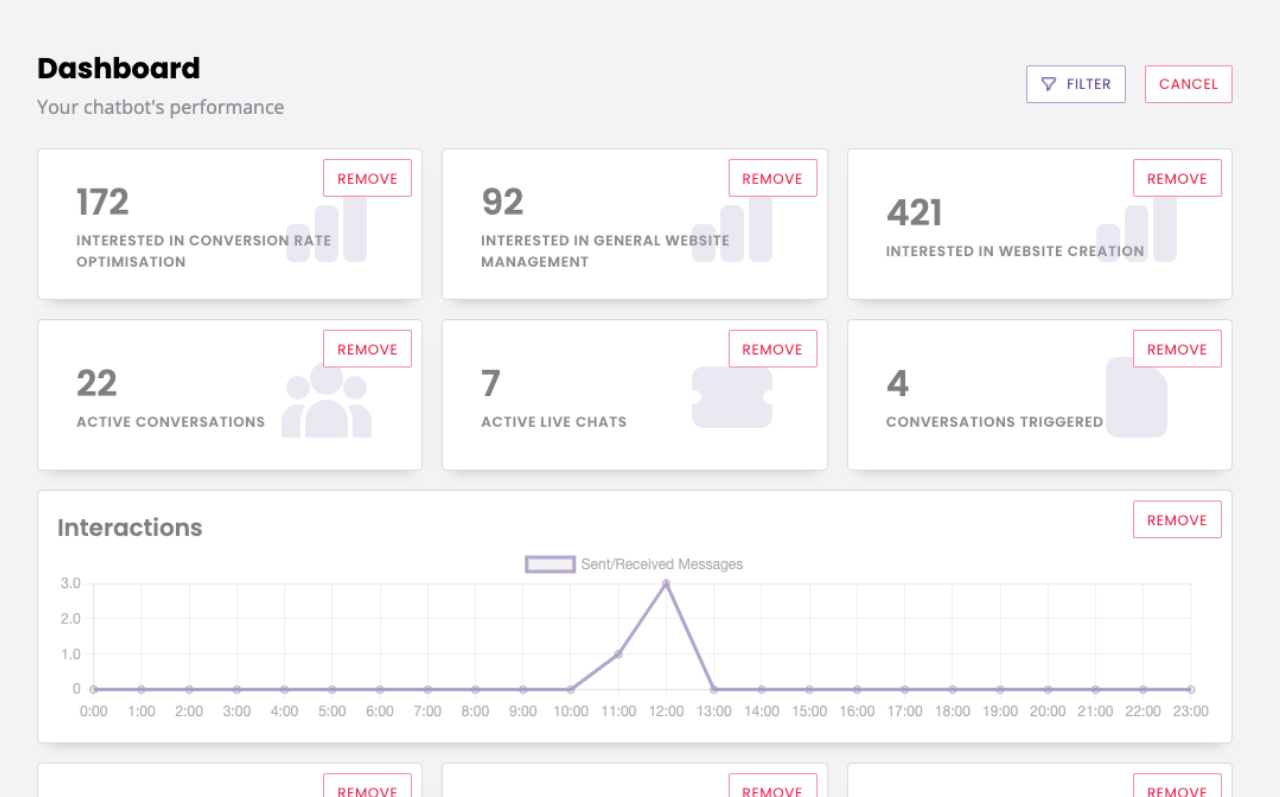
Step 3: View your custom metric in action
To see your metric in action, simply edit your dashboard and add your custom metric.