Example of a dynamic composer with a spreadsheet
Last updated: 15 August 2022
To help us understand the power of dynamically creating a composer, let’s go through a quick example.
Example - Dynamic fuzzy composer (for statement)
For this example, we will use a spreadsheet integration.
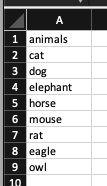
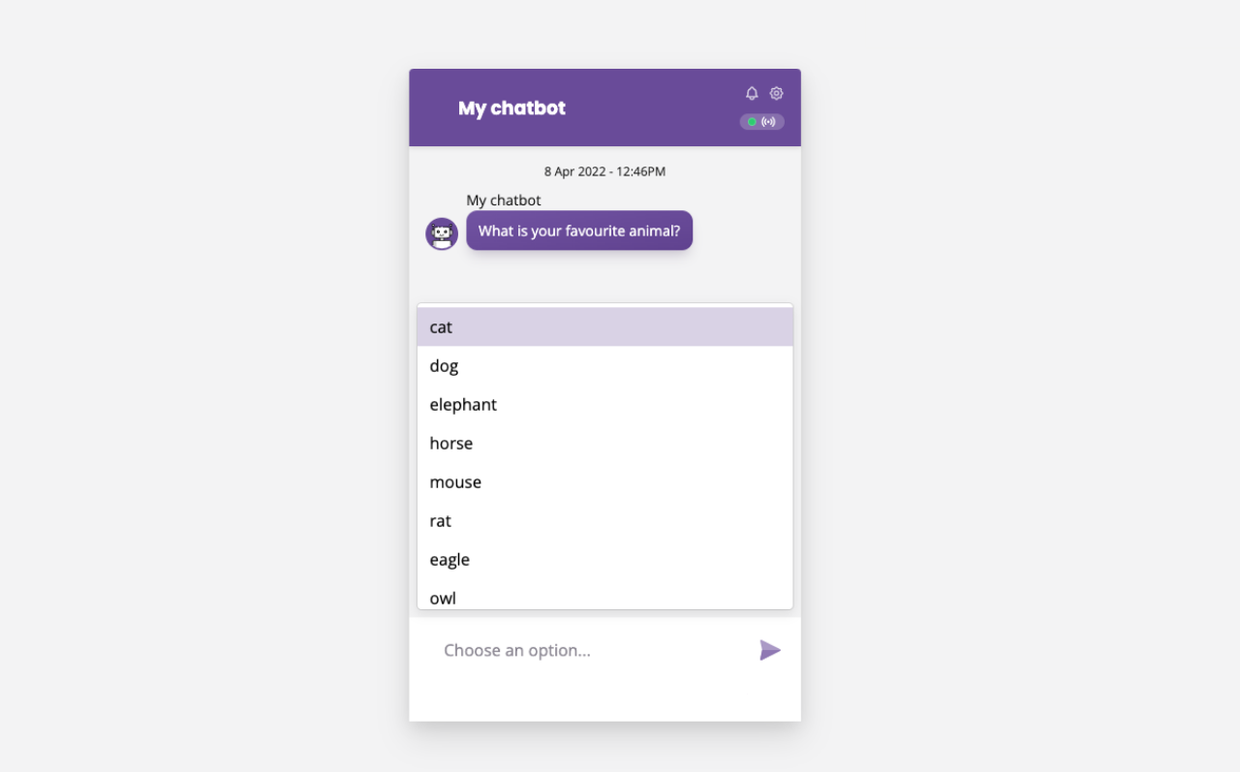
Let’s imagine you have a spreadsheet with a list of animals. You’d like to use this list to dynamically create a fuzzy composer. Why? Because doing it the manual way would require copy and pasting potentially tens or hundreds of options into your CMS. Not fun, not fun at all.
Data
Grab your spreadsheet and make sure it:
Is saved as a .CSV (Excel sheets will not work).
Has data (e.g. the list of animals) in the first column.
Has a column name (e.g.
animals).

Create the spreadsheet lookup
Go to Integrations and click Add spreadsheet integration.
Find (or upload) your spreadsheet and hit Save.
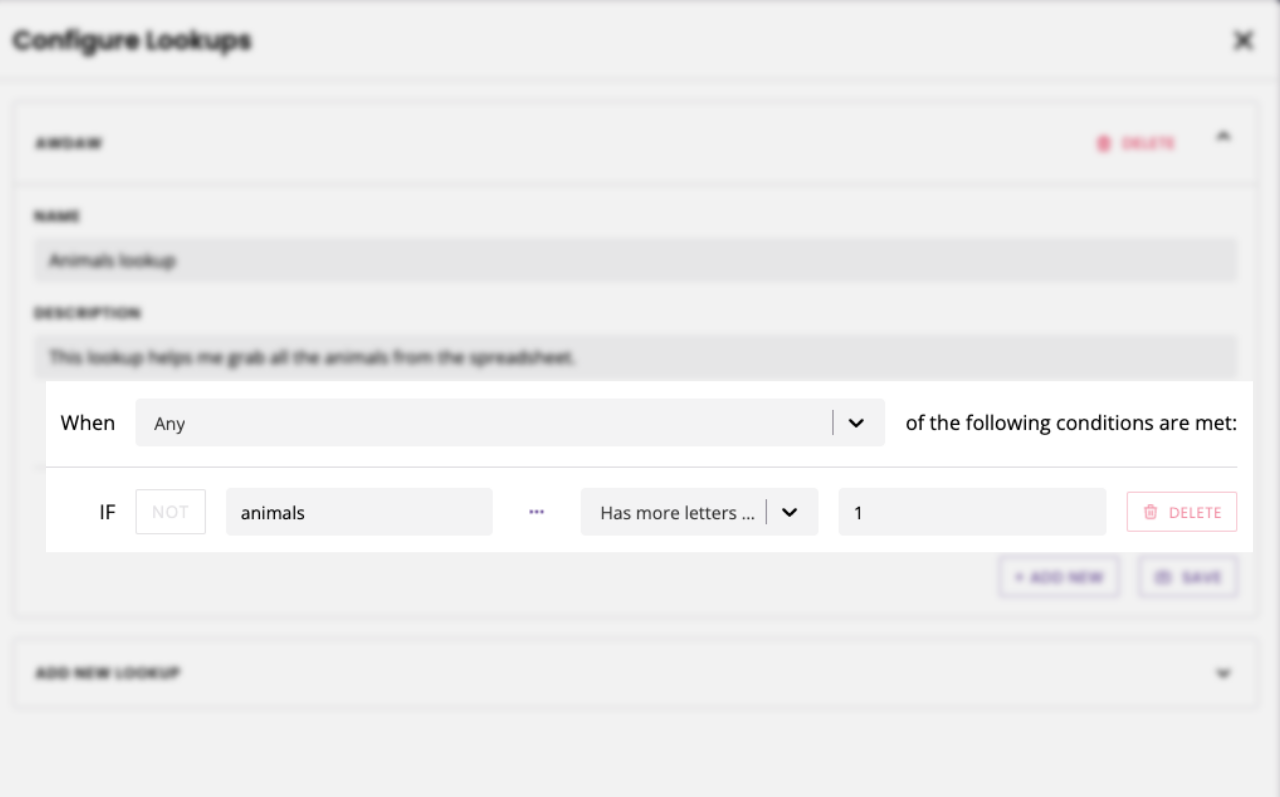
Once you’ve got your spreadsheet added to the platform, click Lookups and create the following rule:
If name_of_column has more letters than 1.
Make sure you change name_of_column to the actual name of your column in your spreadsheet. In our example, we use animals (cell A1).

Create the custom composer
Go to Engage → Composers.
On the right-hand side, you will see your custom composers section. Click Create composer.
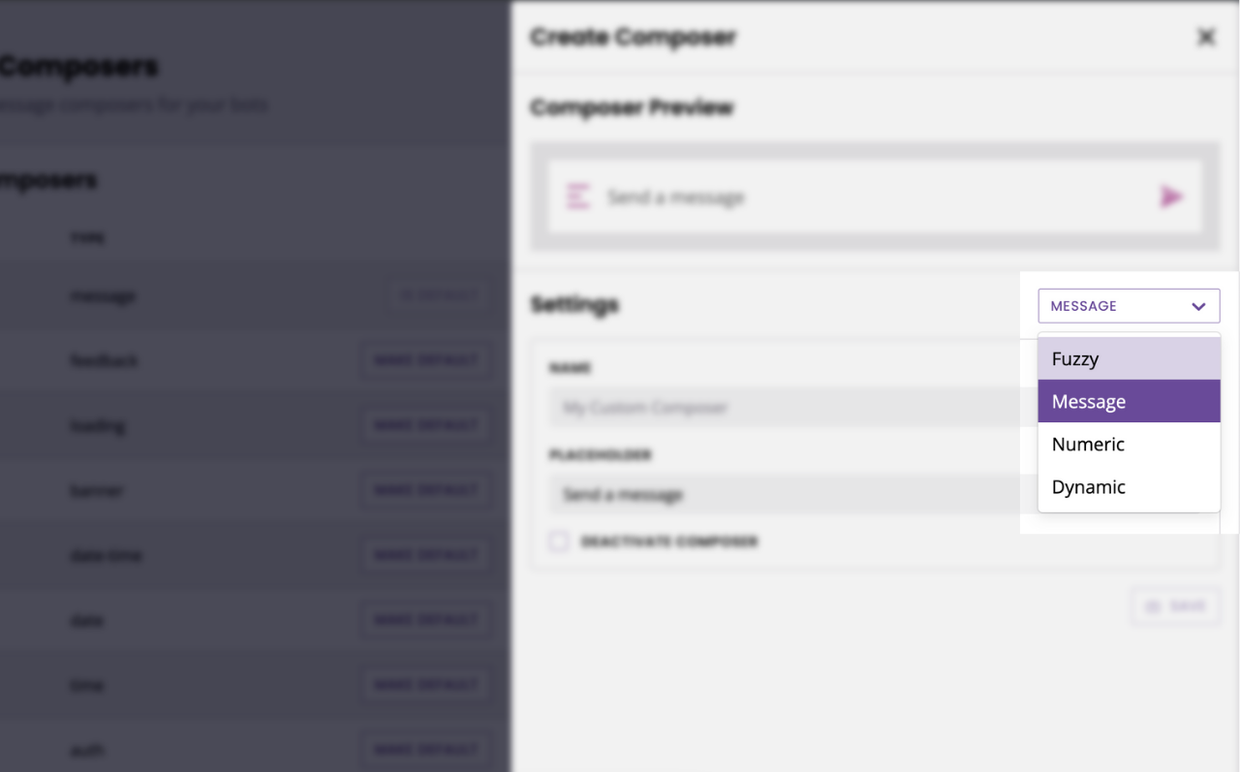
Select the dynamic composer option in the dropdown.

Pull the data
Give your composer a name (e.g. “Animals”).
Under Variables, we will grab our integration. This is the section we use to tell our chatbot where it should go and fetch the data to populate our fuzzy composer.
Because we’re working with a spreadsheet integration, select Use spreadsheet values. Grab your spreadsheet name and lookup from their respective dropdowns.
Create a dynamic fuzzy composer
Delete everything from the code editor, as we’ll start from scratch.
Our platform allows you to create a dynamic version of any of our composers. For this example, we need a fuzzy composer, so using the Add composer… dropdown, select Fuzzy.
Learn about the fuzzy composer and its associated values.
Write the template
We will use a for loop to populate the value inside the items section. Put your cursor below the first [ and click the </> For tag button. Grab the {"label": "", "value": ""} and paste it inside the for loop.
{
    "type": "fuzzy",
    "content": {
      "placeholder": "Choose an option...",
      "disabled": false,
      "multi": false,
      "items": [
		{% for variable in variables %}
            {"label": "", "value": ""}
 		{% endfor %}
      ]
    }
}
Looking good. Now, we just need to add our variables in there.
Spreadsheet integrations work with rows, so instead of variable we will write row. The variables value is also set in stone with spreadsheets; we’re looking for lookup.data.
Now, we can write the value the composer will display, i.e. the animal names.
Simple too: we enter row.animals. Simply put, we’re telling the code to go and fetch whatever value we have in every row under the column animals.
Finally, we close the loop.
This gives us:
{
    "type": "fuzzy",
    "content": {
      "placeholder": "Choose an animal...",
      "multi": false,
      "items": [
			{% for row in lookup.data %}
        		{
					"label": "{{row.animals}}",
					"value": "{{row.animals}}"
				}{% if not loop.last %},{% endif %}
  {% endfor %}
      ]
    }
}
Beautiful, all done. Now, you can attach your new composer to a conversation step (learn how). Voila!
