How to set up a click-to-email or click-to-call buttons
Last updated: 16 March 2022
Would you like to offer your users a way to contact your team directly, via email or a phone call?
Click-to-email and click-to-call buttons might be for you. Follow the easy steps below to set them up.
Step 1: Message type
Click-to-email and click-to-call buttons are compatible with any message type that allows you to add buttons, such as:
Action
General
Carousel
And more. Read the message type documentation to know more.
Step 2: Create your message
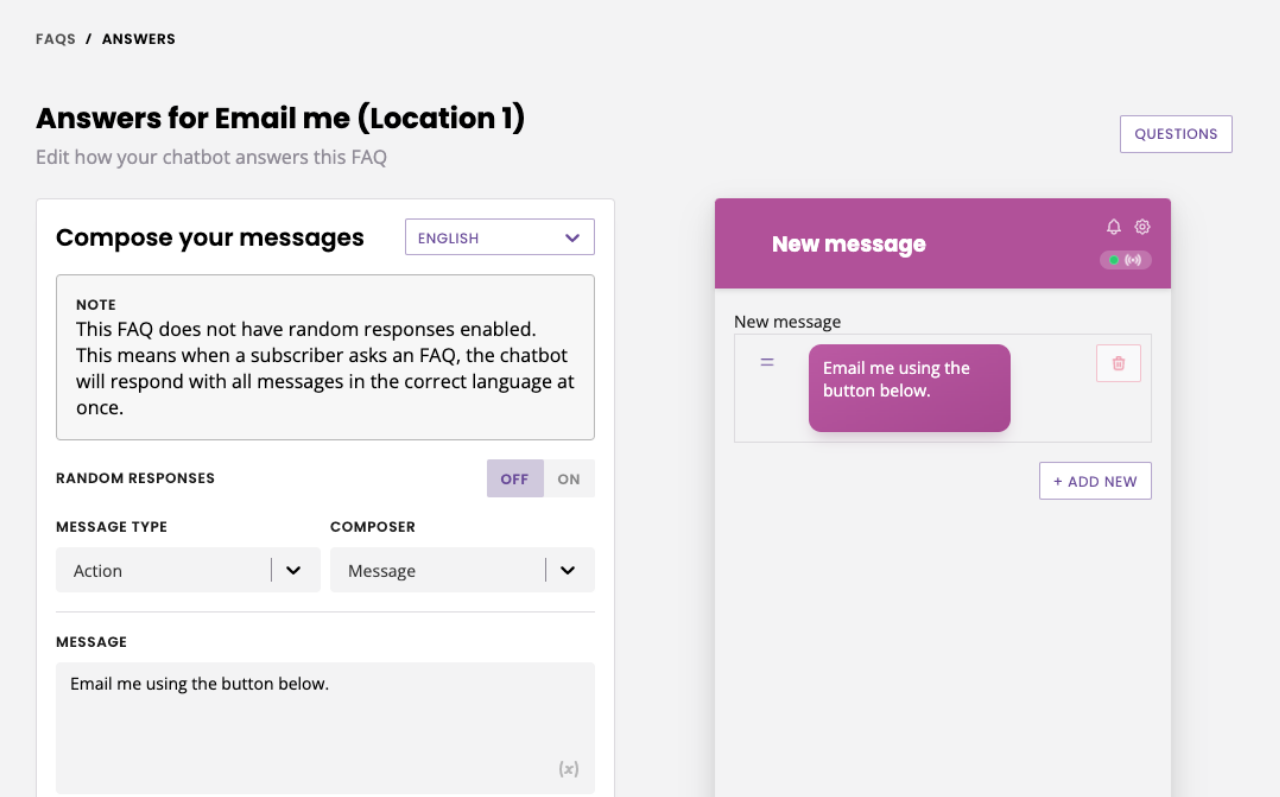
You may use these buttons as part of an FAQ answer or a conversation step. For the purpose of this tutorial, let’s assume you’re setting up an FAQ.
Head over to Knowledge → FAQs.
Click + FAQ in the top right.
Give your FAQ a name (and, optionally, a tag).
Enter your three questions, and hit Create.
In the next page, select a compatible message type. Let’s go for an Action message for now.

Enter your message copy.
In the button options, click Protocol.
Step 3: Set up a click-to-email button
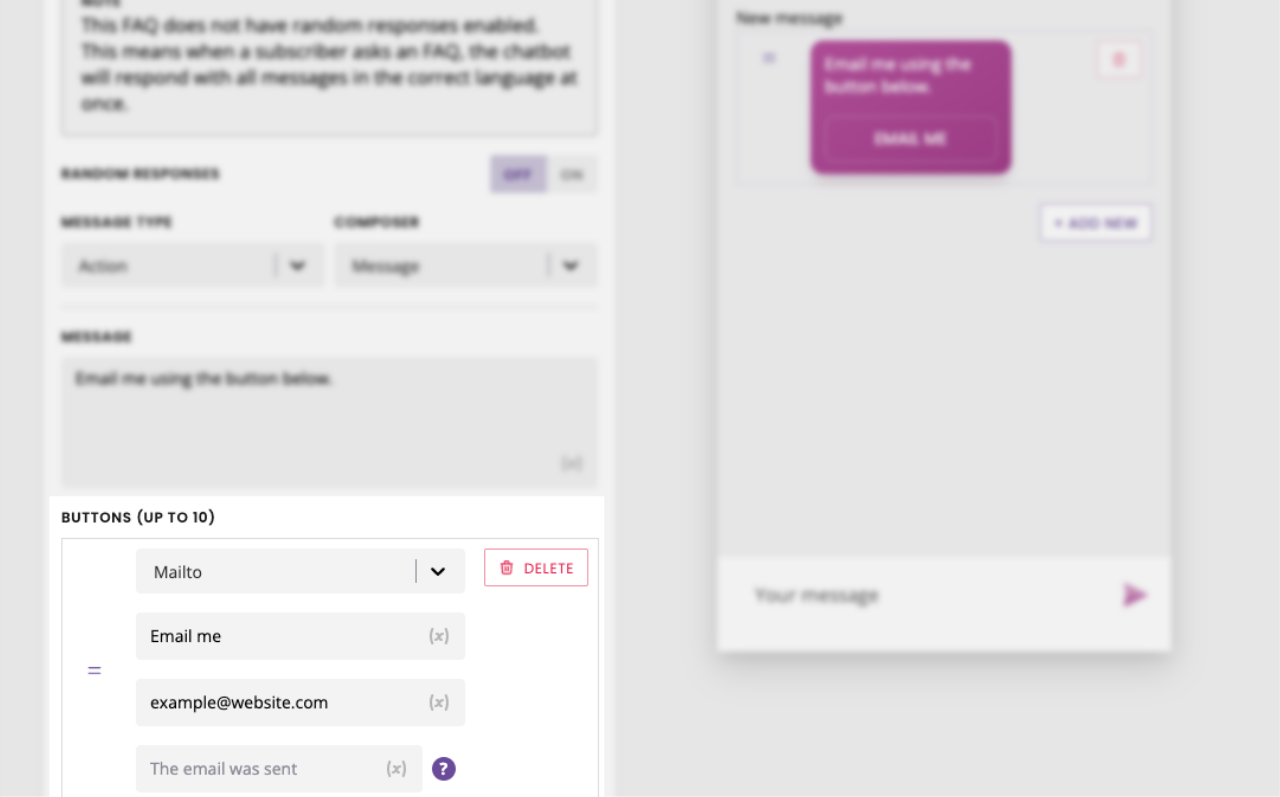
In the dropdown, select Mailto.

You are now presented with three fields:
The first is the button’s label. This will be visible to the user.
The second is the email address. Enter the email address you’d like to pre-fill when the user clicks the button. You may enter multiple email addresses using
,The third is a postback. This is optional and will trigger in the background, after the user has clicked the button. You can use this to, for example, trigger a different conversation.
All done? Click Save.
When a user clicks this button, their default email application will automatically open along with a new email, with the email address you’ve set up pre-filled in the To field.
Step 4: Set up a click-to-call button
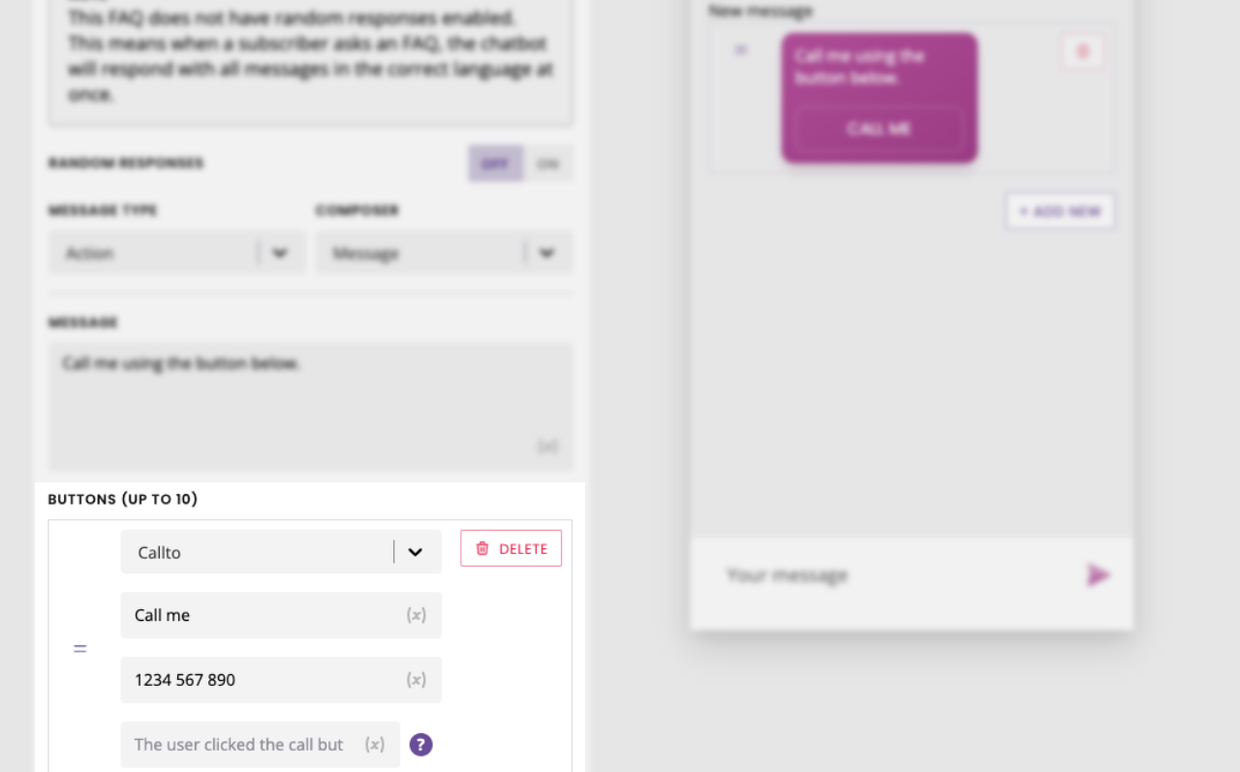
In the dropdown, select Callto.

You are now presented with three fields:
The first is the button’s label. This will be visible to the user.
The second is the phone number. Enter the phone number you’d like the user to automatically call when they click the button.
The third is a postback. This is optional and will trigger in the background, after the user has clicked the button. You can use this to, for example, trigger a different conversation.
All done? Click Save.
When a user clicks this button, their device will automatically open the call function with the phone number you’ve programmed filled out.clic