Create a new spreadsheet integration
Last updated: 05 December 2023
Integrations allow you to connect your chatbot with external sources of data.
Often, integrations come into the form of an API. However, in some cases, your data may reside in a spreadsheet instead of a piece of accessible software.
For such cases, we have a a spreadsheet integration.
Spreadsheet integrations allow you to use data stored inside a .CSV (or .TXT) file into your chatbot.
Spreadsheet integrations, though amazing, are more limited than API integrations. For example, you cannot update a piece of data into a spreadsheet from your chatbot. You may only pull data from your spreadsheet into your chatbot.
Below are a couple of examples of how powerful a spreadsheet integrations can be:
Upload a spreadsheet of your inventory. Use it to inform chatbot users of how many items are available to purchase.
Upload a spreadsheet listing each of your employees' particular skills. As employees talk to your chatbot about a project they’re working on, your chatbot can recommend other employees with complimenting skills.
Upload a spreadsheet listing various vacancies at your business. As candidates talk to your chatbot and share their experience, the chatbot directs them to a suitable vacancy.
Step 1: Format your spreadsheet
Before importing a spreadsheet, make sure it suits the following requirements:
Your spreadsheet has to be a
.CSVor.TXT. Excel spreadsheets will not work.Content within the spreadsheet must be organised from column A, row 1.
Ensure there are no spaces at the end of the content inside a cell.
Ensure the column names are all lowercase.
Ensure every column has a heading.
Spreadsheet formatted? Fantastic. Let’s import it into your platform.
Step 2: Import your spreadsheet
To create a spreadsheet integration, head to Integrations.
Click + New spreadsheet integration.
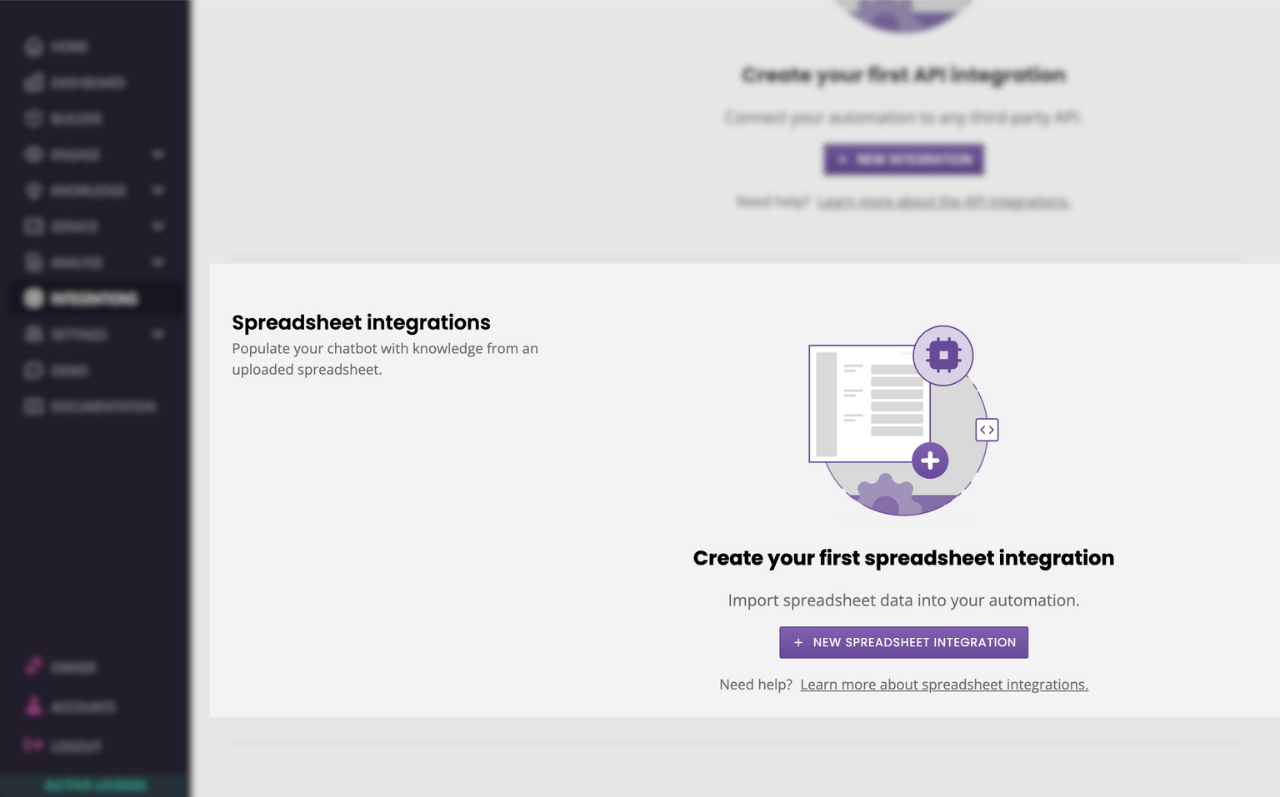
A popup invites you to create your import.
You must give your file a name before you are able to import it. In this instance, we’ll call it inventory.
Hit Create.
Once you’ve created the file name, the upload button becomes available.
Click Select a spreadsheet. If your spreadsheet is already uploaded in your file storage, find it there. If not, click + File and find it on your local computer.
Hit Save.
Step 3: Create your lookups
Our spreadsheet is now uploaded to the platform. Time to create the lookups.
Lookups are the equivalent of VLOOKUP functions in Excel. The lookup will look for a value inside your first row, allowing you then to horizontally return the corresponding value from another column.
Need to see a real life example? Read our tutorial on using spreadsheets as a pricing matrix.
In your newly created spreadsheet import, click Lookups, then Add new lookup.
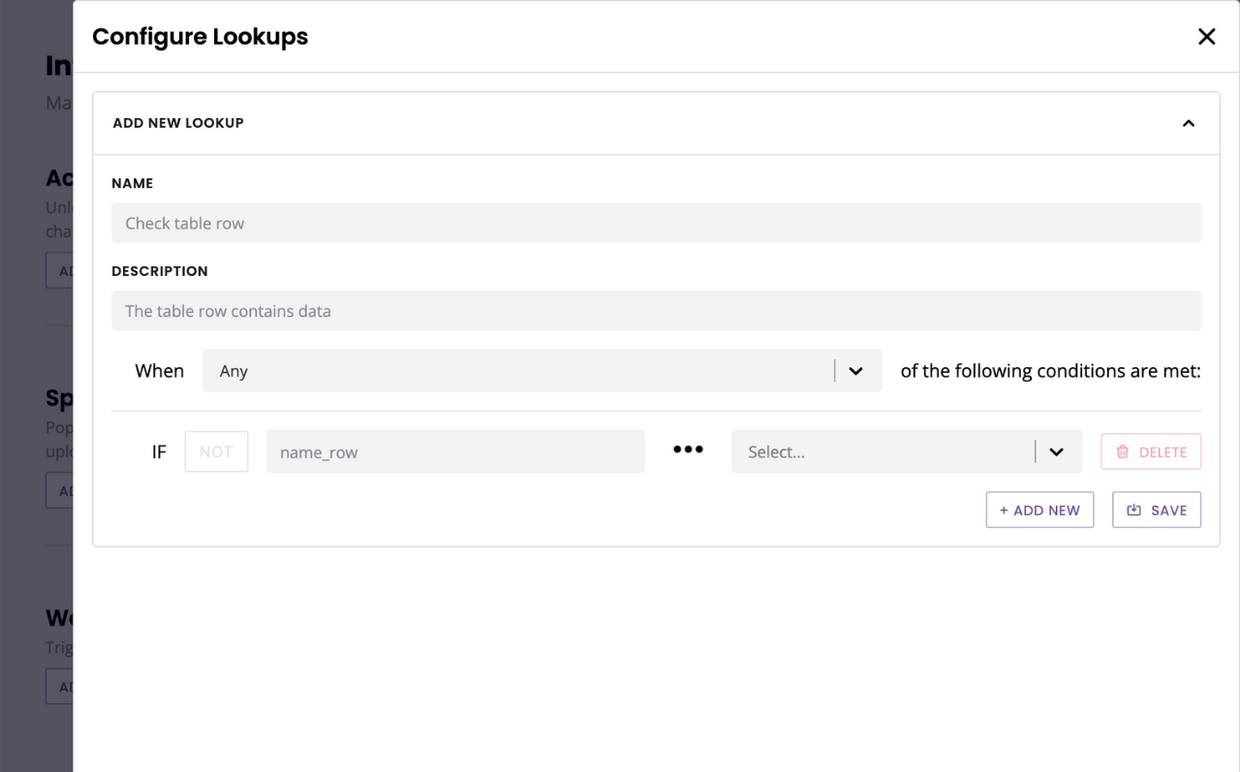
Give your lookup a name and a description, for internal use only.
In the name_row field, enter the name of the column you would like to use as a starting point for your lookup. For example, if your spreadsheet has two columns, items and inventory, enter items in this field.
Select the conditional you need.
In the last field, enter the variable you will use in your lookup.
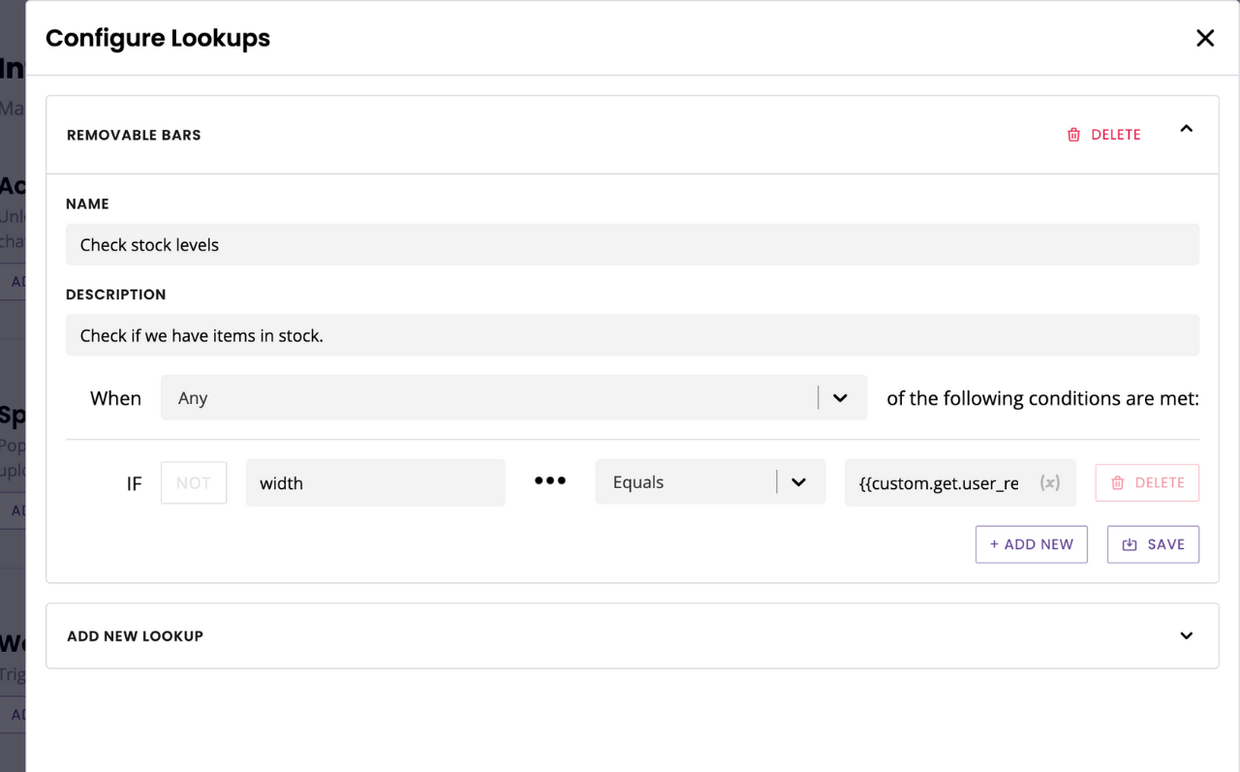
To make your chatbot and its spreadsheet integration more powerful, use variables in this last field.
Hit Save.
Step 4: Use your spreadsheet in a conversation
Your spreadsheet has been imported and you’ve set up your first lookup. Now, you can use the conversation builder to resurface values from your spreadsheet to your users.
Go to Builder.
Find the conversation you’d like to use and click View.
Within your conversation, find the step at which you would like to resurface your spreadsheet data. Click the three dots on the right and Edit response.
Click Advanced settings.
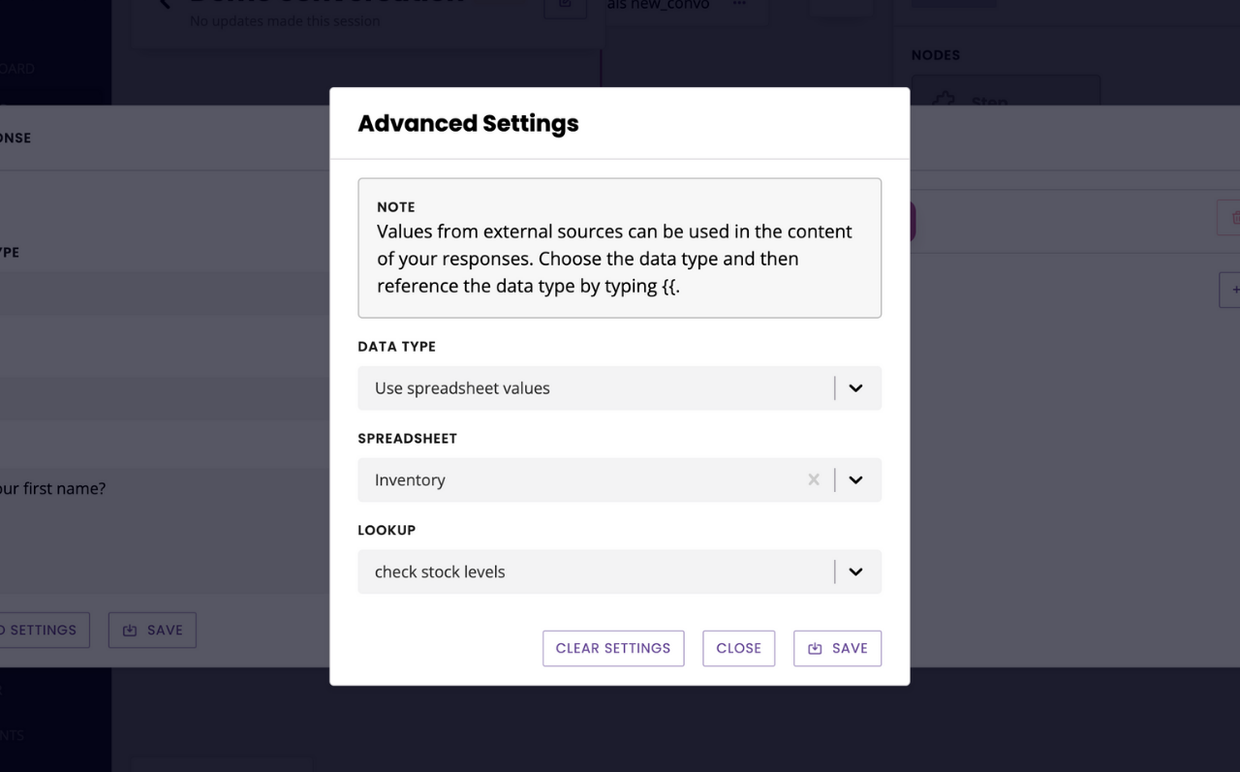
In the popup, select the following options:
Use spreadsheet values
Your spreadsheet name
Your spreadsheet lookup
Hit Save.
Your spreadsheet lookup values are now available to pull into this specific message. To do so, use the following variable format inside the content of your message:
{{lookup.data.0.column}}
lookup.datais the format of a spreadsheet data lookup.0means look for the first element within the spreadsheet to match the lookup.columnis the name of the column you’d like to look up.
As you start typing {{, the variable popup will appear. This popup makes it easier for you to pick an existing variable. Look for Lookup to bring up the spreadsheet lookup variable Data. Untick the ‘Use entire spreadsheet’ and enter 0.column manually into the field.
Once you’re done, hit Save.
More about the 0.column format
Spreadsheet lookups might appear complicated, particularly due to the format you must use to bring values into the message copy.
It helps to understand a little bit more about the format.
This format represents an array. Arrays are common in programming languages. They represent a structured collection of data.
In our spreadsheet example, the data inside the spreadsheet forms the array. The columns and the rows allow us to programmatically navigate within the array by giving the platform instructions on where to land.
A perhaps confusing aspect of arrays is they are zero-indexed. This means instead of numbering each element of the array starting by 1, we actually start at 0 – hence the example 0.column meaning ‘find the first element within the spreadsheet to match the lookup’.
Once you’ve moved past this little quirk, though, it all makes sense. Creating a lookup for items and telling your platform to resurface 0.inventory would simply mean:
Go through the spreadsheet of items and their inventory I’ve uploaded. Find the item I want and vertically look up the inventory we have on this item. Resurface the first value you find. Thanks, friend.
You can change the number from 0 to anything you’d like. Writing 2.inventory for instance would be asking not for the first value but the third value we can find in the array.
If this is all still a bit confusing, make sure you reach out to your account manager for help.
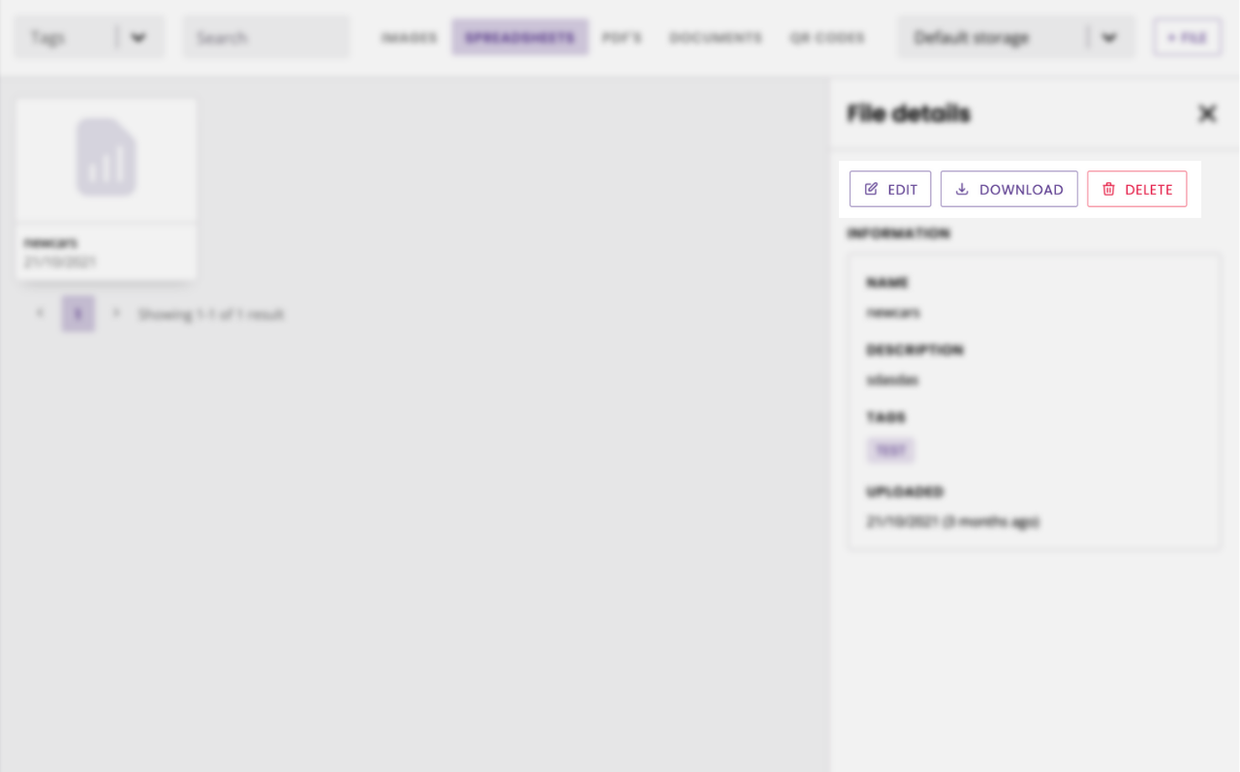
Can I download my spreadsheets?
To download your spreadsheet, head over to Settings → Files.
Find your spreadsheet in your hosted file. Remember, it may be hosted on a different file storage.
Click on your spreadsheet. A right-side panel opens with more details about your file. Hit the Download button in said panel.