
Examples of dynamic messages
Last updated: 31 March 2025
To better understand the power of templating and dynamic messages, let’s work our way through three examples.
Example #1: A simple if template
For our first example, we’ll keep things simple. We’ll create a two step conversation where we will ask the user for their name, store their name in a variable and, depending on their name, show them a different message.
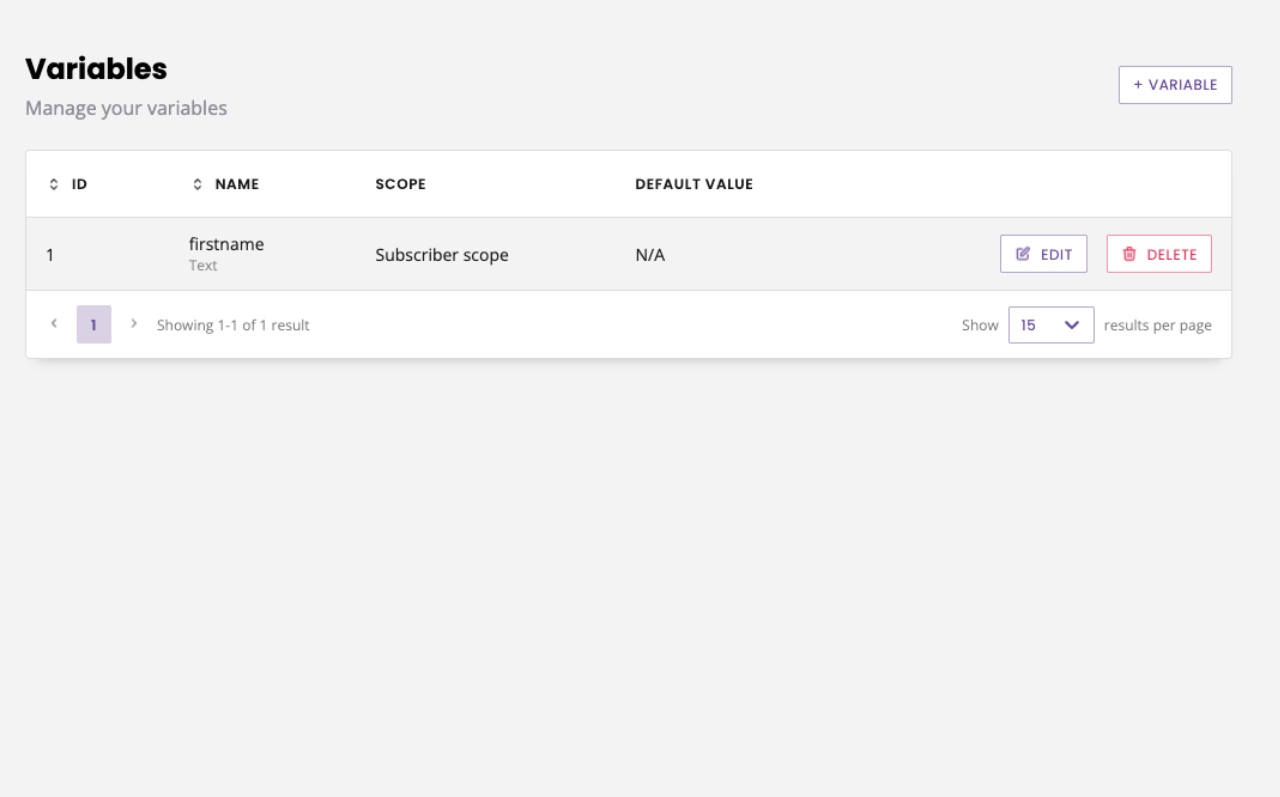
Go to Settings → Variables and click + Variable in the top right. Name your variable, for example firstname.
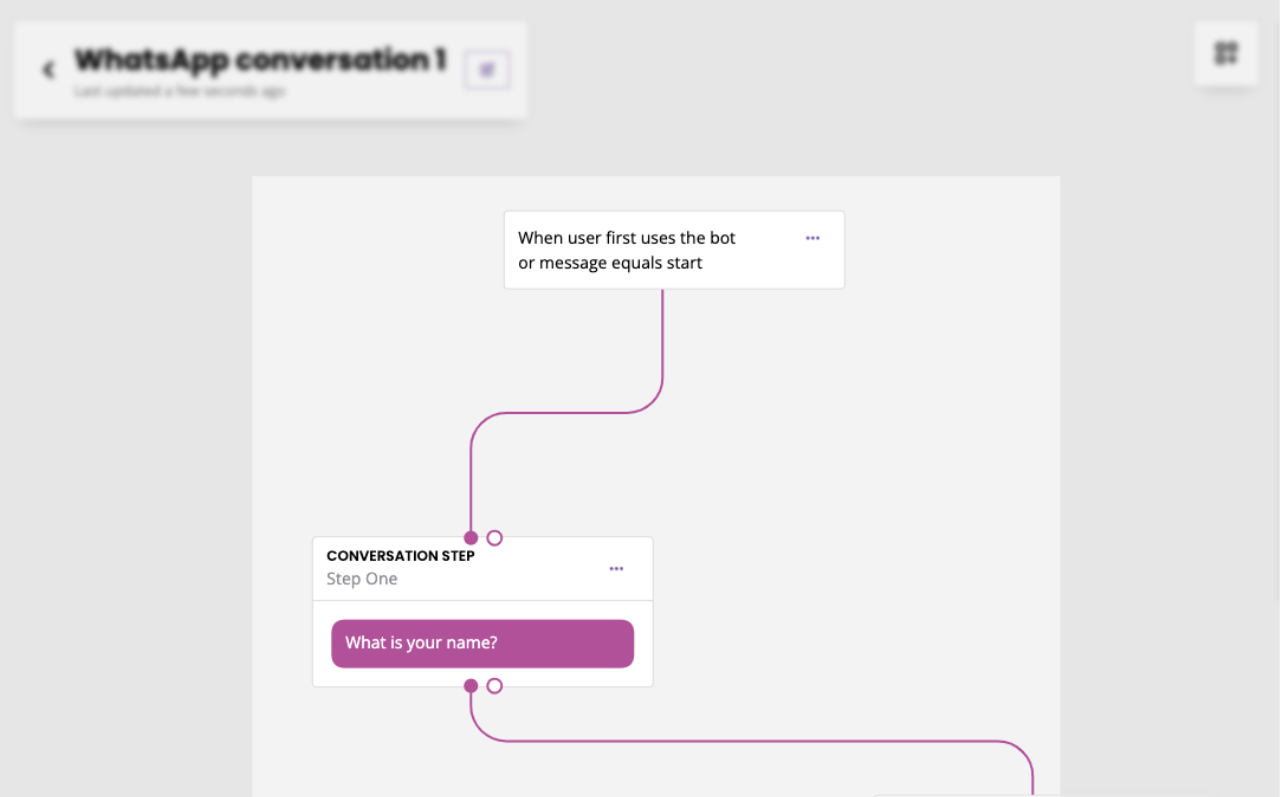
Go to the Builder and create a conversation. Give it a name, a description, and a simple trigger.
Edit the first message with a few words asking for the user to enter their name.
Create a new step. This step will return a dynamic message depending on the name entered by the user.
Under Message type, select Dynamic and copy this template:
[
{% if custom.get.firstname == 'alex' %}
{
"type": "standard",
"content": {
"text": "Hi alex"
}
}
{% else %}
{
"type": "standard",
"content": {
"text": "Hi steve"
}
}
{% endif %}
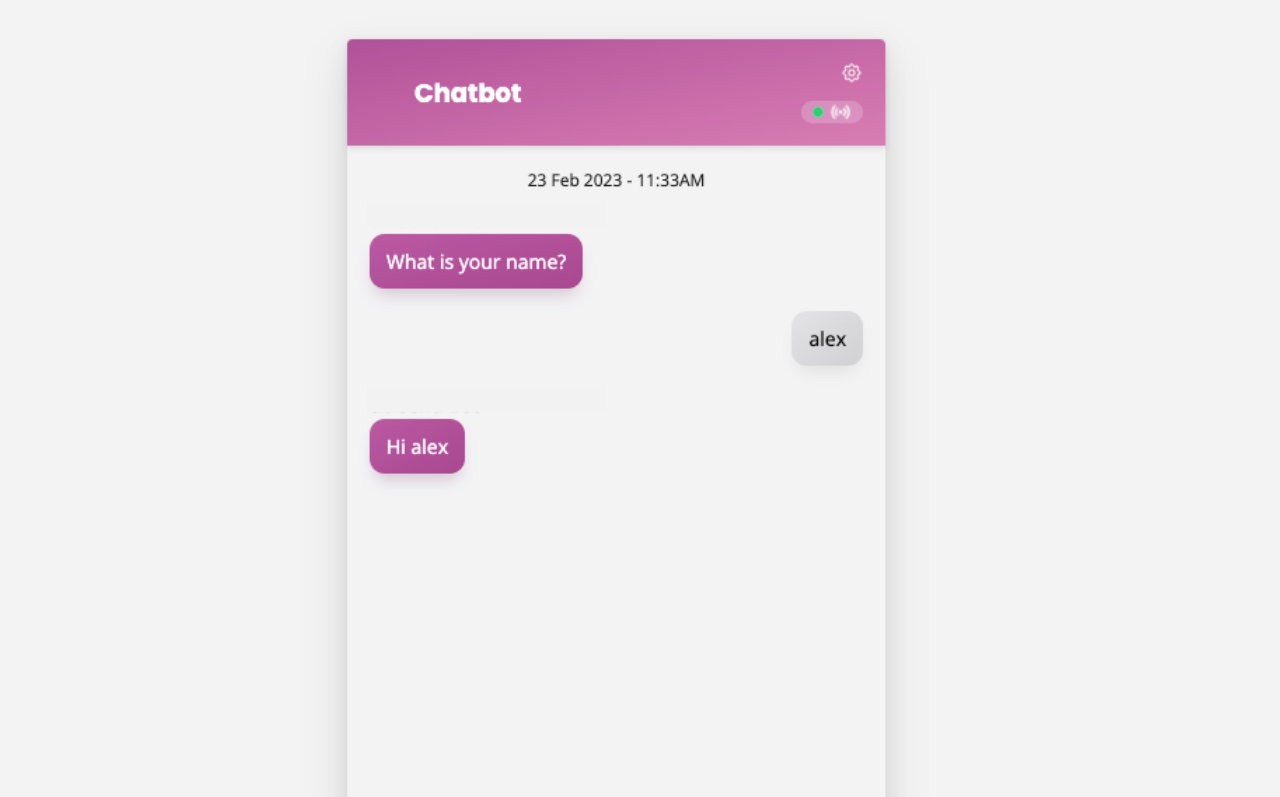
]With this simple template, if the user says their name is alex, the chatbot will respond Hi alex. If the user says anything else, the chatbot will respond Hi steve.
This scenario is, of course, a bit of a goof. You would never set up such a blatantly silly template. However, it’s a great starting point to learning templating as it’s very simple. Notice the formatting, the if statement, and more.
Hit Save.
In transition between step one and two, make sure you store the firstname variable. Voila!
Got more than two options? No problem! Use elseif:
[
{% if custom.get.variable == 'Alex' %}
    {
    "type": "action",
    "content": {
      "text": "Hello Alex, click the button below",
      "responses": [
        {
            "type": "url",
            "label": "Alex's website",
            "action": "https://www.alex.com",
            "linkback": "",
            "expires": false
        }
      ]
    }
}
{% elseif custom.get.variable == 'Steve' %}
    {
    "type": "action",
    "content": {
      "text": "Hello Steve, click the button below",
      "responses": [
        {
            "type": "url",
            "label": "Steve's website",
            "action": "https://www.steve.com",
            "linkback": "",
            "expires": false
        }
      ]
    }
}
{% else %}
      {
    "type": "standard",
    "content": {
      "text": "I don't know who you are."
    }
  }
  {% endif %}
]
Example #2 & 3 - Integration set up
Before we start on the next two examples, let’s set up an integration. This will allow us to create some more exciting templates based on third-party data.
Data
Dynamic content gets populated from APIs and/or spreadsheets. For these examples, we will work with a free API: https://reqres.in.
Because it’s free and public, it’s easy for you to go along and follow the instructions. By the end of these tutorials, you’ll have enough knowledge to apply these to any API you might actually need to use.
To set you up, go to Integrations. Click + New integration.
Give your integration a name (e.g. Reqres).
For the base URL is https://reqres.in/api
This API doesn’t require any authorization.
There are no headers needed. Hit Save.
We will create a simple GET endpoint, which will allow us to retrieve the information from the API:

Understand the data structure
Before we build anything, let’s double check the structure of the data we will receive from our API.
We can see in Reqres data is formatted like this:
"data": [
    {
        "id": 7,
        "email": "michael.lawson@reqres.in",
        "first_name": "Michael",
        "last_name": "Lawson",
        "avatar": "https://reqres.in/img/faces/7-image.jpg"
    },
    ...
]
So, to access a user’s email address, we will need to enter data.email. To access their first name, data.first_name. And so on.
This information will come in handy when we start building.
Right! We’re ready to move ahead with our examples.
Example #2 - Dynamic carousel (for statement)
For our first scenario, we’re going to dynamically create a carousel. Using our API, we’ll populate a carousel with
The name of each user as title
Their name as subtitle
Their picture as the image
A link to a website as the image link (we’ll using http://google.com)
A link button to ‘read more’, sending them to http://google.com too
Building this manually would be a time-consuming process, particularly since we don’t actually know how many users there are in this database.
With templating, we can do this in just a few lines.
Create the conversation
Go to the Builder.
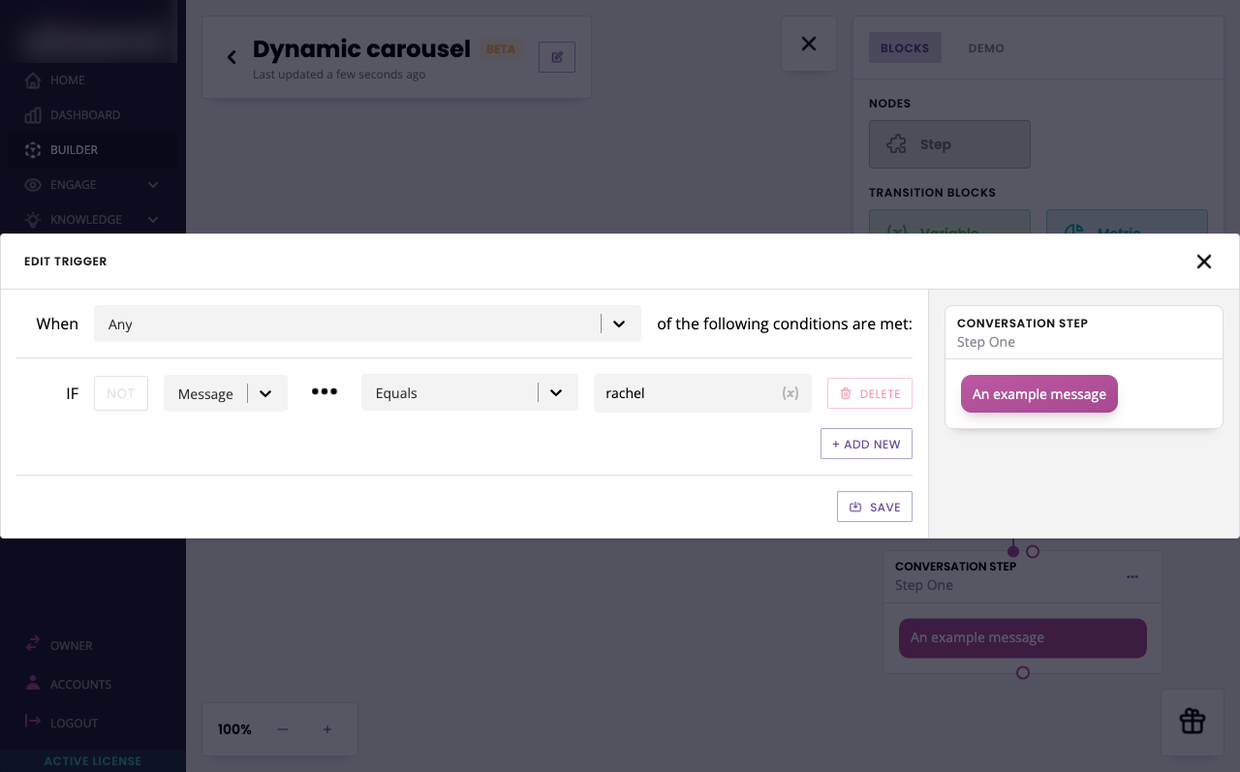
Create a new conversation. Give it a name, a description, and a simple trigger (e.g. message equals users).

Create the message
Edit the first message by clicking the three dots then Edit response.
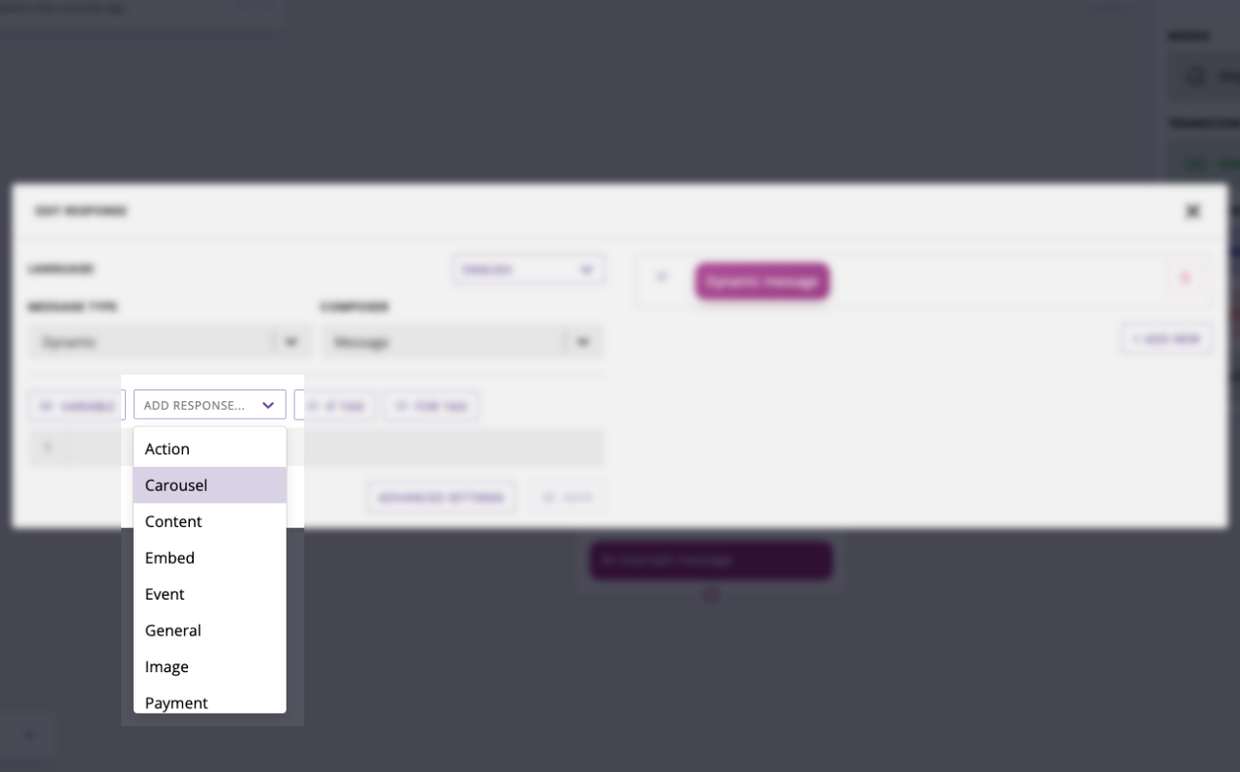
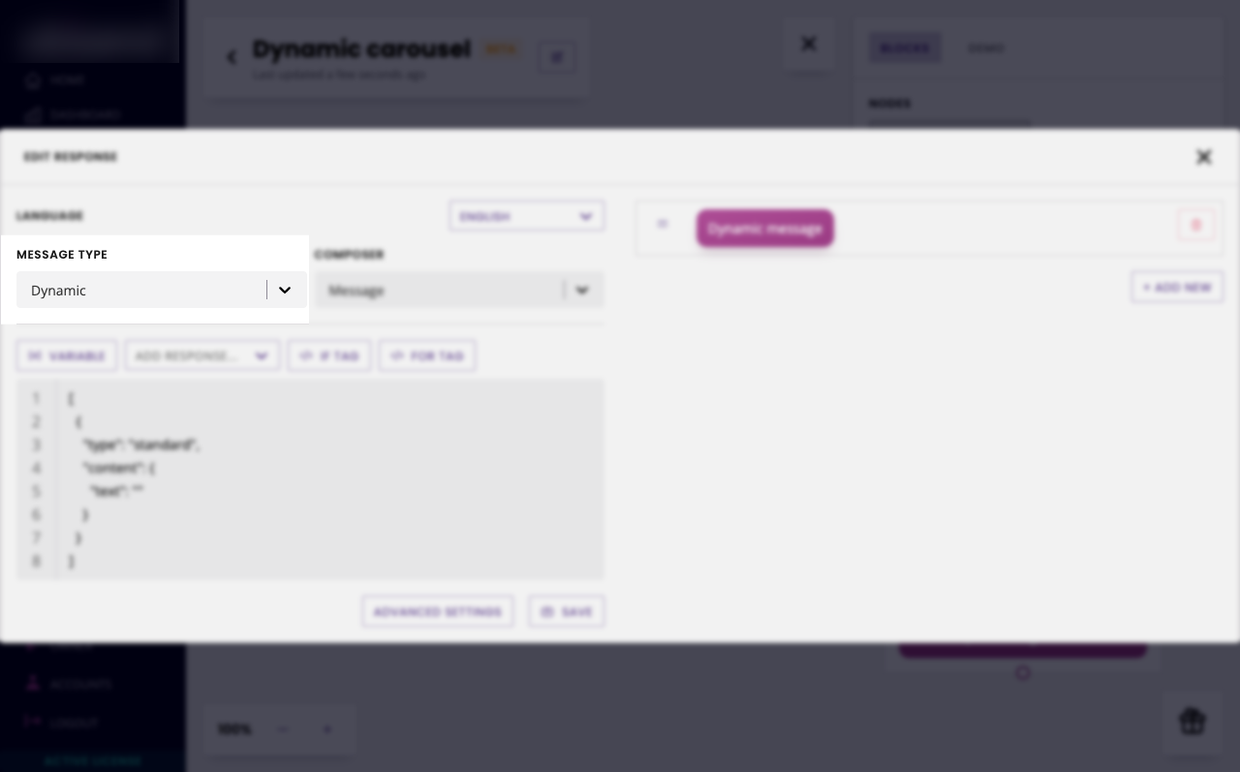
Under message type, select Dynamic.

Delete everything from the message (aside from the opening and closing square brackets), we’ll start from scratch.
Ensure your cursor is in the middle of the square brackets and then, under Add response, select Carousel.
Learn about the carousel template and its associated values
Using what we know of the data structure, we can build the following template:
[
    {
        "type": "carousel",
        "content": {
            "items": [
                {% for user in integration.data.data %}
		            {% if loop.index < 10 %}
        	            {
         		            "title": "{{user.first_name}} {{user.last_name}}",
         			        "subtitle": "{{user.first_name}} {{user.last_name}}",
         			        "image": "{{user.avatar}}",
          			        "image_description": "{{user.first_name}} {{user.last_name}}",
         			        "url": "https://google.com",
          			        "responses": [
            			        {"type": "url", "label": "Read more", "action": "https://google.com", "linkback": ""}
          			        ]
        		        }{% if not loop.last and loop.index != 9 %},{% endif %}
			        {% endif %}
                {% endfor %}
            ]
        }
    }
]
Understand the template
The structure of the template is simple.
First, we define its type; carousel.
Then, we set up the for loop. In this example, we want to create a carousel card for every user. So, we will need to loop over the data every time we create a new item.
What if we wanted to create an entirely new carousel message for every user? We would set up the for loop at the very beginning of the template, turning it into an entire array.
Finally, we enter the values for each field.
Set up the integration
Now that we have the template all written out, we need to tell our chatbot platform where to fetch this data. We already have an integration set up, so we just need to tie the two together.
Click Advanced Settings. Under Data type, select API request response. Find your integration and endpoint, and hit Save.
Test the template
All done! Go to Demo and test your conversation. If you’ve followed this process with us and used the Reqres API, you should have a carousel with six items.
Use cases that follow the same approach:
Creating a carousel that displays available products in stock from an API.
Creating a standard message that displays a comma separated list of names of all participants to a competition, pulled from a spreadsheet.
Example #3 - Dynamic standard message (one message per value)
For this scenario, we’re going to dynamically return a message per value that matches in our integration.
We’ll use the same Reqres example in which, as we can see, there are 6 results (George, Janet, Emma, Eve, Charles, and Tracey).
We will programme our template to loop over those results and return a standard message for each of them.
Create the conversation
Go to the Builder.
Create a new conversation. Give it a name, a description, and a simple trigger (e.g. message equals loop).
Create the message
Edit the first message by clicking the three dots then Edit response.
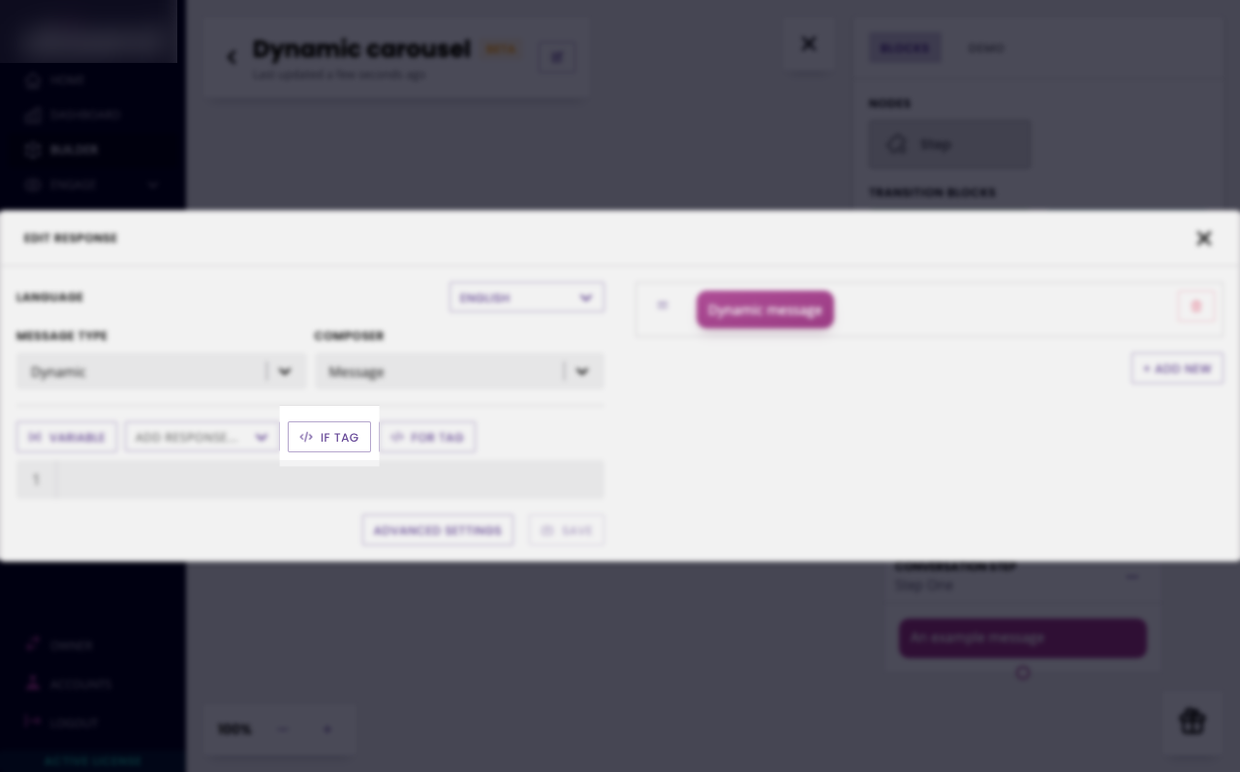
Under message type, select Dynamic.
Delete everything (aside from the opening and closing square brackets) from the message, we’ll start from scratch.
Ensure your cursor is inside the square brackets and click </> If tag to add the template statement.
Learn about the standard template and its associated values.
Using what we know of the data structure, we can build the following template:
[
    {% for user in integration.data.data %}
        {% if loop.index < 10 %}
            {
               "type": "standard",
               "content": {
                   "text": "{{ user.first_name }}"
               }
            }{% if not loop.last and loop.index != 9 %},{% endif %}
        {% endif %}
    {% endfor %}
]
Understand the template
We target our entire array of users on line 2. On line 3, we declare we’d like to bring a maximum of 9 results. This is helpful if your database is likely to contain lots and lots of results.
For example, even though we have 6 users in our database if we set loop.index < 4 on line 3 and loop.index != 3 on line 9, we would return only three results.
Then, we create our standard messages; each of which will contain the user’s first name.
Finally, we close the loop after 9 iterations and close our template.
Set up the integration
Now that we have the template all written out, we need to tell our chatbot platform where to fetch this data. We already have an integration set up, so we just need to tie the two together.
Click Advanced Settings. Under Data type, select API request response. Find your integration and endpoint, and hit Save.
Test the template
And you’re done. If you go and test your template, you’ll see it will return the one-and-only Rachel Howell.
Use cases that follow the same approach:
If an item is in stock, send an action message with a purchase button. If not, let the users know it is out of stock with a standard message.
If you have a case study for one of your services, send a general message with a nice illustration, a summary of the case study, and a button to read it. If not, send a simple action message with a button to get in touch.
Example #4 - Dynamic standard message using Set
For this scenario, we’ll assume you have a CRM full of users. One of your users asks your chatbot if they are already part of your CRM and, if so, to return the email address you have stored on file.
We will use the Set operation before looping over our data, instructing our template to stop looping as soon as it has found the user. If it hasn’t found them, we will instruct the template to return a simple standard message.
To demonstrate this capability, we continue to use the free Reqres API we set at the start of this doc.
Create the conversation
Go to the Builder.
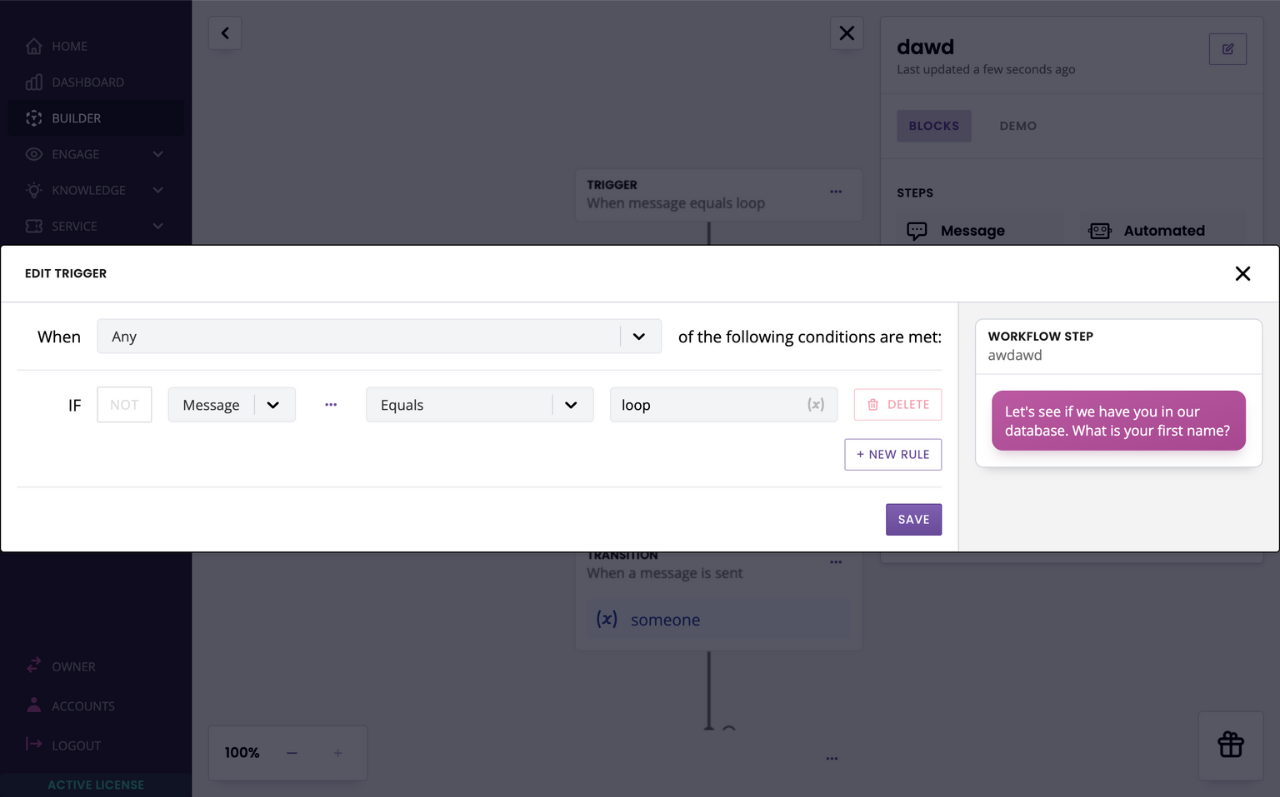
Create a new conversation. Give it a name, a description, and a simple trigger (e.g. message equals loop).
Create the question step
In the first step, we will ask the user to enter their name. We will use this name to loop over our data.
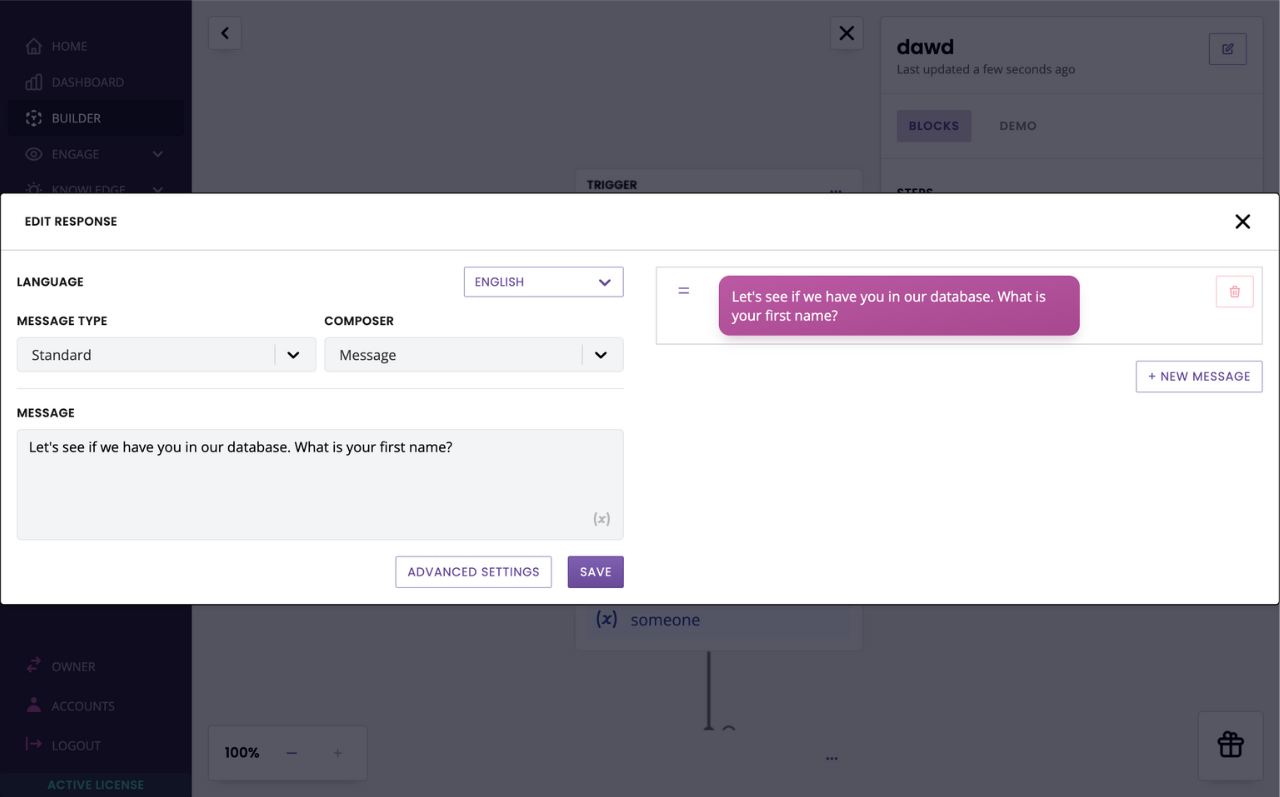
Store the subscriber’s answer in a custom variable (e.g. someone).
Create the template
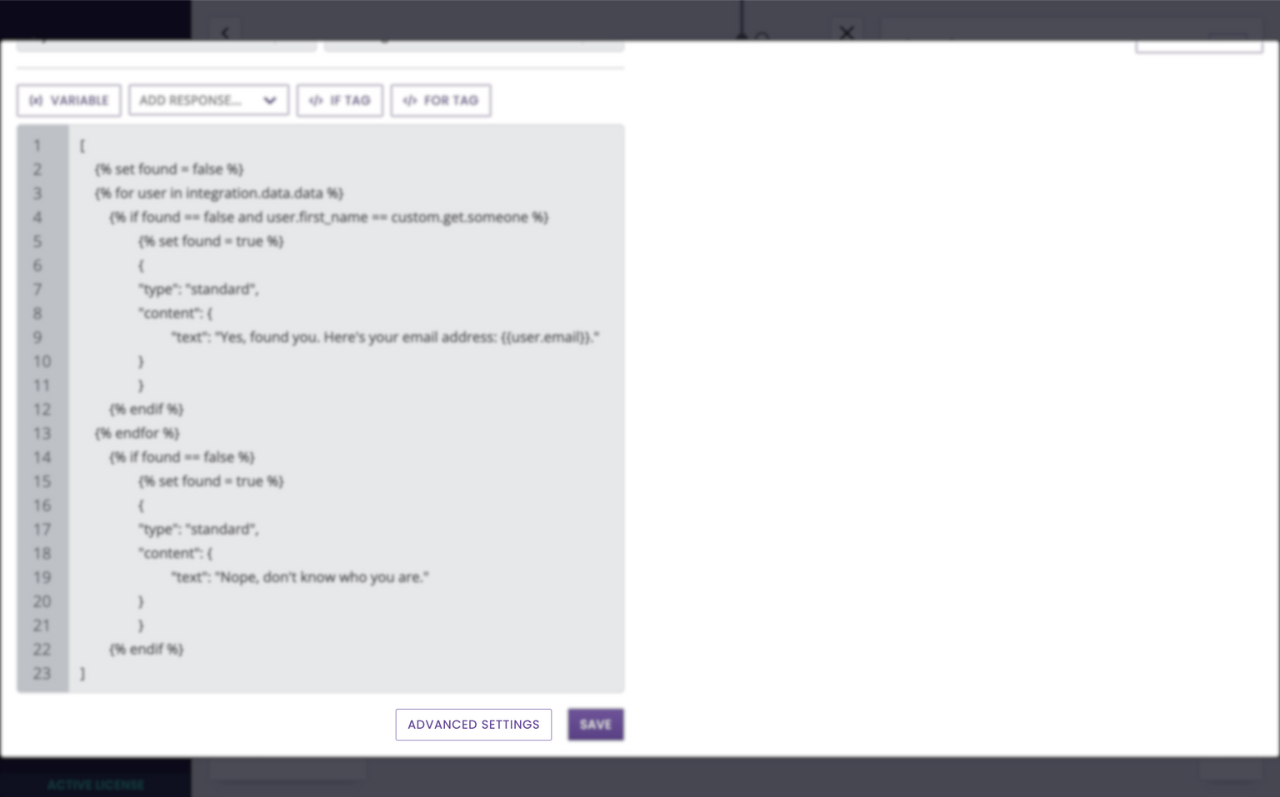
In the second step, we will use the following template:
[
	{% set found = false %}
    {% for user in integration.data.data %}
        {% if found == false and user.first_name == custom.get.someone %}
				{% set found = true %}
            	{
               	"type": "standard",
               	"content": {
                  		 "text": "Yes, found you. Here's your email address: {{user.email}}."
               	}
            	}
        {% endif %}
    {% endfor %}
        {% if found == false %}
				{% set found = true %}
            	{
               	"type": "standard",
               	"content": {
                  		 "text": "Nope, don't know who you are."
               	}
            	}
        {% endif %}
]
Don’t forget to tie the API call in the step:
Understand the template
At the beginning of the template, we set a variable called found as false.
Then, we set up our for loop. It loops over the integration under the following condition:
foundis equal tofalse, and,the user’s first name is equal to the name given by the user in the previous step.
If these two are true, we set the found variable as true, which ensures our for loop stops looping.
If found remains false after parsing through our entire database, we return a standard message saying ‘Nope, don’t know who you are'.
Example #5 - Dynamic buttons
For this simple example, we’re going to display a different URL button based on a variable collected previously.
Let’s say you offer a selection of products. You have created a custom fuzzy composer with the list of products, which the user selects. In the next message, you want to display a simple message acknowledging the selection and linking to the selected product’s associated web page.
Here’s a dynamic template you can use to do this:
[
{
    "type": "action",
    "content": {
      "text": "Absolutely, we can help you with {{custom.get.product}}! Click below to read more.",
      "responses": [
{% if custom.get.product == 'PRODUCT 1' %}
        {"type": "url", "label": "PRODUCT 1", "action": "https://www.website.com/product-1", "linkback": "", "expires": true}
{% elseif custom.get.product == 'PRODUCT 2' %}
        {"type": "url", "label": "PRODUCT 2", "action": "https://www.website.com/product-2", "linkback": "", "expires": true}
 {% elseif custom.get.product == 'PRODUCT 3' %}
        {"type": "url", "label": "PRODUCT 3", "action": "https://www.website.com/product-3", "linkback": "", "expires": true}
{% elseif custom.get.product == 'PRODUCT 4' %}
        {"type": "url", "label": "PRODUCT 4", "action": "https://www.website.com/product-4", "linkback": "", "expires": true}
{% elseif custom.get.product == 'PRODUCT 5' %}
        {"type": "url", "label": "PRODUCT 5", "action": "https://www.website.com/product-5", "linkback": "", "expires": true}
{% endif %}
      ]
    }
}
]
Understand the template
In the previous step, we ask the user to select a product and store their selection in a variable called {{ custom.get.product }}.
Because we’re happy presenting the same message regardless of the product selected, we can focus our dynamic templating solely on the URL button.
We grab an Action message type template and add a simple if statement before the button is generated. There are 5 possible products, so we use 5 if / elseif statements in a row.
For each potential product selected, we display a different URL and label.