
How to create a gated chatbot
Last updated: 29 June 2023
Is your chatbot meant to be accessible by only a select few? Does it contain information you only want authorised users to read?
In this tutorial, we learn to create a gated chatbot.
Step 1: Activate the authorisation feature
The authorisation feature is currently in beta. Only your account manager can activate this feature for you. Reach out before progressing further into this tutorial.
Step 2: Authorised versus unauthorised users
Once activated, the authorisation feature separates your chatbot users into authorised and unauthorised users.
It's important to understand that the difference between an authorised and an unauthorised user is simply a variable assigned to the user.
You can use this variable to create your automation and, of course, to gate your content.
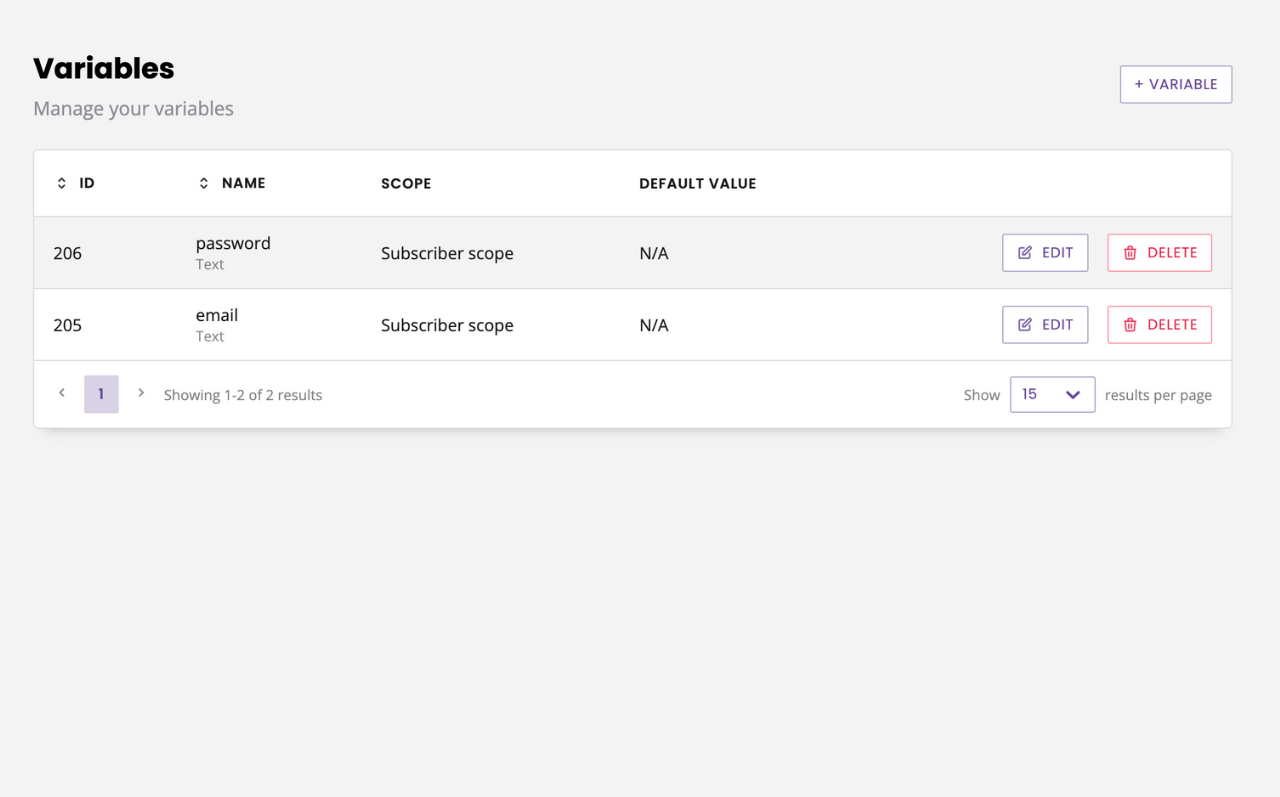
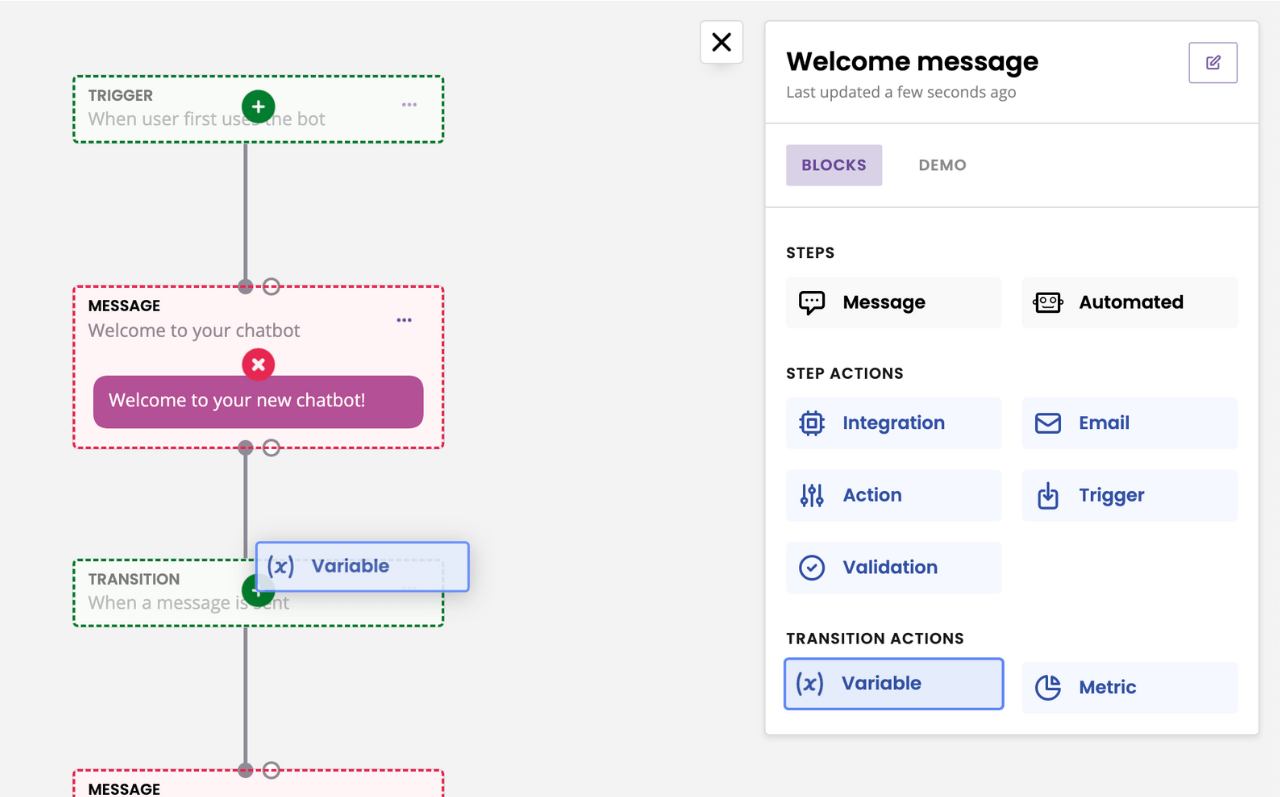
Step 3: Create your variables
We will need users to identify themselves with email and password. Go to Settings → Variables and create a variable for each.
Step 4: Create the sign up workflow
Before we can authorise a user, we need them to create an account on our chatbot. We require them to enter an email address and a password.
Go to the Builder.
It is best practice to create the sign up workflow as part of the welcome conversation. It ensures the first step of your conversation requires users to either create an account or login (if they already have one).
Edit your first message to something like this:
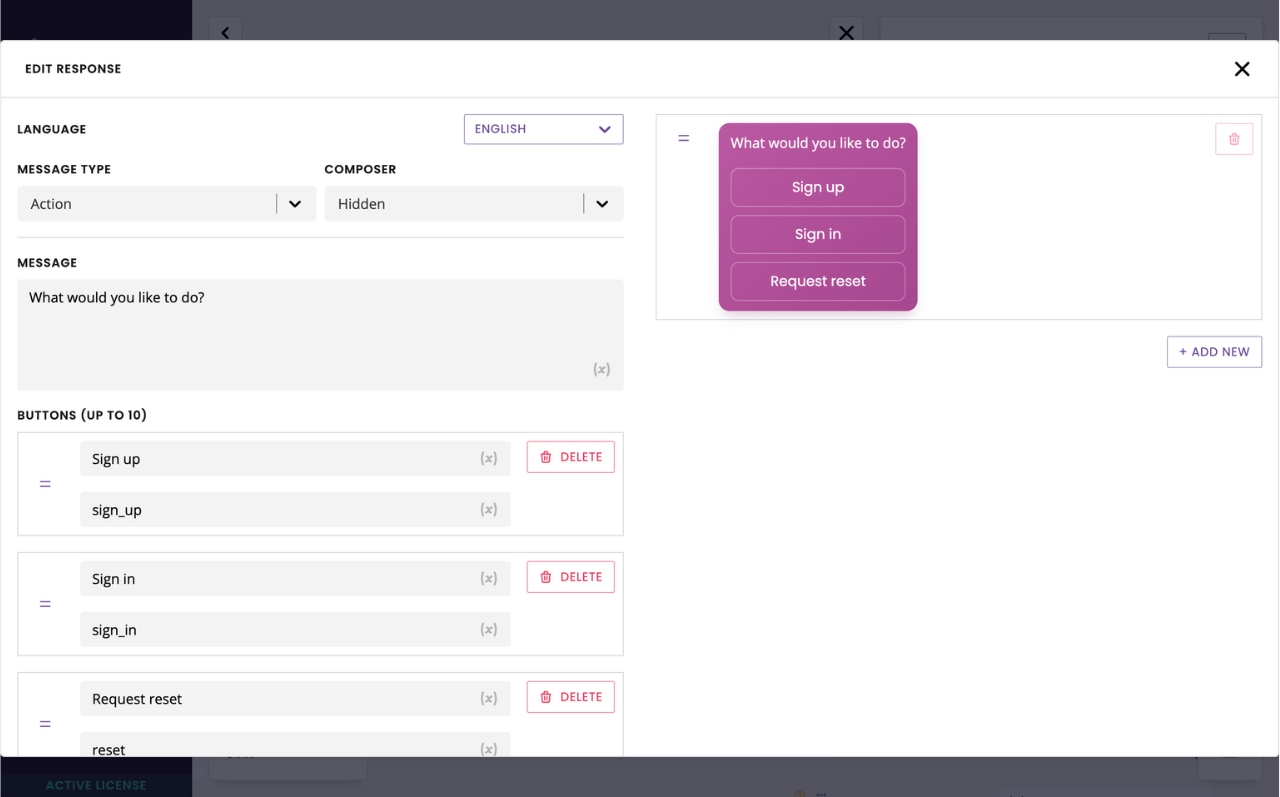
We are creating three buttons:
A sign up postback button, which users will use to create their account.
A sign in postback button, which users will use to log back into their account.
A reset postback button, which users will use if they have lost their password.
We will build the two other branches in future steps.
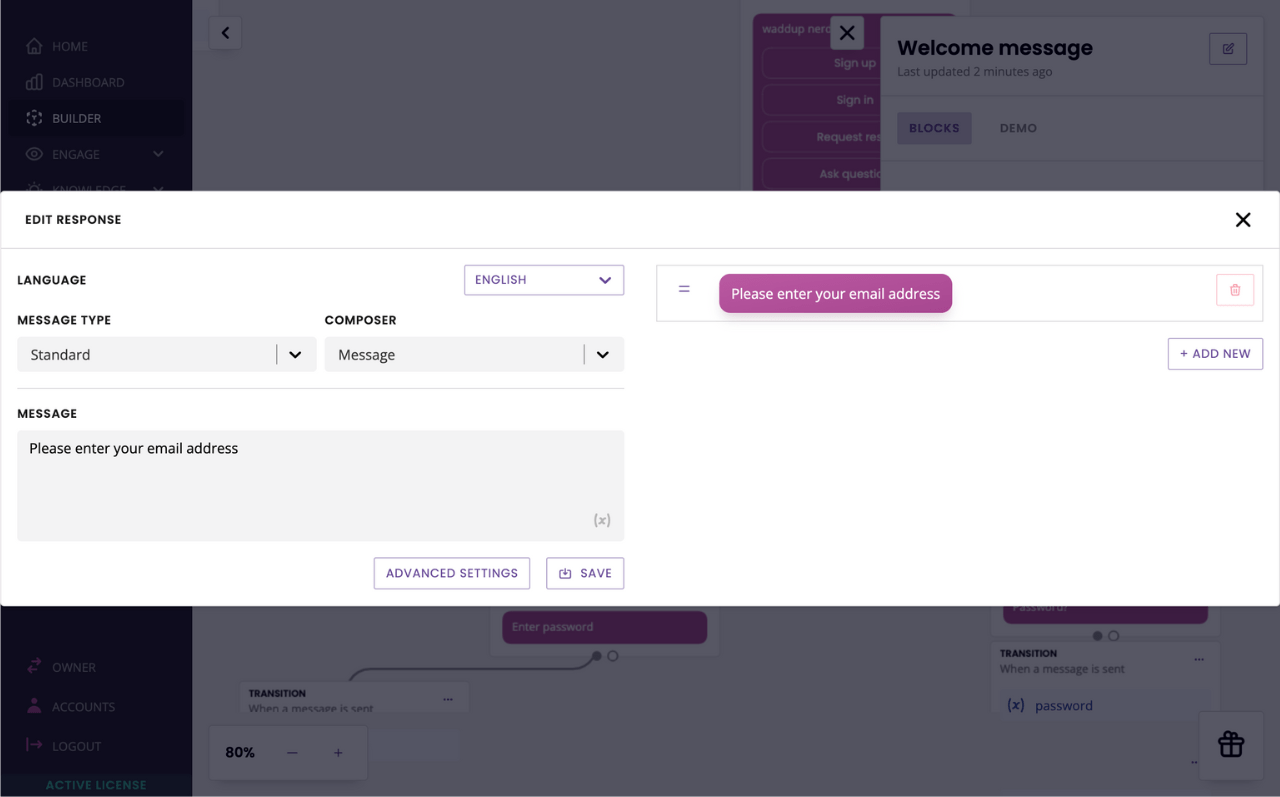
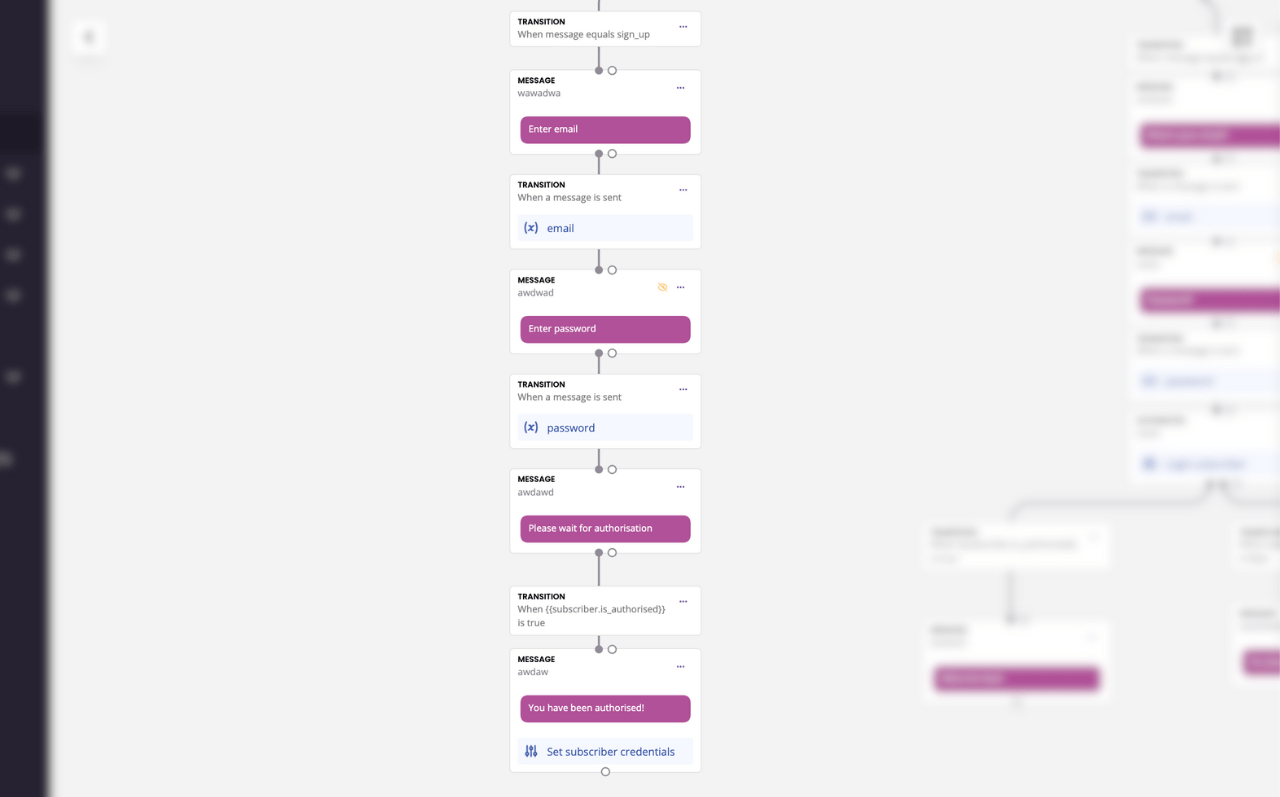
Drag a new Message step onto the canvas. At this step, we ask the user to enter their email address.
Click Save.
In transition, enter Message equals sign_up; the postback we created in the welcome step.
Drag another Message step onto the canvas. We now ask the user to create a password.
Create a custom composer with a Password input type. Assign this composer to the step to hide the password from preying eyes.
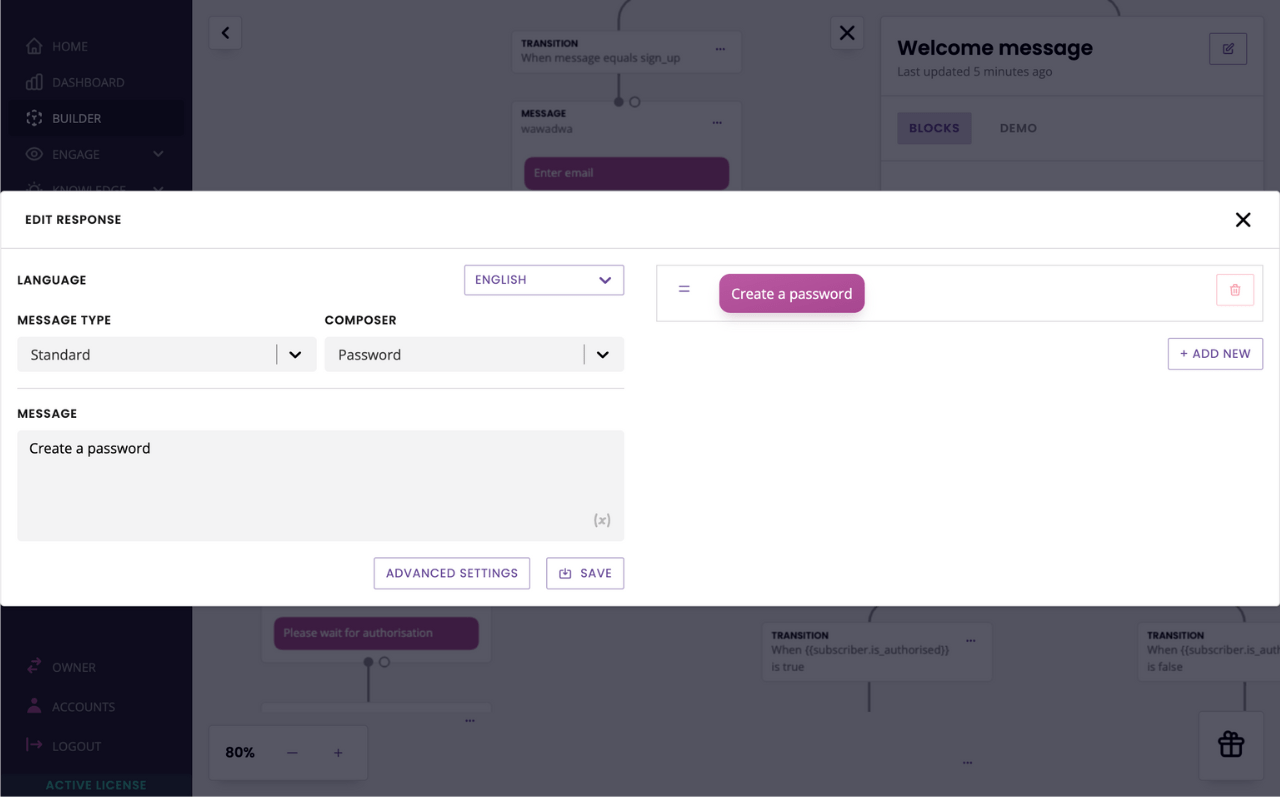
Click Save.
In transition, enter Message is an email address.
Drag another Message step onto the canvas. We will now ask the user to wait for someone to authorise their account.
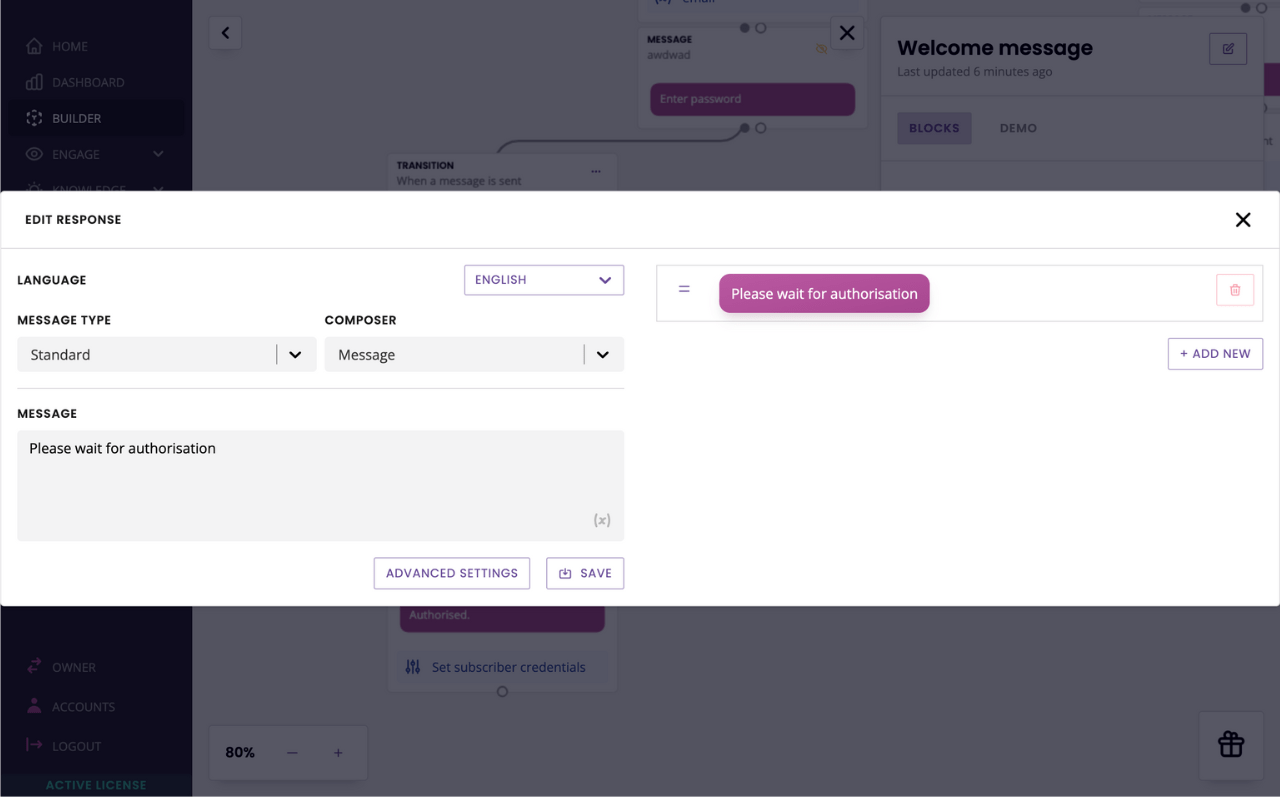
Click Save. In transition, enter A message is sent.
Drag a final Message step onto the canvas. Users will only reach this step when their account has been manually authorised.
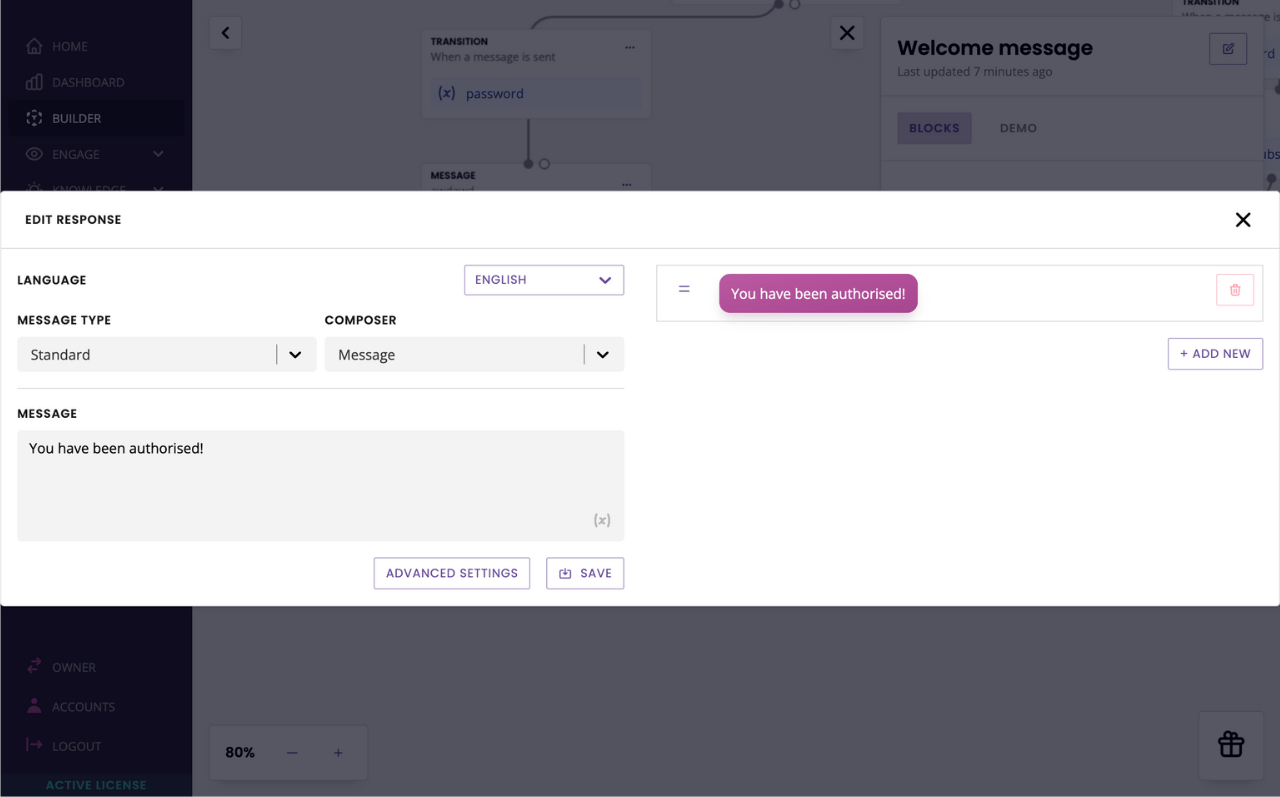
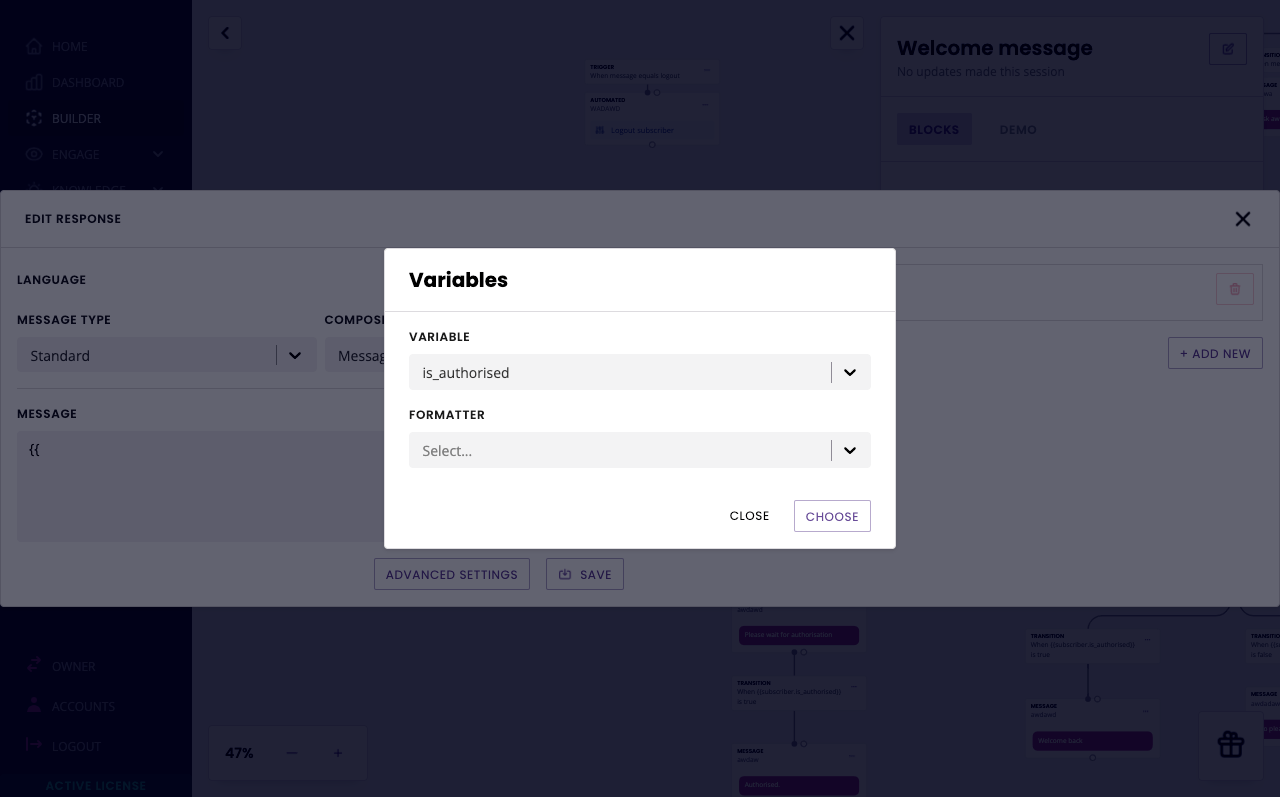
In transition, enter Variable {{ subscriber.is_authorised }} is true.
Drag and drop the Set subscriber credentials action onto the final step. In the email and password fields, enter your custom variables.
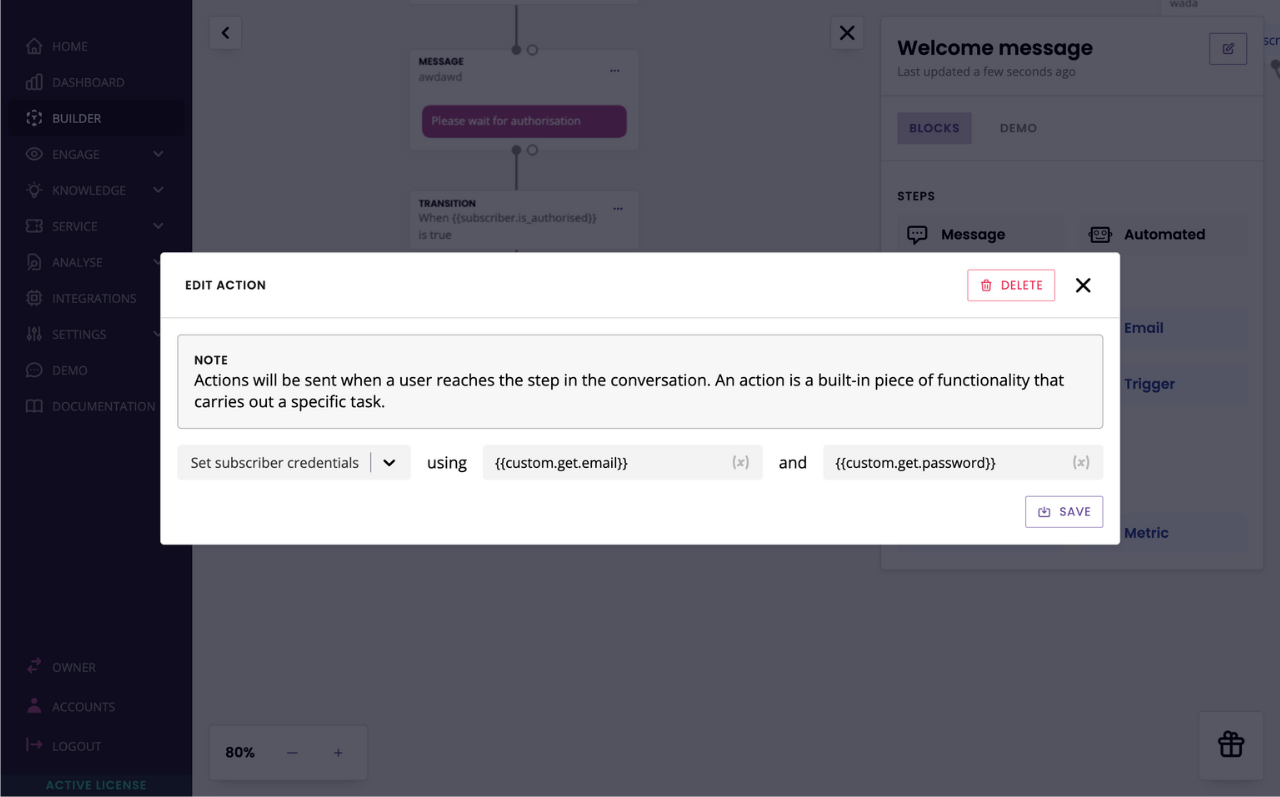
Click Save.
Finally, drag and drop your variables in transition between the email and password steps to store the values entered by your user.
Your sign up workflow should look something like this:
Step 5: Authorise users
You may have noticed at some point in the workflow, someone must manually authorise a user to continue. Until this is done, the user is stuck on the 'Waiting' step.
To authorise a user, go to Analyse → Conversations.
Find the user you want to authorise, click the three dots and View.
In the slide-in panel, click Authorise.
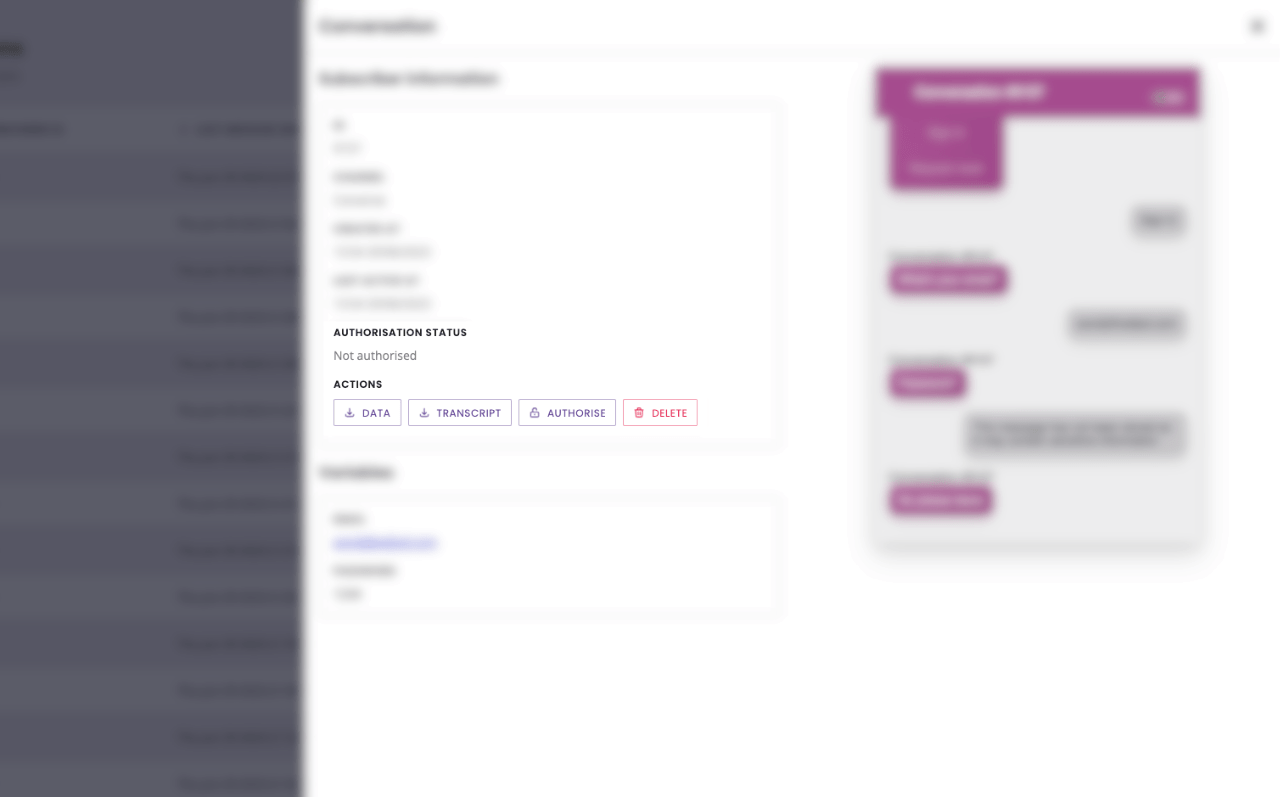
When the user is authorised, their conversation automatically moves on from the 'waiting' step to the next.
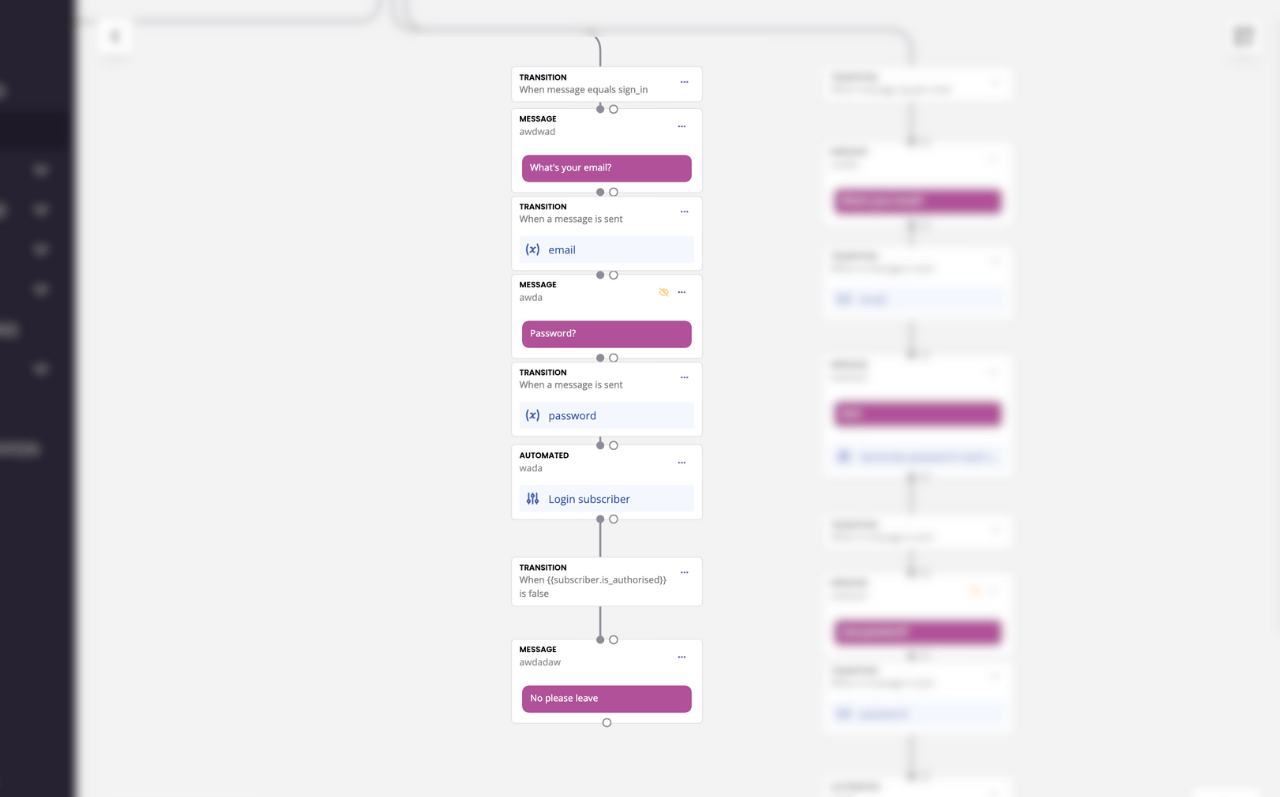
Step 6: Create a log in workflow
Now that our user has created an account and has been authorised, we need to allow them to log back into the chatbot.
Create a new Message step branching out of the first message.
In this step, we ask the user to enter their email address.
Drag and drop another Message step and ask for their password.
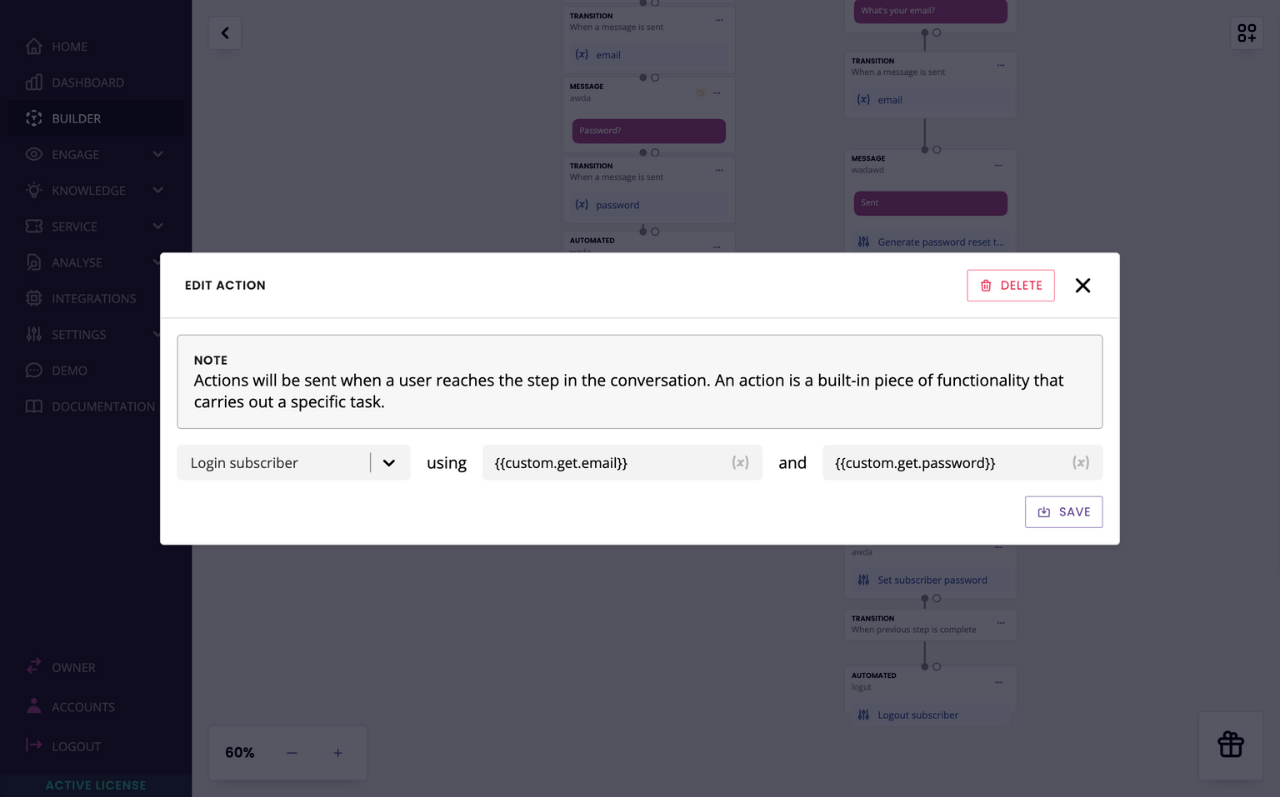
Drag and drop an Automated step. Drop the Login subscriber action onto the automated step. Use your custom email and password variables.
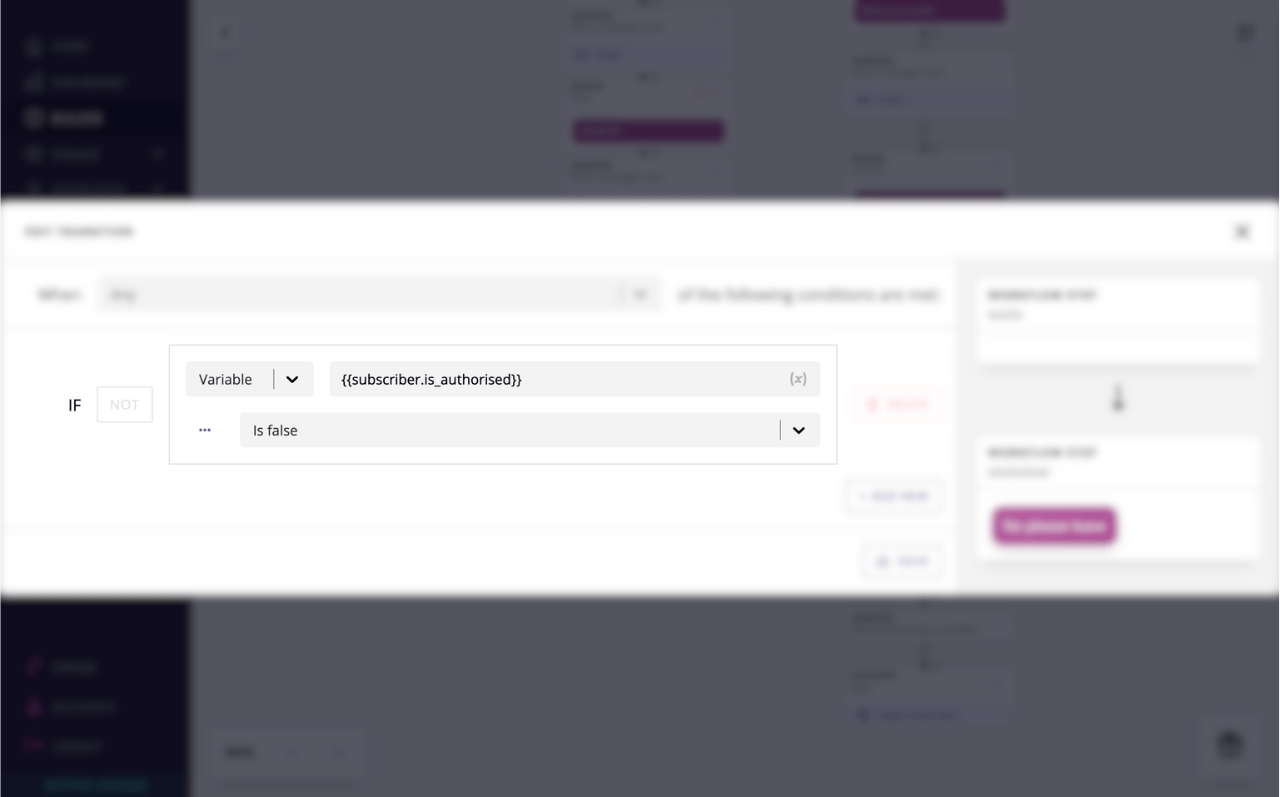
Drag and drop a Message step. We will use this step to indicate to the user that their details are not recognised. In transition from the automated step to the message step, enter Variable {{ subscriber.is_authorised }} is false.
Don't forget to drop your email and password variables in transitions to capture the user's input.
When users go through this workflow, either of two things will happen:
Their details match. In this case, the conversation will seemingly reset as they are logged back into the last conversation they had with your chatbot.
Their details don't match. In this case, they receive the final message of the workflow.
For safety, you can use the Hidden composer on the 'not recognised' step to prevent users from typing anything else (learn more). Alternatively, you can also drop the End current session action onto it which will throw the user back to the start.
Your login workflow should look like this:
Step 7: Create a password reset workflow
Finally, we need to account for authorised users who may have simply forgotten their password.
Create a new Message step off the first message.
First, we ask the user to enter their email address.
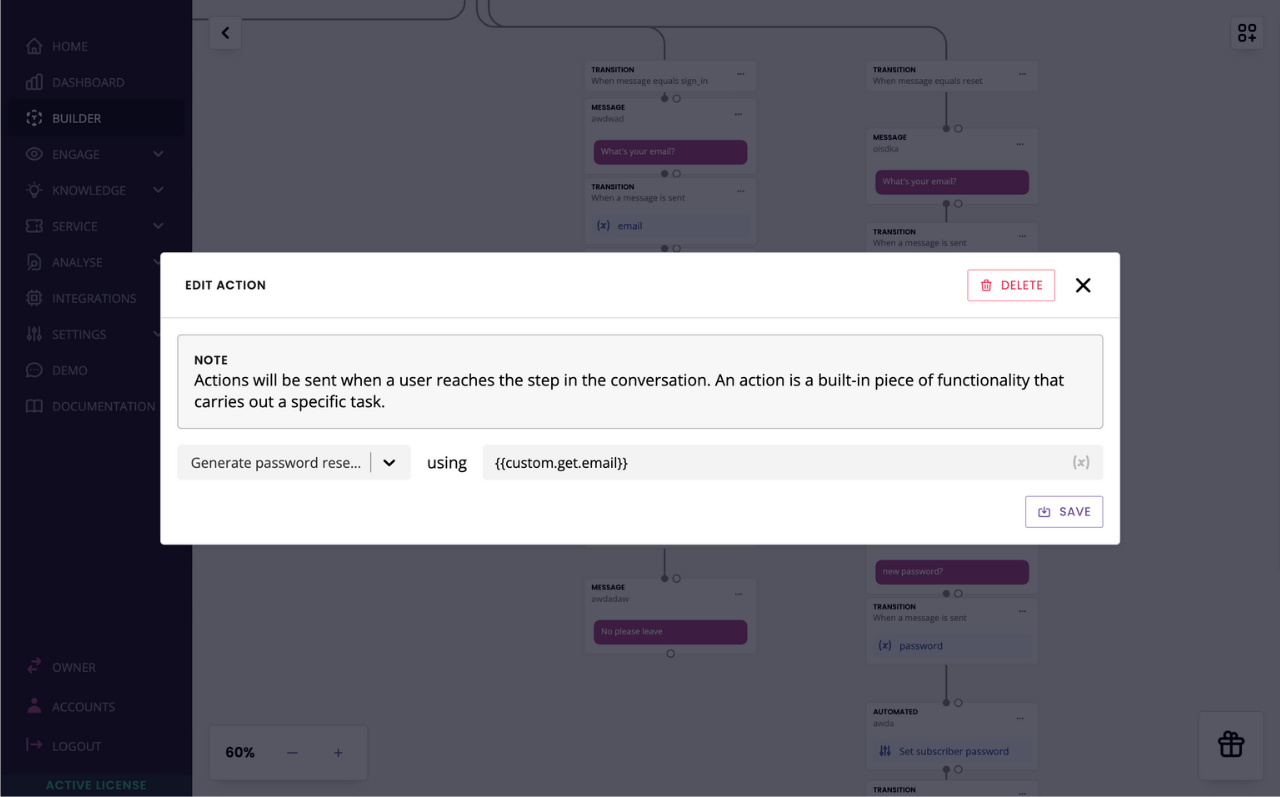
From this step, drag a new Automated step. In transition between the two, drop your custom Email variable.
In your automated step, drop the Generate password reset token action. This action will use the email address to generate a token which we can use later to update the user's password.
From the automated step, drag a new Message step. We now ask the user to enter a new password.
In transition between the automated and the new message step, select When previous step is complete.
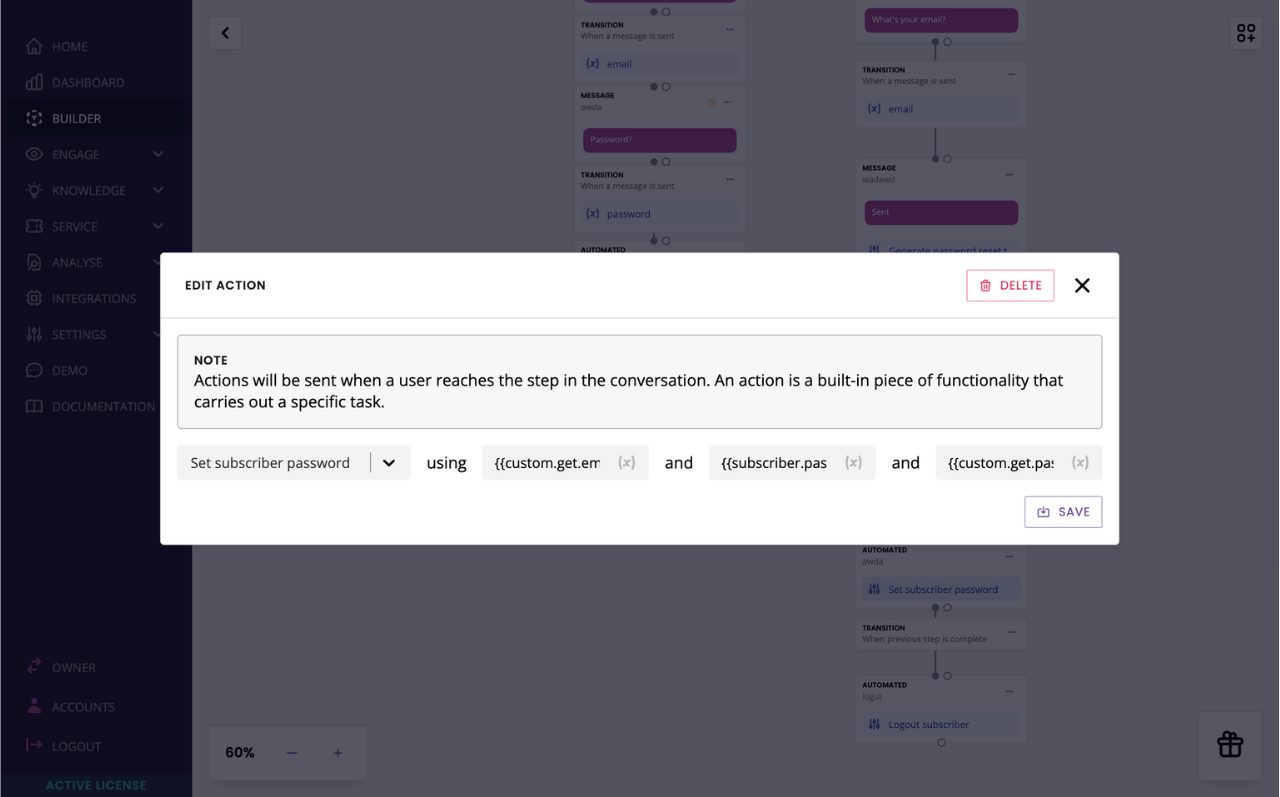
Create a final Automated step. Drop the Set subscriber password action onto it:
In the Email field, enter your custom email variable.
In the Token field, enter the
{{subscriber.password_reset_token}}variable.In the Password field, enter your custom password variable.
Done! Your user can now log back in using their new credentials (without needing another authorisation).
FAQs
How would you use this feature to gate content?
The simplest way is to 'lock' all conversations or access to FAQs until a user has logged in. If you followed the tutorial, this should be the case with your bot. Users are immediately thrown into the sign up/in flow, with no way out until they've done either.
Another is to use the Variable {{ subscriber.is_authorised}} is true/false as part of various triggers. This allows you to partially gate your content.
Can I force log people out of their account?
Yes. There is an action called Logout subscriber which you can drop anywhere in your conversations.
Can I track chatbot usage between authorised and unauthorised users?
Yes. There are four default metrics you can use:
Subscribers authorised, a count of all the users you have authorised.
Authorised subscribers, a live count of authorised subscribers currently using the bot.
Not authorised subscribers, a live count of unauthorised subscribers currently using the bot.
Messages sent by authorised subscribers.
You can also create custom metrics and drop them strategically in your workflows.