
How to hide a CTA after it has been dismissed by a user
Last updated: 20 May 2024
Call-to-actions (or CTAs) are helpful little messages that pop up above your chat widget. You can use them to catch a web visitor’s eye and invite them to engage with your chatbot.
They look like this:
If a user is not interested in what your chatbot has to offer, they can dismiss the CTA by clicking the X button that appears when they hover over the CTA.
In this tutorial, we will show how you can create a set of smart rules to prevent your CTA from appearing again for a set amount of time after a user dismisses it.
Step 1: Learn about CTAs
We will assume you already know what a CTA is and how they generally work.
If you need a refresher, read this doc: create a call-to-action.
Step 2: Learn about ‘received at’ and ‘closed at’ variables
Our platform boasts a number of built-in variables. These variables help with everything from storing a chatbot user’s IP to the current date & time.
For this tutorial, we will focus on the two following built-in variables:
subscriber.received_cta_at - This variable stores the date and time when the subscriber has last seen the CTA.
subscriber.closed_cta_at - This variable stores the date and time when the subscriber has last closed the CTA.
These two variables will come in handy, as they allow us to know when a user has seen your CTA and when they have dismissed it (to the minute). We can use these timestamps to tell our widget not to display the CTA anymore.
Step 3: Create your CTA
We’re going to create a CTA that:
Displays all the time, for any visitor on any page of your website.
Has a smart rule that stops it from being displayed for one full day after a user has dismissed it.
This rule will only apply to the user who dismissed the CTA. All other users (who have not dismissed the CTA) will continue to see the CTA.
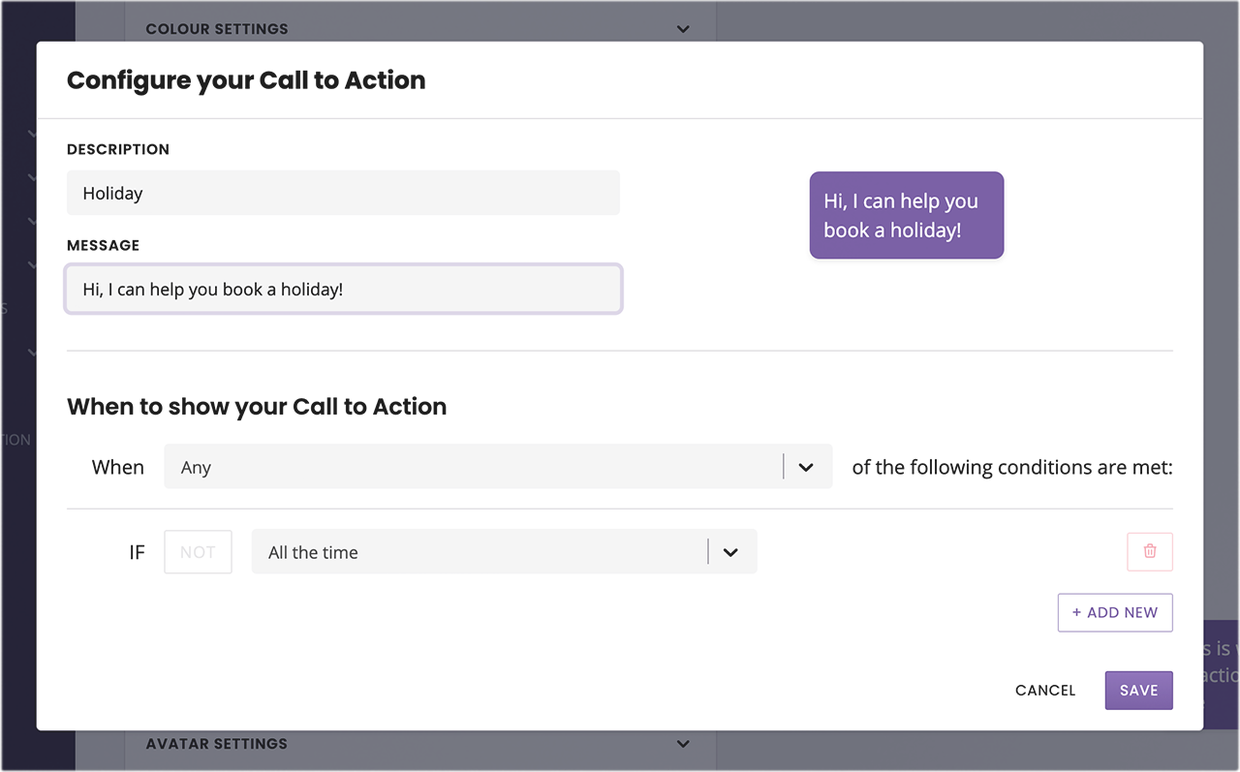
Let’s first create our basic CTA.
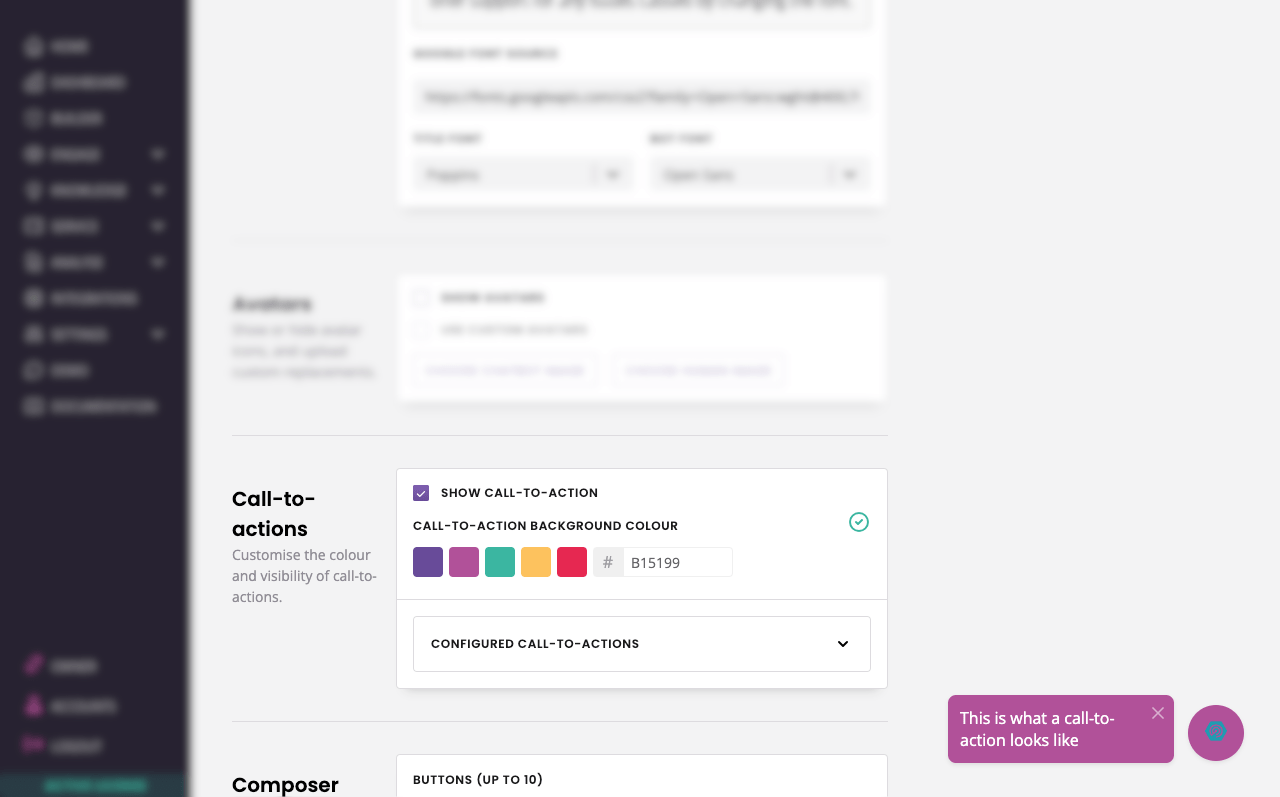
Navigate to your CTA (Engage → Channels → Converse → Options).
Inside the call to action settings, click + New call-to-action.
Give your CTA a description and a copy. The rules should be All the time.
Step 4: Add your smart, time-based rule
Now, we’re going to leverage our powerful built-in variables to create our smart rule.
Inside your CTA, click + Add new to add a second conditional.
The second conditional is going to use the following settings:
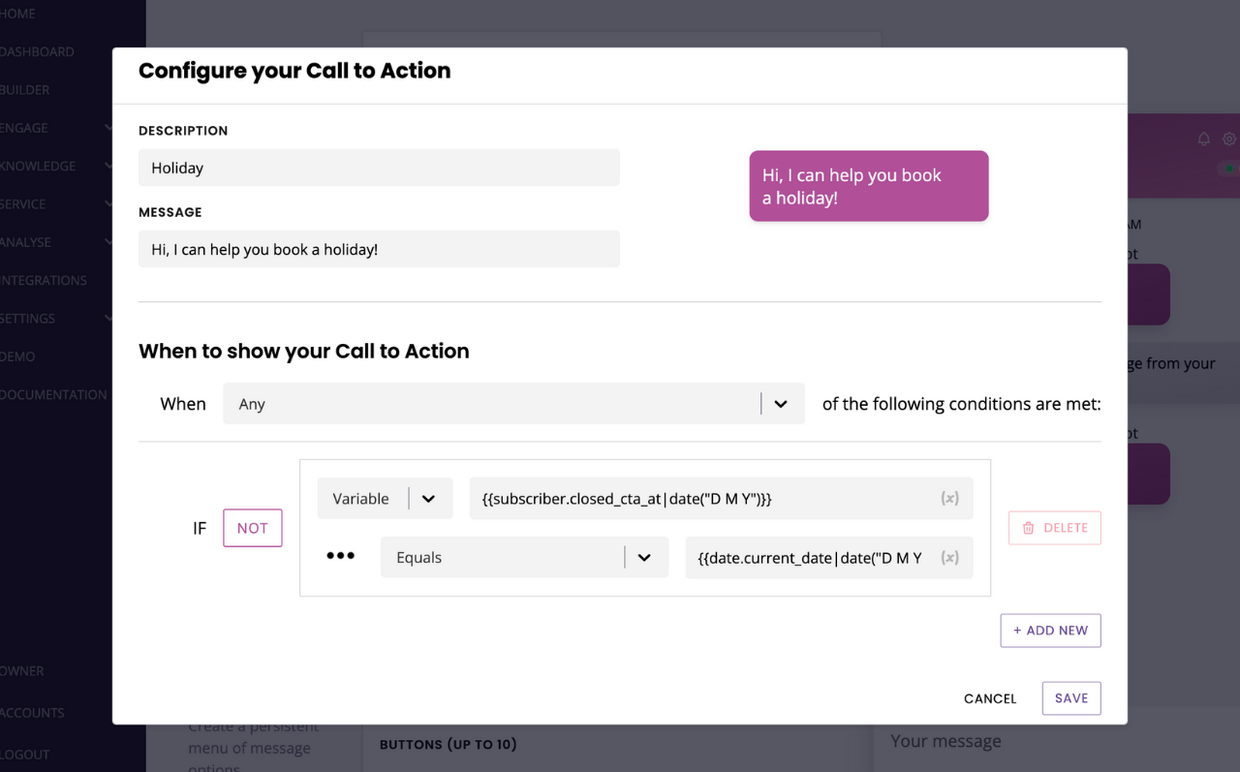
Let’s deconstruct what we’ve done.
If not – we are saying ‘if the following conditions are NOT met’.
Variable – we are going to use a variable.
{{subscriber.closed_cta_at – the built-in variable that stores the date & time at which the user has last closed the CTA.
date(“D M Y”)}} – the format of the date we are storing, here in day (D), month (M), and year (Y). Learn more about date formatters.
Equals – we are comparing the data stored in the previous variable to the one stored in the next variable.
{{date.current_date_time – the date it is today, right now.
date(“D M Y”)}} – the format we’re using to store today’s date.
So, we are saying:
Please show the CTA to every user, unless the day when they last closed the CTA matches with today’s date.
Once a user has dismissed the CTA, they won’t see it until today’s date no longer matches with the date when they dismissed it. Therefore, if they land on your website again the next day, they will once again see your CTA.