
How to save a variable from a webhook
Last updated: 16 May 2024
Your webhook can contain valuable information parsed from your system to the chatbot. For example, your webhook might include a token, an email address, a product the user is looking to purchase, etc.
In this tutorial, we look at capturing this information from your webhook and storing it into a variable. You can then use this variable to do anything you’d like, for example triggering a specific conversation.
Step 1: Create a webhook
To create your webhook, go to Integrations.
Find the Webhook section and click Add webhook.
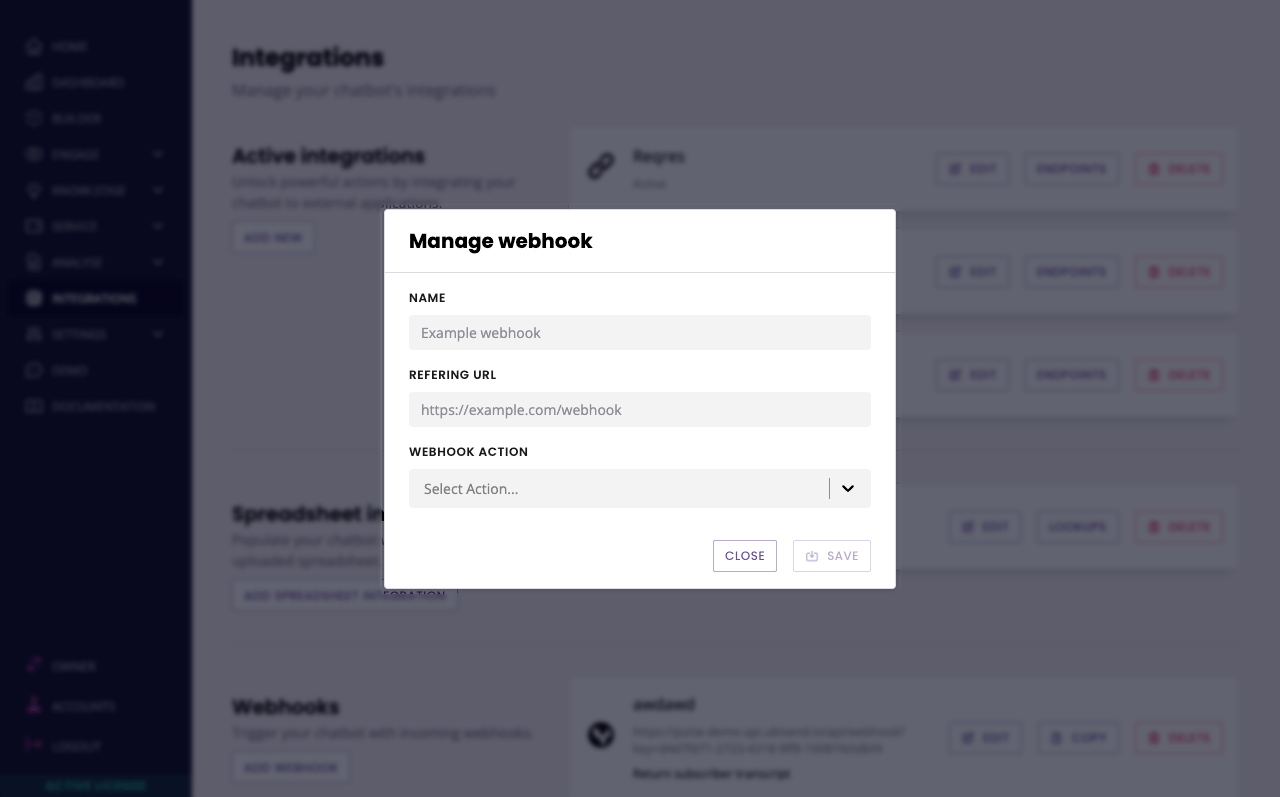
Give your webhook a name and a referring URL. Leave the action empty.
The name is used for you to easily identify your webhooks. Make a note of the webhook’s key (the long string of numbers and letters after ?key=).
Step 2: Add your custom information to your webhook
There are two ways to add custom information to your webhook.
Send a
POSTrequest to it containing a JSON formatted payload. Provided the correctRefererheader is included in the request, the posted data will hit the platform and it can be used to trigger a conversation.Append information to the webhook using
?key=value.
Either way, we will use this information (the key) and store its value inside a variable.
Don’t forget to include your channel as part of the payload. More info.
For the purpose of this tutorial, we’ll use a simple URL param and append email_address to our webhook like so:
https://your-platform.io/api/webhook?key=your-key&email_address=alex@google.com&channel_driver_name=Converse
Step 3: Create a variable
Go to Settings → Variables and click + Variable.
Give your variable a name, such as webhook_email and click Advanced Settings.
Under Data type, select Copy existing value and enter {{webhook.data.email_address}}.
The format is {{webhook.data. then the name of your custom variable (contained in JSON payload or URL. To store nested values, continue using the same format, for example {{webhook.data.address.city}}.
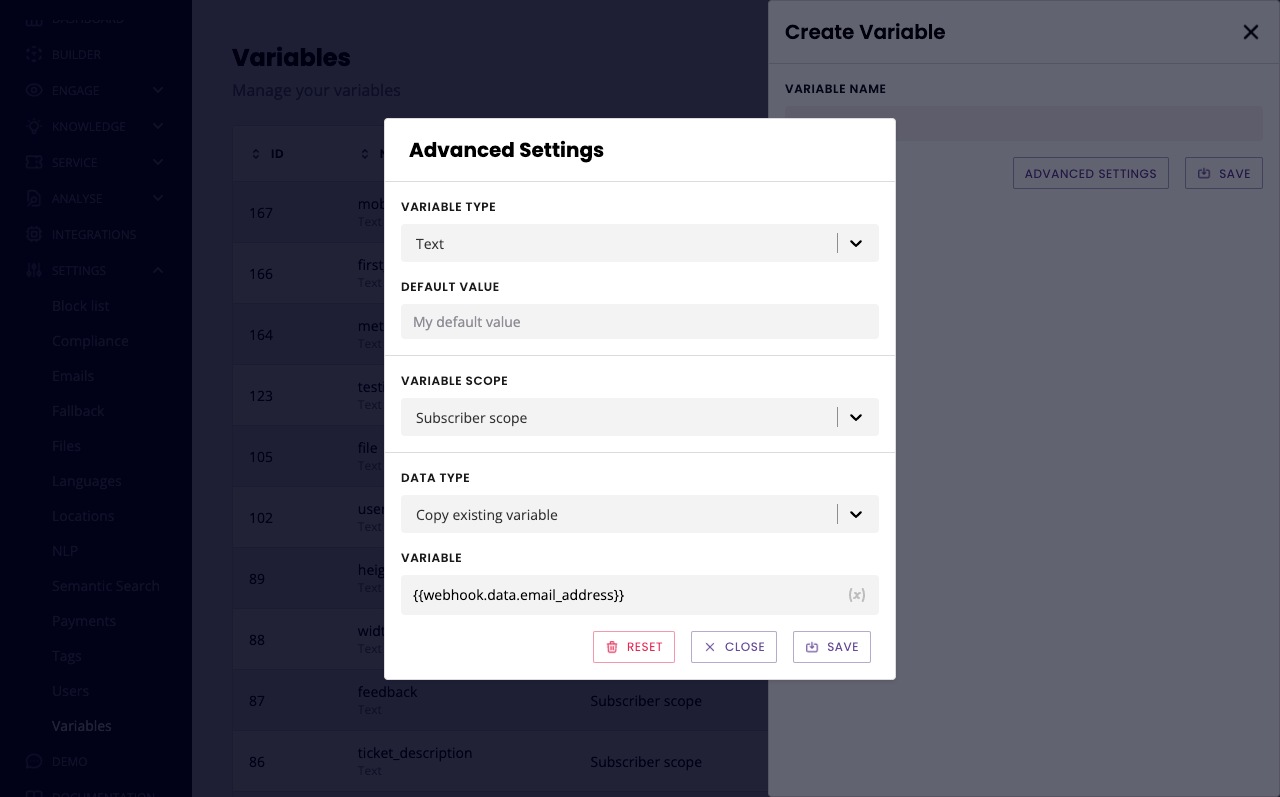
Click Save.
Step 4: Create your conversation
We now need to capture this variable as part of a conversation. Go to Builder and create a new conversation.
Give your conversation a name and a description.
For its trigger, select If Variable {{webhook.key}} equals and enter your webhook key (found in step 1).
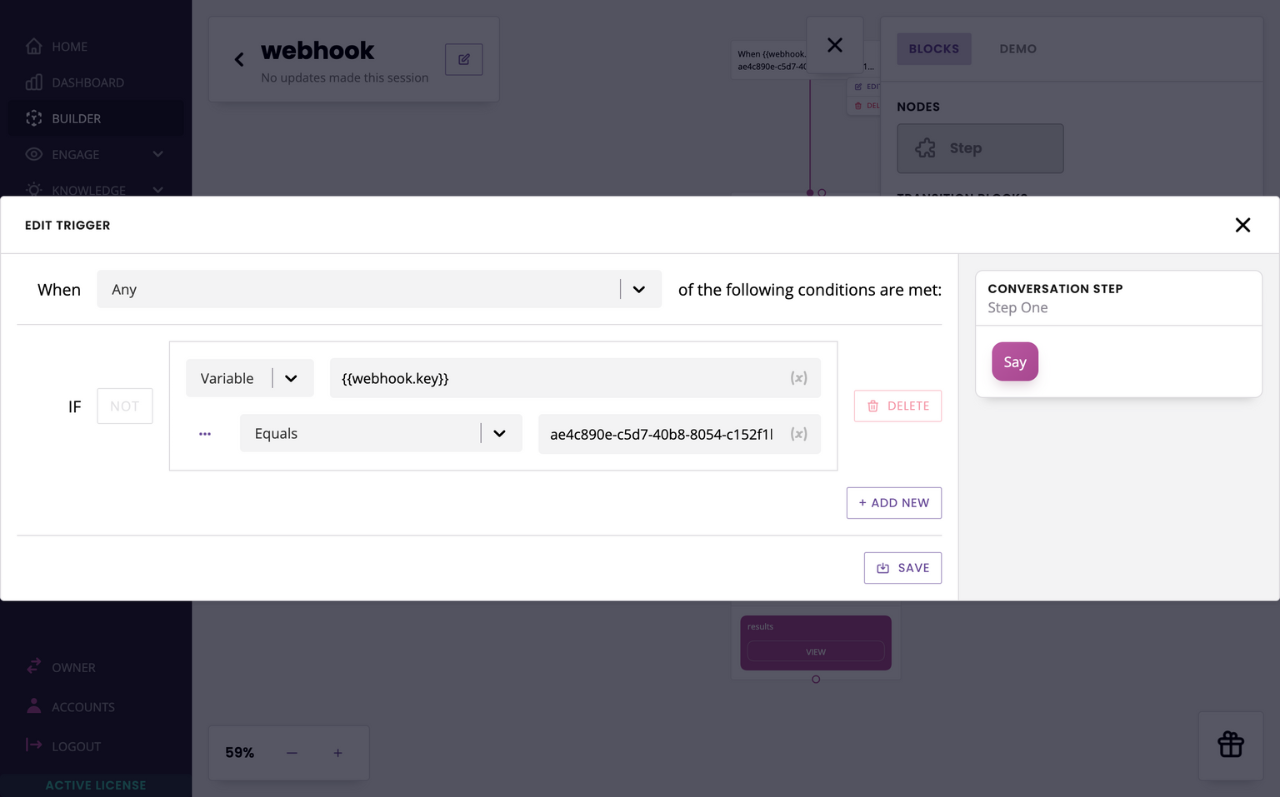
Hit Save.
Finally, from the block bank, drag and drop a variable inside the trigger. Select the webhook_email variable and hit Save.
Done! Now, as soon as the webhook is hit, the variable will automatically save the email_address value from the webhook inside the webhook_email variable; which you can then use for other actions in your chatbot.