
How to trigger a conversation from a webhook
Last updated: 14 May 2024
There may be times when you would like an action performed in a different piece of software to trigger a conversation in your chatbot.
We will help you achieve just that using webhooks.
The scenario for this tutorial is as follows: A lead is created in a third-party software, which should trigger a conversation inside our chatbot. The lead will immediately receive an email notification (through our emailing system) inviting them to engage with our chatbot. As the lead starts talking to the chatbot, the chatbot is already aware of the lead’s details (e.g. email address, name, etc.).
Step 1: Create a webhook
To create your webhook, go to Integrations.
Find the Webhook section and click Add webhook.
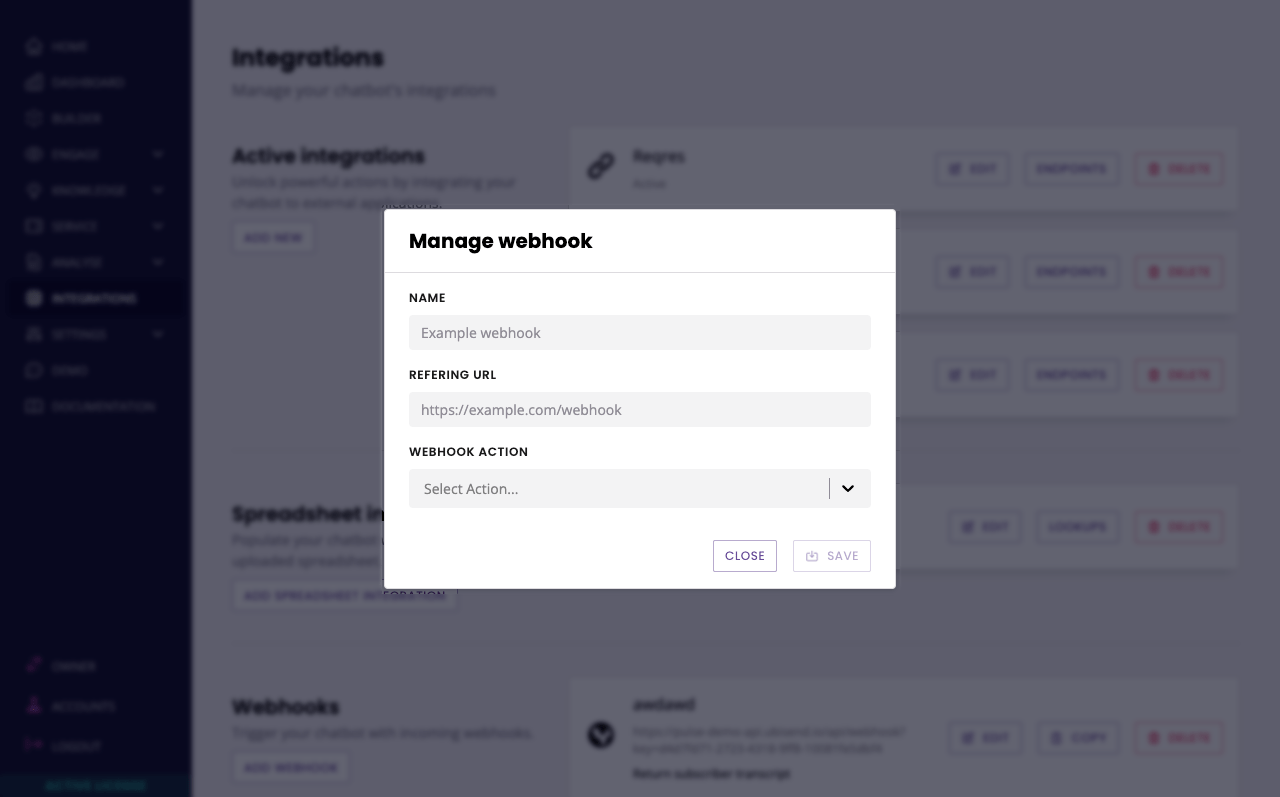
Give your webhook a name and a referring URL. Leave the action empty.
The name is used for you to easily identify your webhooks.
The referring URL is a security measure. The platform needs to be sure the webhook is coming from a trusted source. This happens in two ways:
The referring URL is checked to ensure it comes from a trusted source. This will be read directly from the header of the request. If you need to add this manually, you should use the
Refererheader.The unique token generated when the webhook is created in the platform. This is automatically appended to the webhook URL when created and can be copied directly from the overview page.
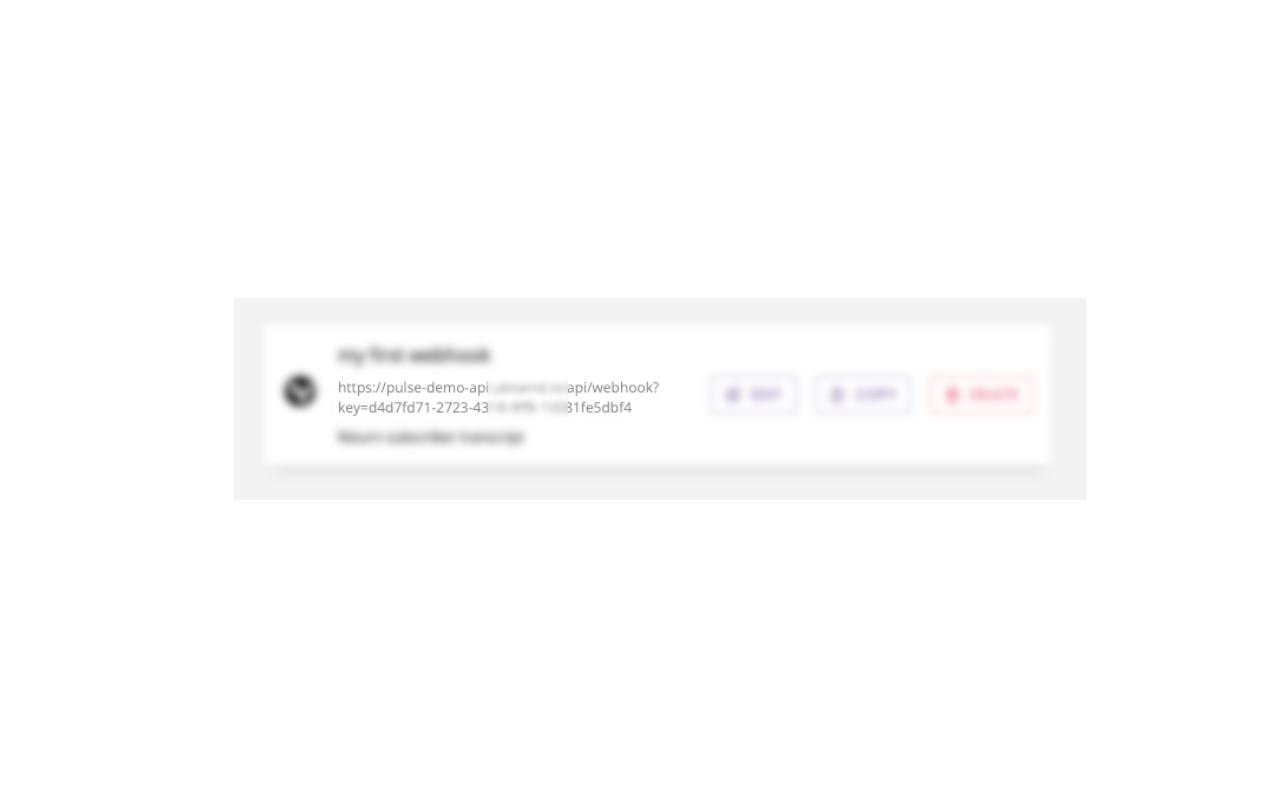
When the webhook has been created, you may copy the URL and you may send a POST request to it containing a JSON formatted payload. Provided the correct Referer header is included in the request, the posted data will hit the platform and it can be used to trigger a conversation. Additionally, all of the posted data is made available as variables to help with routing the conversation and personalising messages.
The JSON payload or the webhook URL must contain the channel you wish the new chatbot user to be created for. To do this, send the key of channel_driver_name with one of the following values:
ConverseEmbeddedFull Page
This can be included as part of the query string (e.g. https://pulse-demo-api.chatbot.io/api/webhook?key=abc-123&channel_driver_name=Converse)
Or it can be included in the JSON payload (e.g. { "channel_driver_name": "Full Page" })
Step 2: Create the email notification
The use case we’re working through includes inviting the new lead to use the bot. To do so, we’re going to email them a link to the bot. We don’t want to send them just any ol' email with a basic link, though, as we want the chatbot to know who the user is.
Variable
One of the key part of the interaction between the two software (the external and your chatbot platform) is to capture the new lead’s email. Their email acts as a unique identifier which tells us who the user is when they reach the chatbot.
Because the webhook will trigger upon the lead being created, we can immediately capture as much information as we need from the webhook’s payload. We will set all this up later. For now, because we’re setting up the email notification, we should create the email variable that will store the lead’s email address.
Go to Settings → Variables.
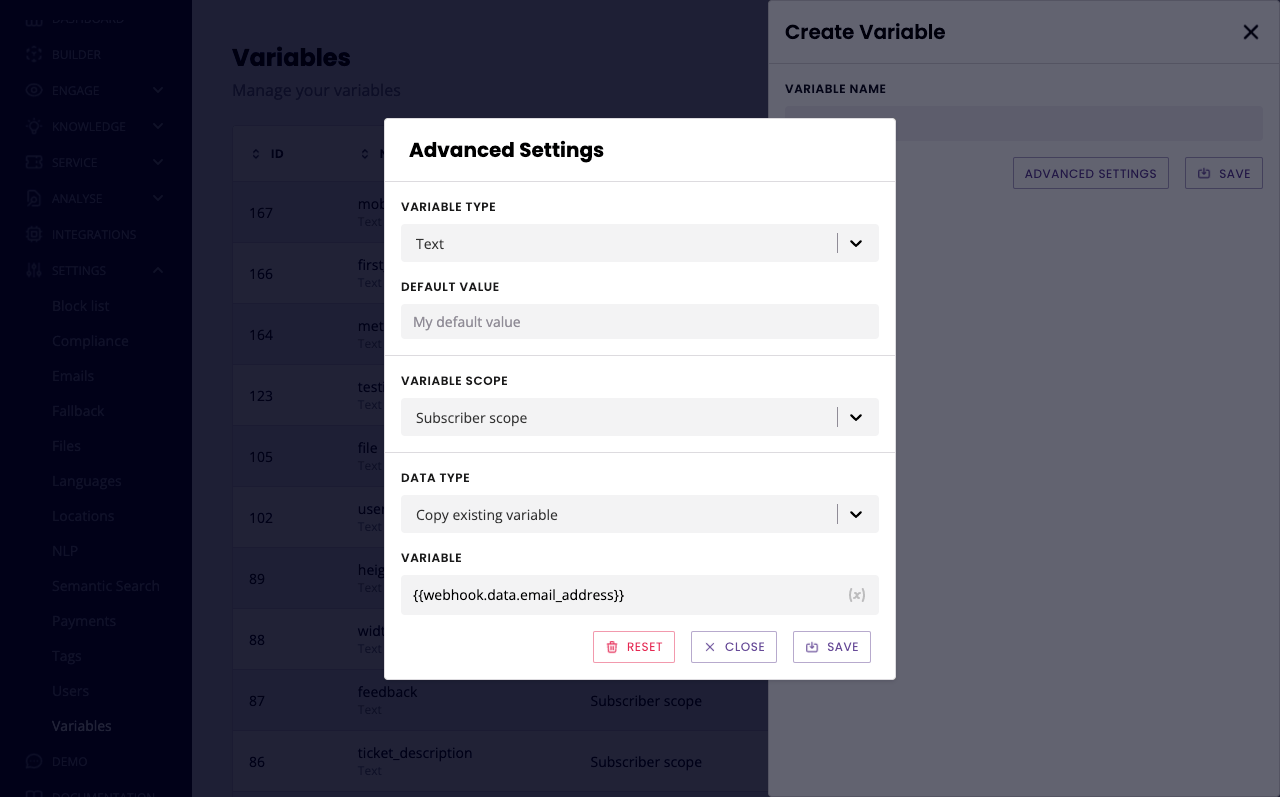
Click Create and name your variable.
Click Advanced settings. Under Data type, select Copy existing variable. Under variable, enter the name of the key containing the email address in your webhook payload. For example, your webhook had the following payload, you would use the following variable: {{webhook.data.email_address}}.
{
    "name": "Jane Doe",
    "age": 35,
    "email_address": "jane.doe@example.com"
}
To learn more about the advanced variable settings, refer to this doc.
Great, we now have our email variable. We can craft our email.
Go to Settings → Emails.
Click Create in the top right.
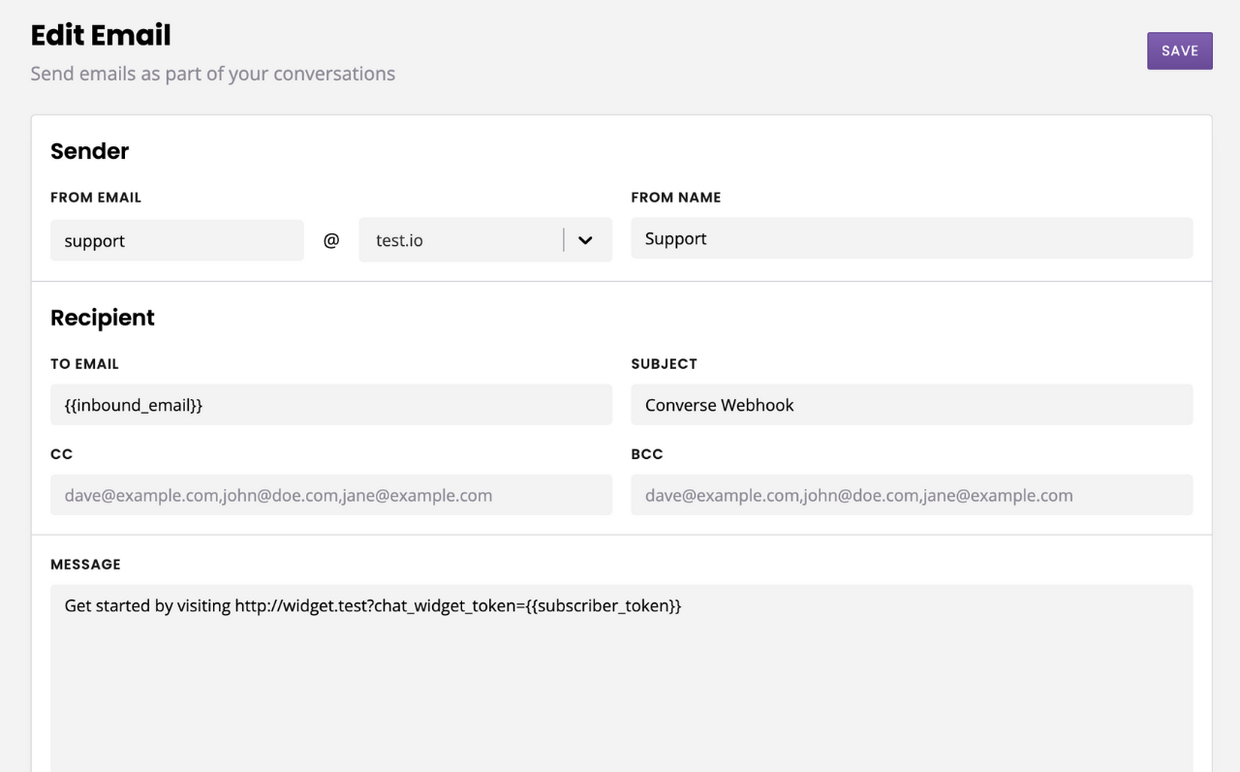
In the To email field, enter your email variable from the previous step.
In the Message field, enter your email copy. This must include a link to your chatbot, appended with the token. The link to your chatbot should look like this:
http://widget.test?chat_widget_token={{subscriber_token}}
Where:
widget.testis your platform's URL.chat_widget_tokenwill send the user to a chat widget. To send them to an embedded chatbot, useembed_token. To send them to a full page chatbot, usefull_page_token.{{subscriber_token}}is a pre-built variable.
Here’s what it should look like:
All done? Hit Save.
Step 3: Create the conversation
The conversation is the crux of this use case.
Creating the conversations puts all the elements together. Once the webhook is hit, the conversation is triggered, which sends an email to the user with a link to the bot, which, when clicked, is pre-loaded with information about the user.
It is where the magic happens.
Go to Builder.
Create a new conversation (top right). Give your conversation a name and a description.
As a trigger, use If Variable and choose key under the webhook category in the variable list. Now select Equals as the condition type and in the value field, copy the token the platform has created for you when you created the webhook.
This should be your trigger:
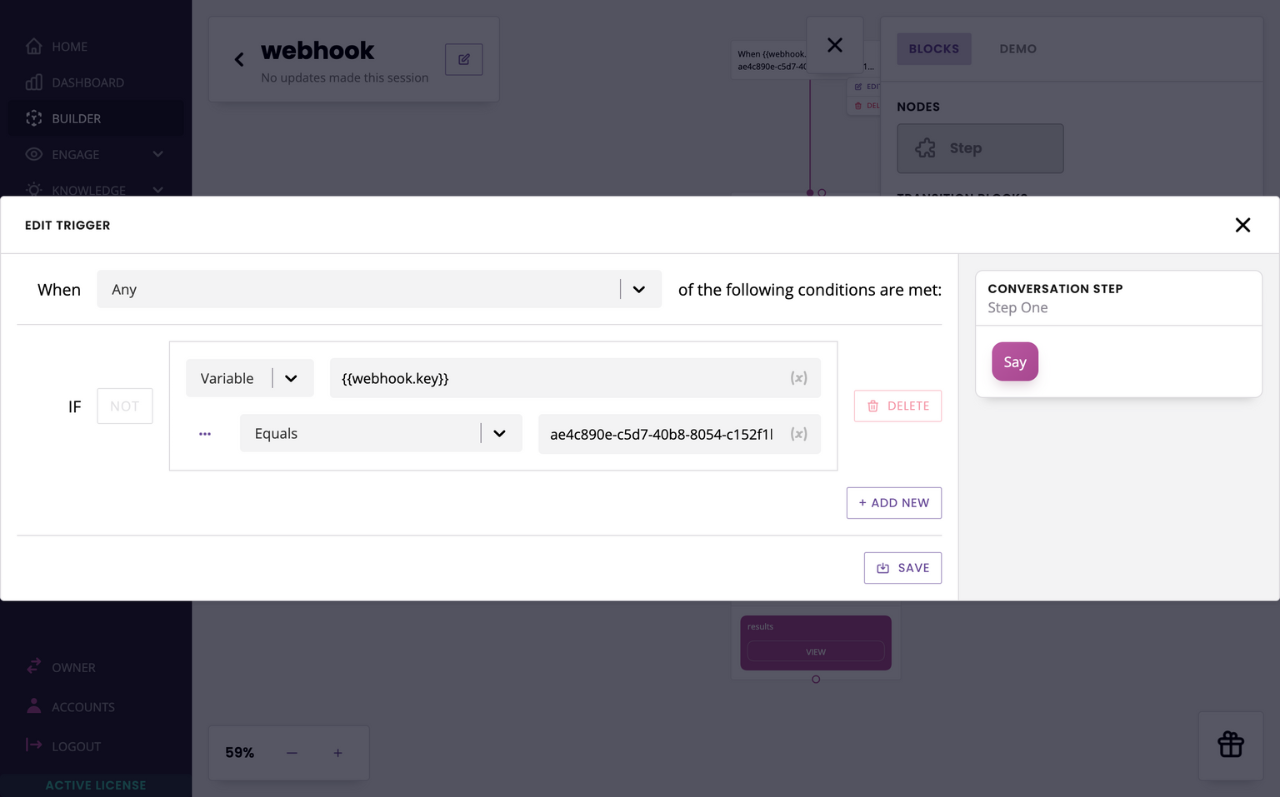
Hit Save.
From your Block bank, click, drag, and drop a Variable onto your trigger.
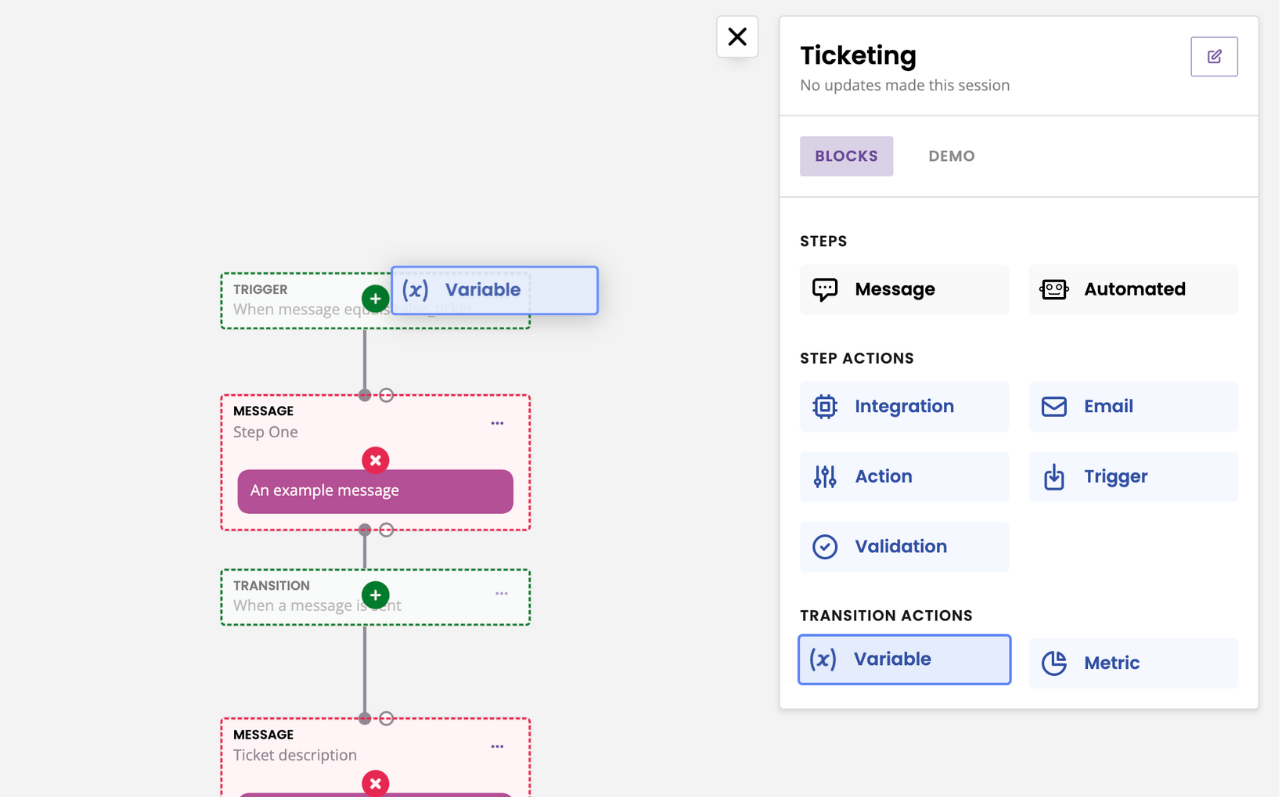
Find your inbound_email variable in the dropdown.
Congratulations, you’ve triggered a conversation from a webhook! You may now create the rest of the conversation as you would any other conversation.
Step 4: Capture more user information from the webhook
So far, we’ve only captured the user’s email address. This allowed us to identify the user as they click the link from the email and reach out bot.
But we can do more.
If the external piece of software allows it, you may grab more information about the user from the webhook’s payload. This could be their first name, their location, the job they’ve applied for – anything the webhook can capture.
To do so, simply go back to Step 2 - Variables and follow the same process for any new piece of data you’d like to capture.