
How to send captured files via an email notification
Last updated: 02 May 2023
File uploads only work on accounts with an active license. If you do not have an active license, contact your account manager.
Your chatbot is geared to receive files from its users. By default, those files are hosted inside your platform. Learn more.
While files being hosted on the platform is great, you might also want an email notifying you of a new file sent by one of your users. In this tutorial, we’ll look into creating an email notification that contains the file link.
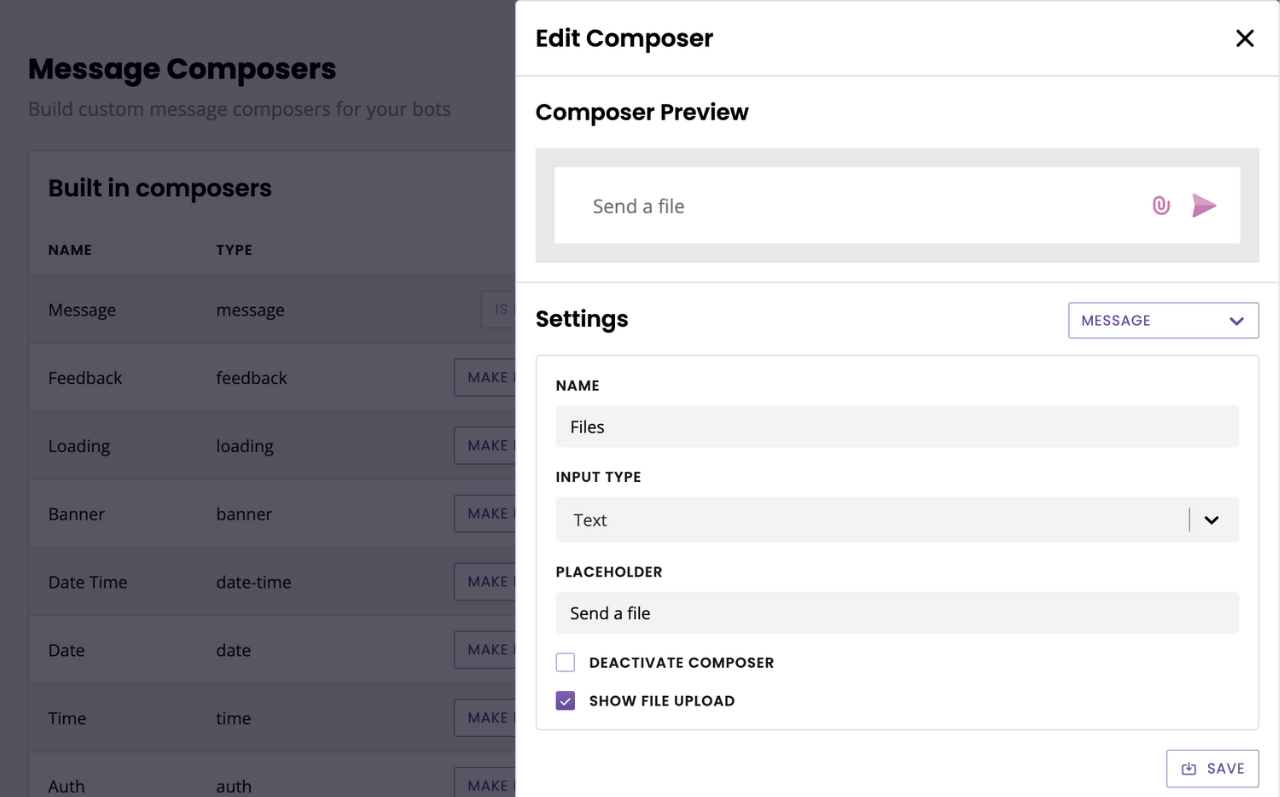
Step 1: Create a file composer
Go to Engage → Composers.
In the top right, click Create composer. Give it a name and optionally change its placeholder.
Tick the Show file upload box, and hit Save.
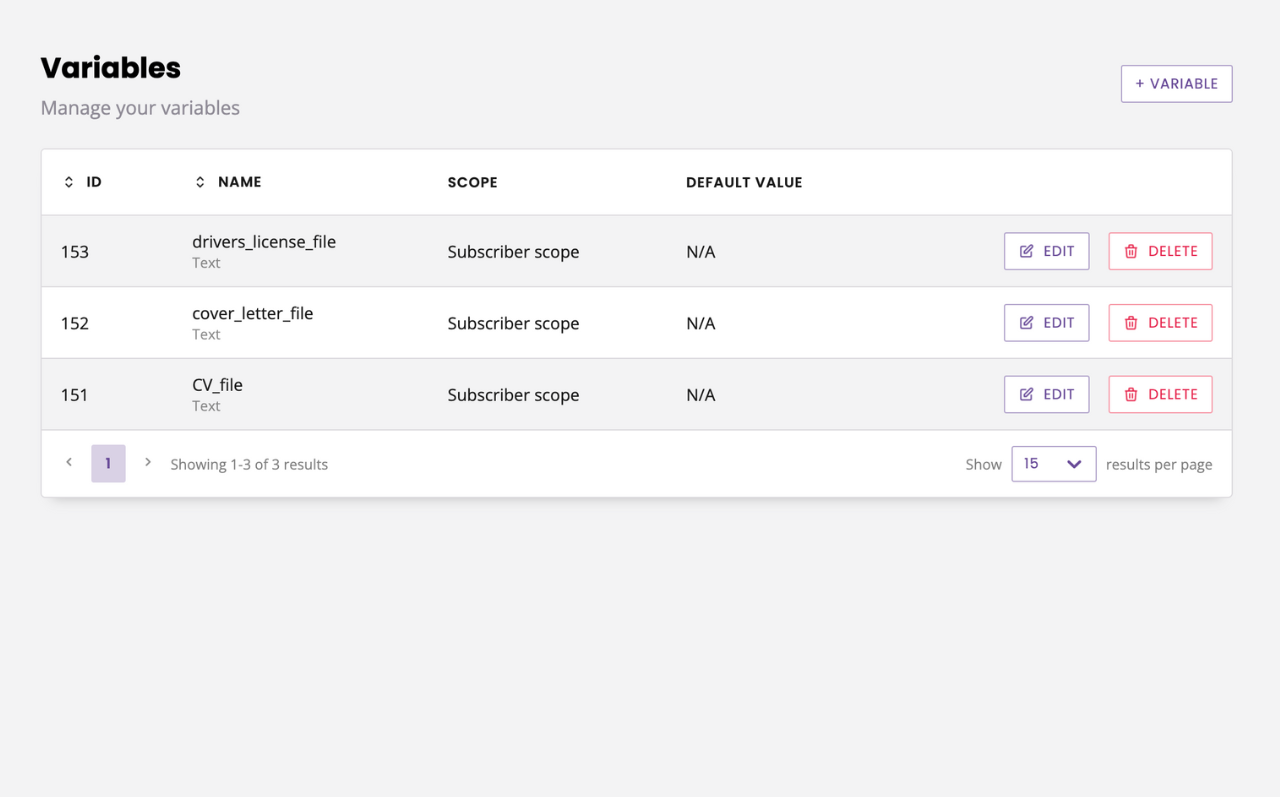
Step 2: Create the variable(s)
Go to Settings → Variables.
Create one variable per file you’re going to request from your users. If you’re building an HR chatbot that requires users to send a CV, a cover letter, and a copy of their driver’s licence, create three variables.
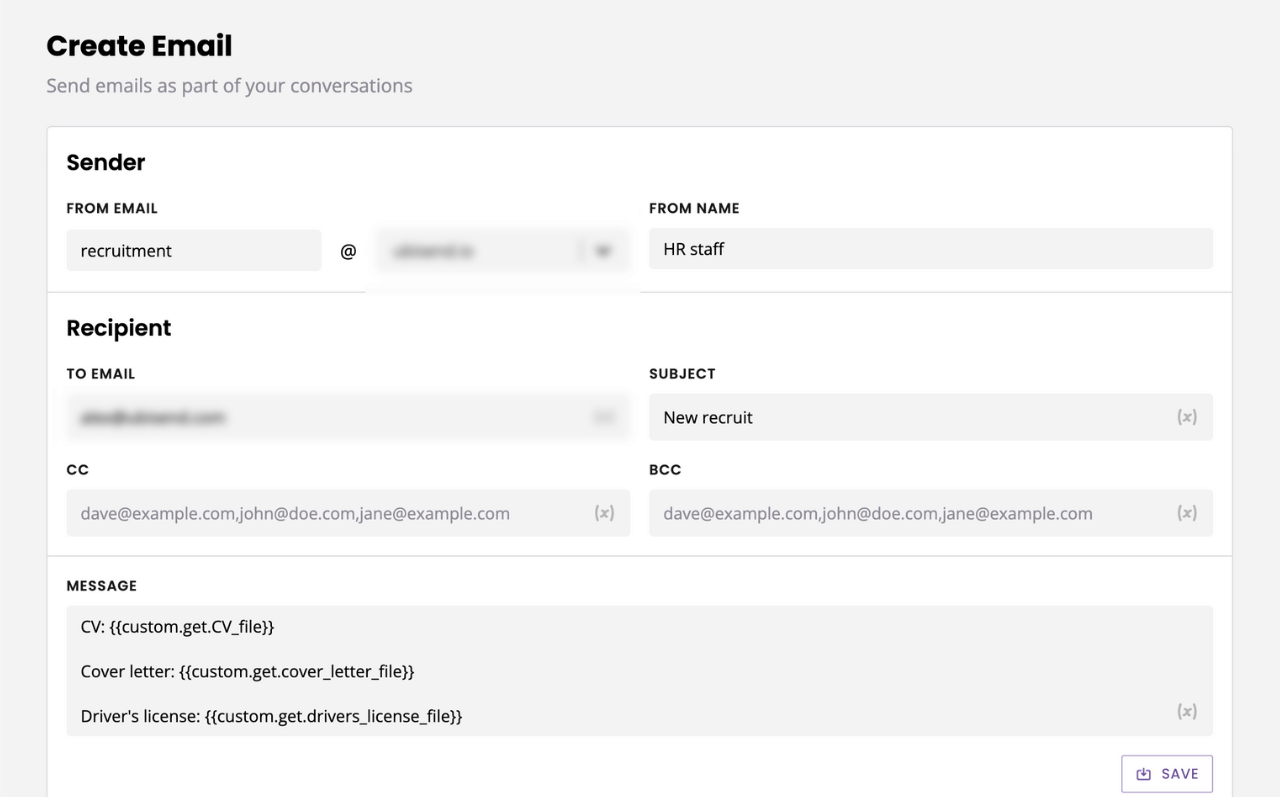
Step 3: Create the email
Go to Settings → Emails.
Click + Email.
Enter your details (sender, receiver, subject line, etc.). In your email body, enter your variable(s).
Step 3: Create the conversation
We will create a conversation where each step collects one file from the user, confirms it with the user, then saves the link to the file into a variable.
Go to Builder and click + Conversation. Give your conversation a name, description, and a trigger of your choice.
4.a Create the file upload step
Edit the first step (three dots → Edit response).
Update the copy of your first step to something more relevant. In our example, we can have it say something like ‘Please upload your CV’.
In the Composer dropdown, scroll to the bottom and select your new Files composer.
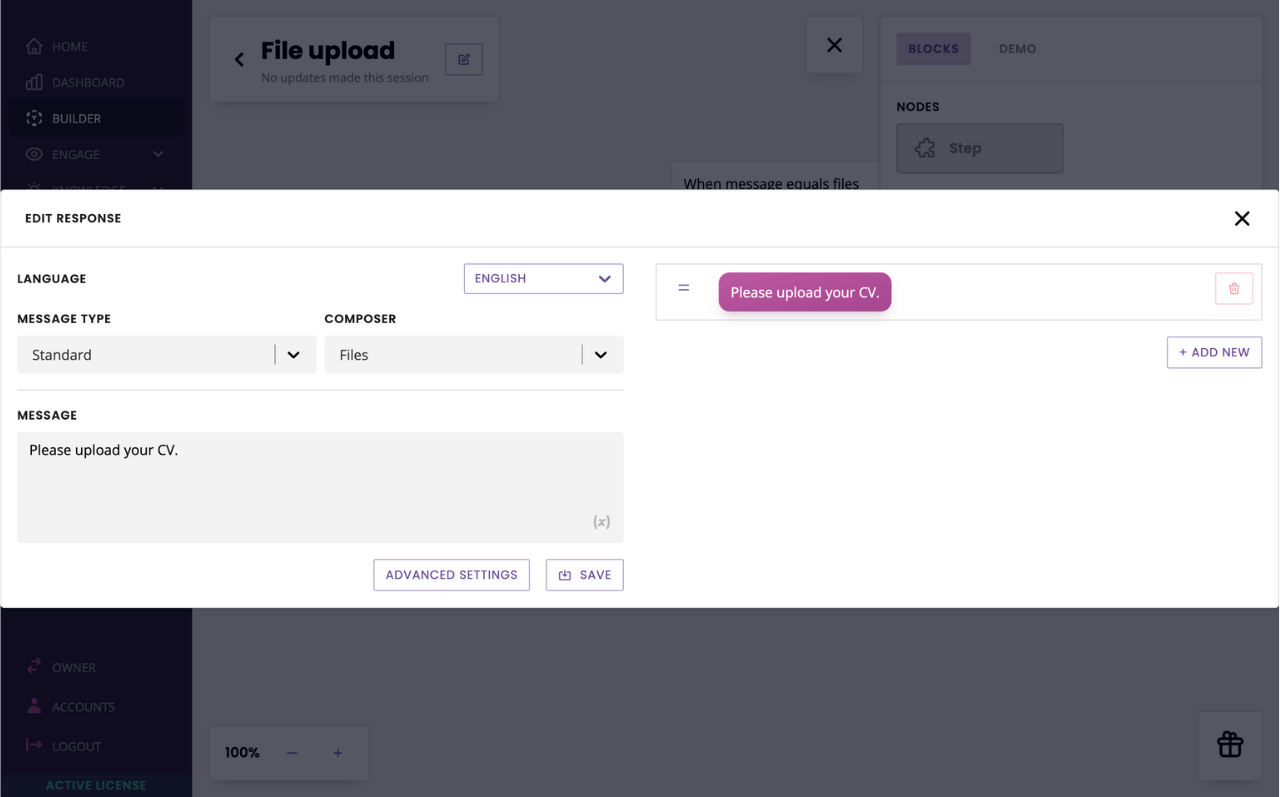
Hit Save.
4.b Create the confirmation step
Before we can send the file via email, we need to store its link in a variable. To get us to that step, we need to create an in-between step where we’ll get the user to confirm the file they’ve sent is the correct one.
This has two purpose:
Gives us an opportunity to do our magic and save the file link in a variable in transition from this step.
Gives our users the opportunity to change their mind and start again.
Drag and drop a new step into your canvas, give it a name and hit Continue.
Change the message type to Action. Add your copy and two postback buttons. The first will get the user to confirm their upload and contain the file’s link variable, {{message.files.0.link}}. The second will allow the user to start again (if they made a mistake).

Hit Save.
Connect the first step to the second (learn how). In transition, pick All the time.
4.c Create the next step
The next step can either be a thank you step or another upload step if you need your users to send you multiple files.
If you need more files, re-create the same process as 3.a and 3.b.
When ready, create the thank you step.
Drag and drop a new step onto your canvas. Give it a name and click Continue.
Write your copy, for example: ‘Thank you for sending your file(s). Someone will be in touch.’
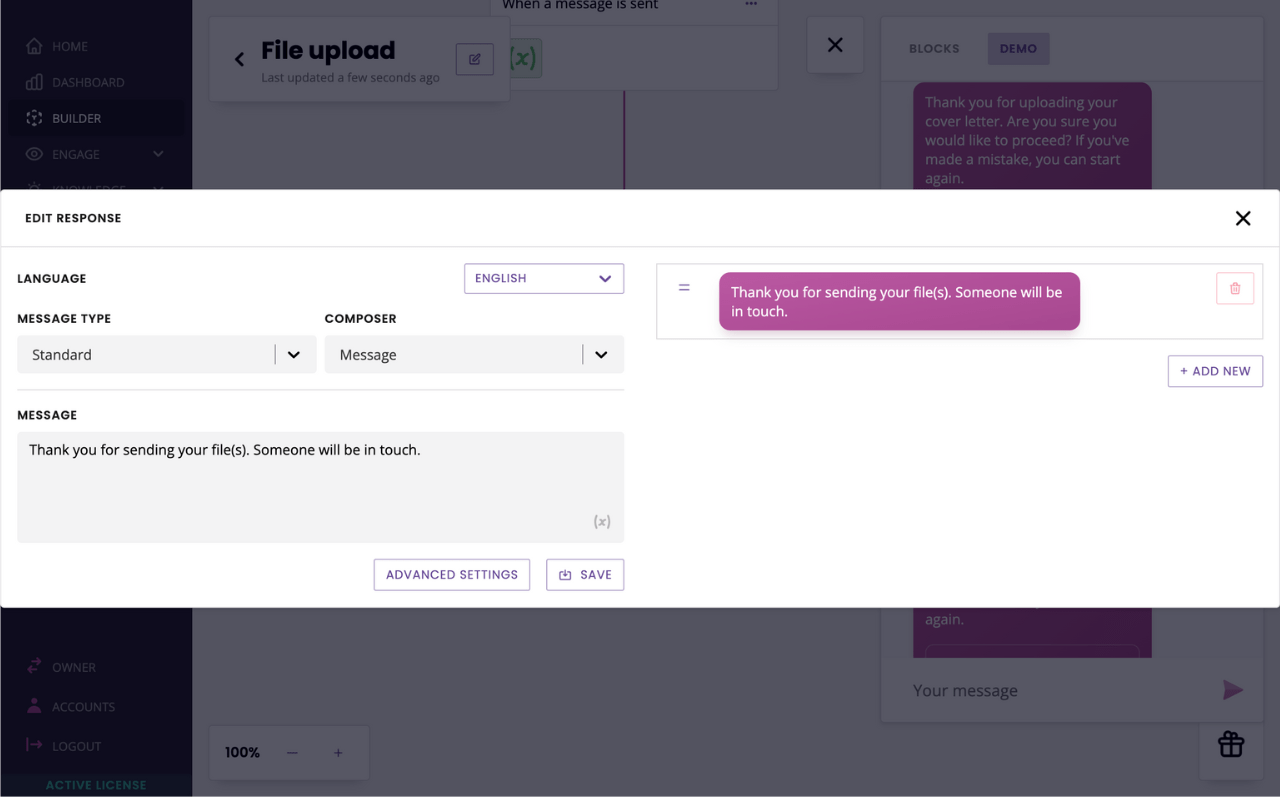
Click Save.
4.d Save your variable(s)
In transition between each confirmation and the following step, drag and drop your variable.
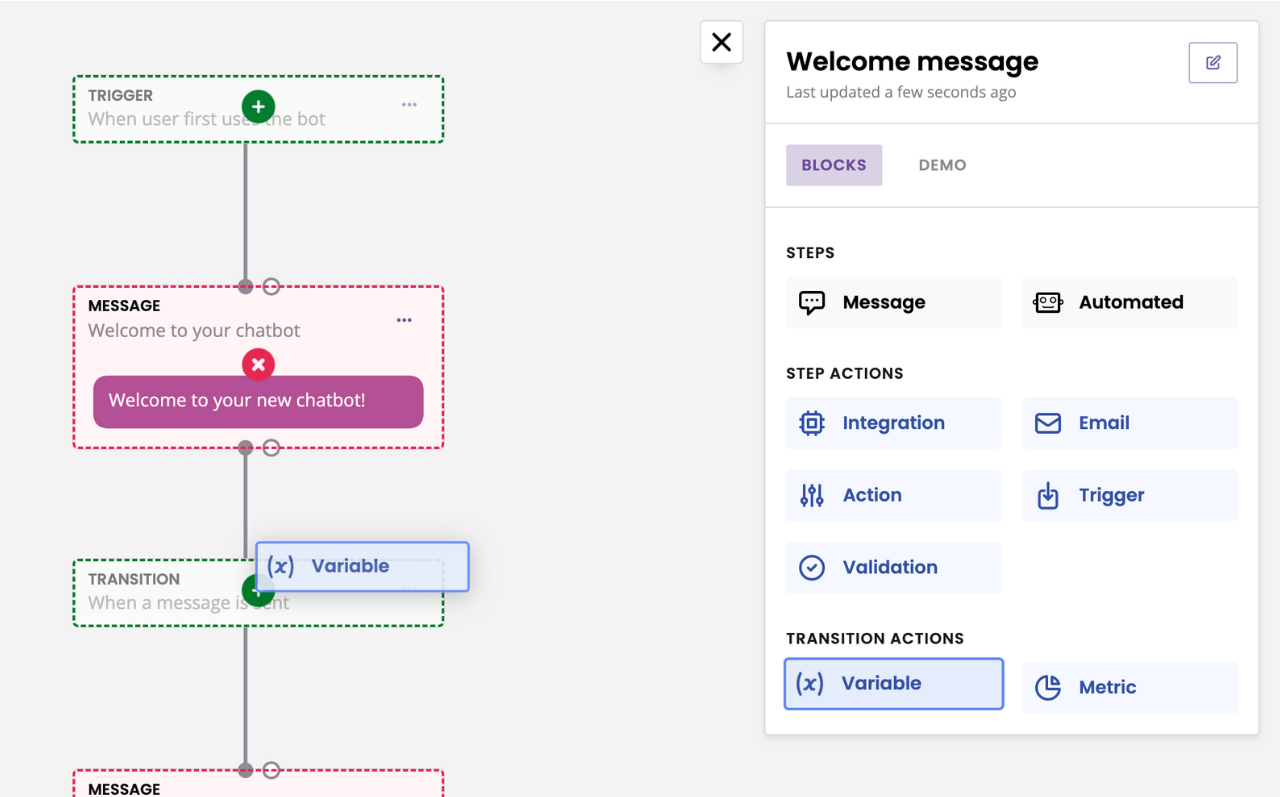
Make sure each variable corresponds to the file you’re receiving (e.g. when asking for the CV, drag and drop the CV associated variable.
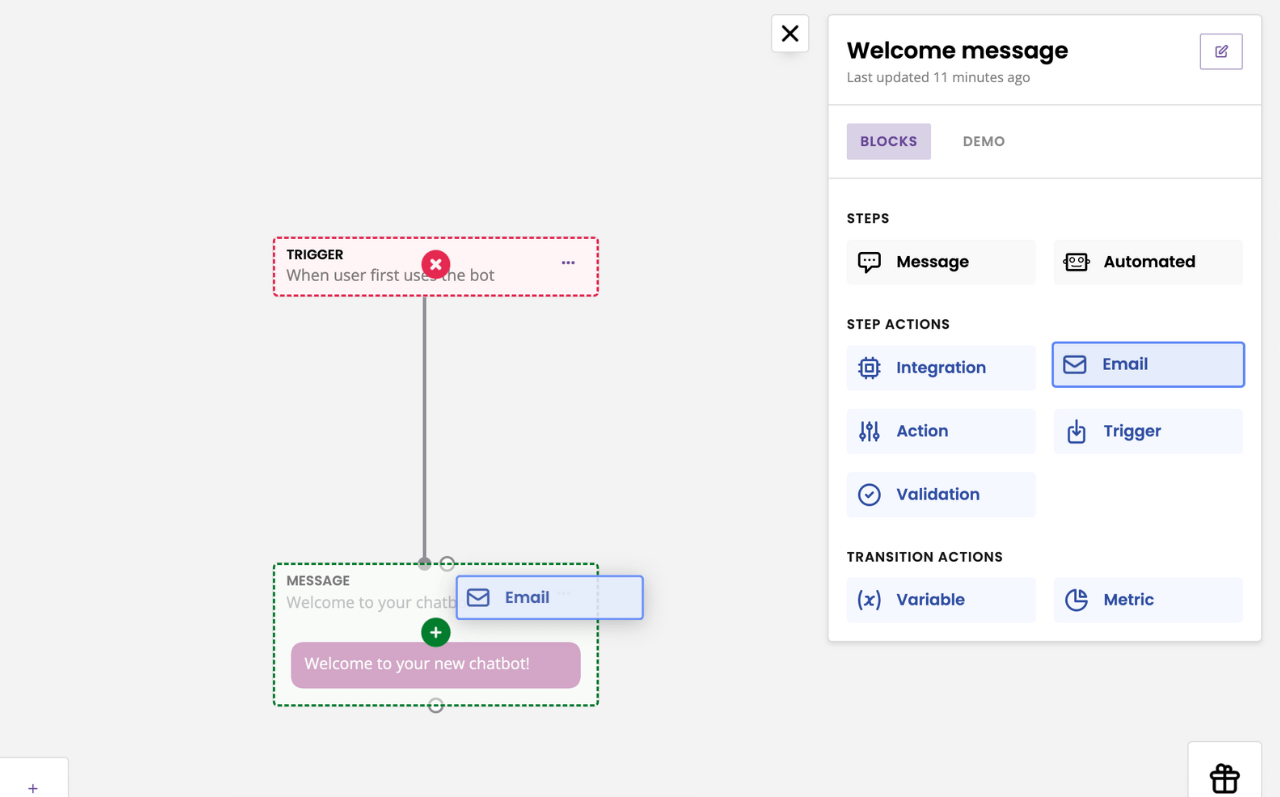
4.e Attach your email notification
Finally, on the last step, drag and drop your email notification.
All done!