
How to bring third-party data into a chatbot message
Last updated: 20 May 2024
Chatbot messages are typically made of two types of content:
Copy that you wrote.
Platform variables which, once a user talks to the chatbot, display stored information.
There’s a sneaky third type of content however, one that you will find powerful once you learn how to use it: data stored in third-party software.
In this tutorial, you will learn to grab third-party data and display it into your chatbot message (without ever storing it on your platform).
To store or not to store the value
This tutorial specifically focuses on bringing content from third-party sources into your chatbot copy without ever storing said variable inside the platform. This approach is 'single-use' – you will not be able to use the value for anything else than copy inside this one message.
If you’d like to store the value for future uses (e.g. other messages, integrations, emails, etc.), read the following tutorial: How to store an API response into a variable.
Step 1: Create a conversation
The same process works for FAQ responses. Follow the exact same steps below, except using an FAQ response instead of a conversation step.
Go to the Builder and create a new conversation.
Give it a name and a description, and a trigger. The trigger can be whatever you’d like. For this example, we’re going to use Message equals firstname.
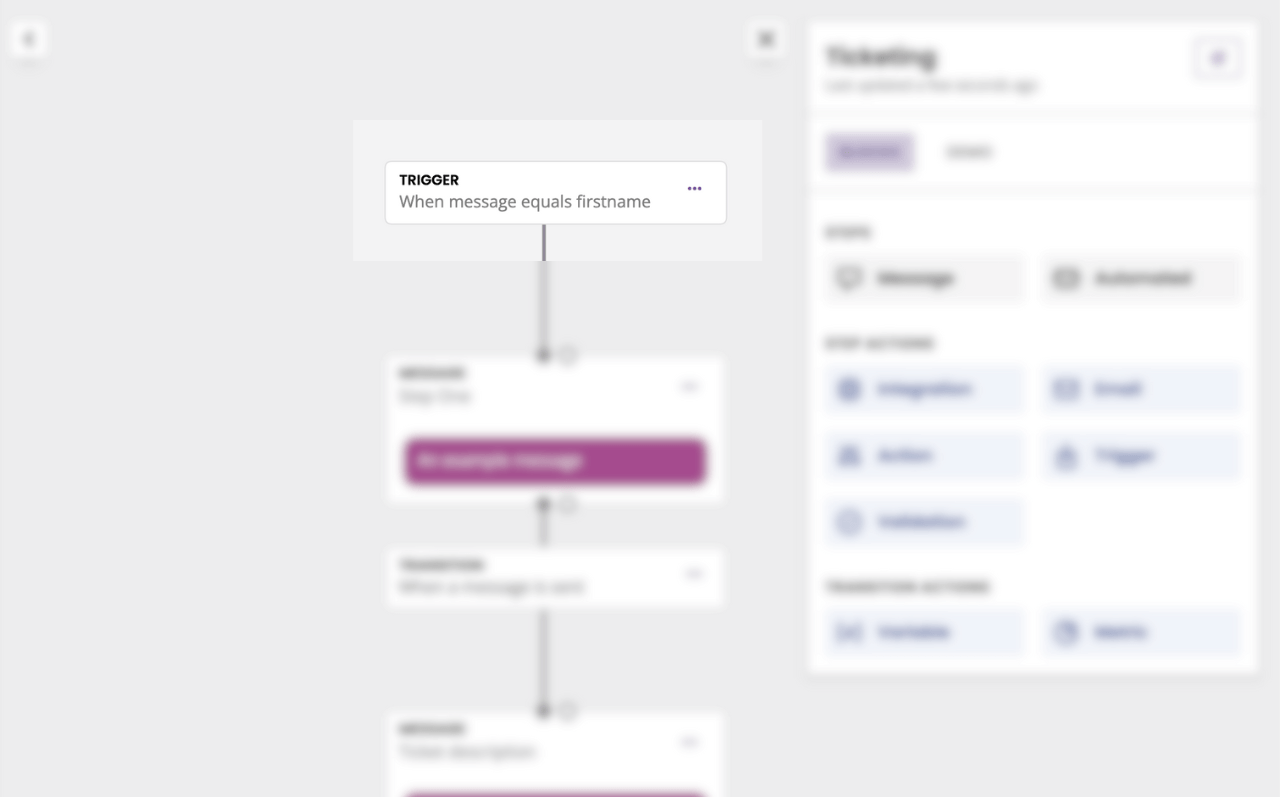
In this scenario, we’re going to call an API that holds customer information (name, email address, etc.). We’re going to display an email address from that API without storing it on our platform.
Let’s write the message copy before we go any further. Click the three dots and Edit response, then write something like:
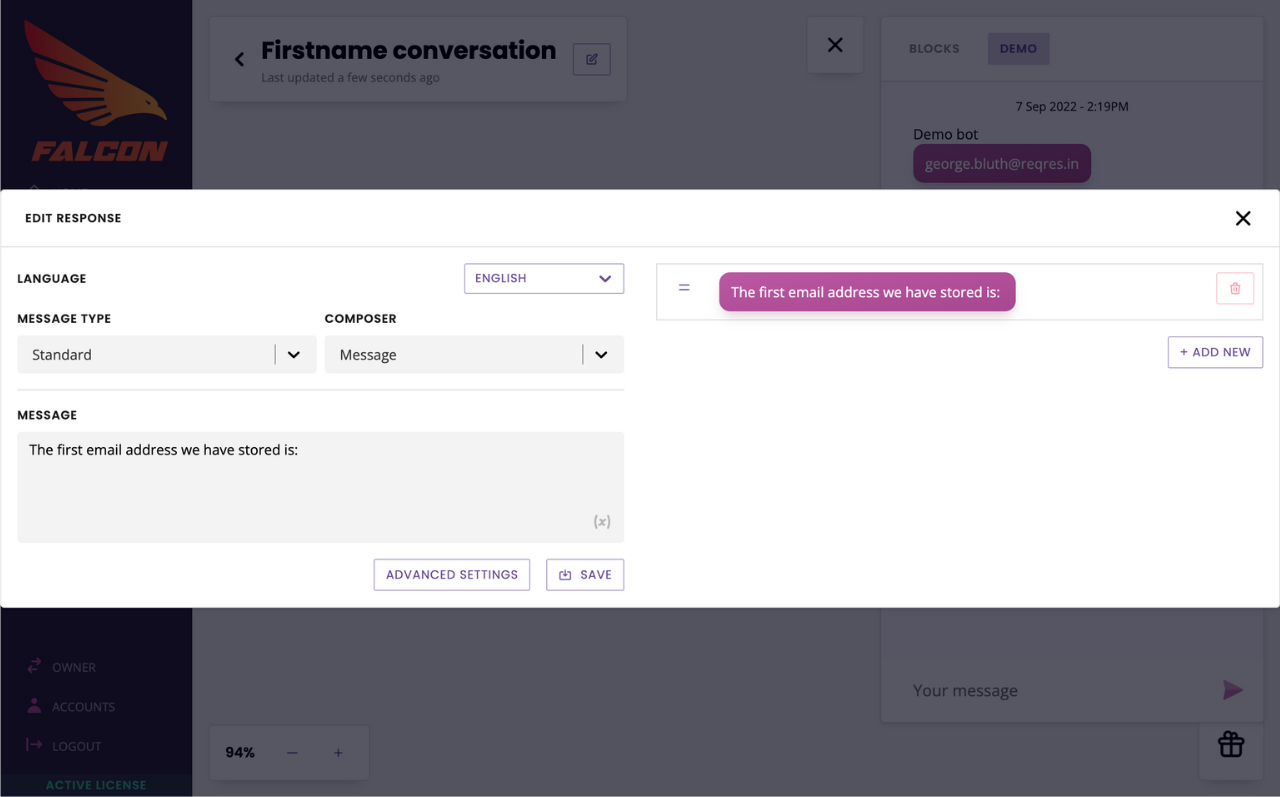
Do not enter a variable yet, we’ll get to that in a moment.
Step 2: Create an integration
For this example, we’ll use this free API: https://reqres.in. Of course, this same process will work for any data stored in third-party software you have access to.
Reqres give us an array of fake user information, including their first name, last name, and email address.
We’ll create an integration that returns that entire array. Don’t worry: we won’t throw the whole response at the user. We’ll specify exactly which information we want to display in our message in a moment.
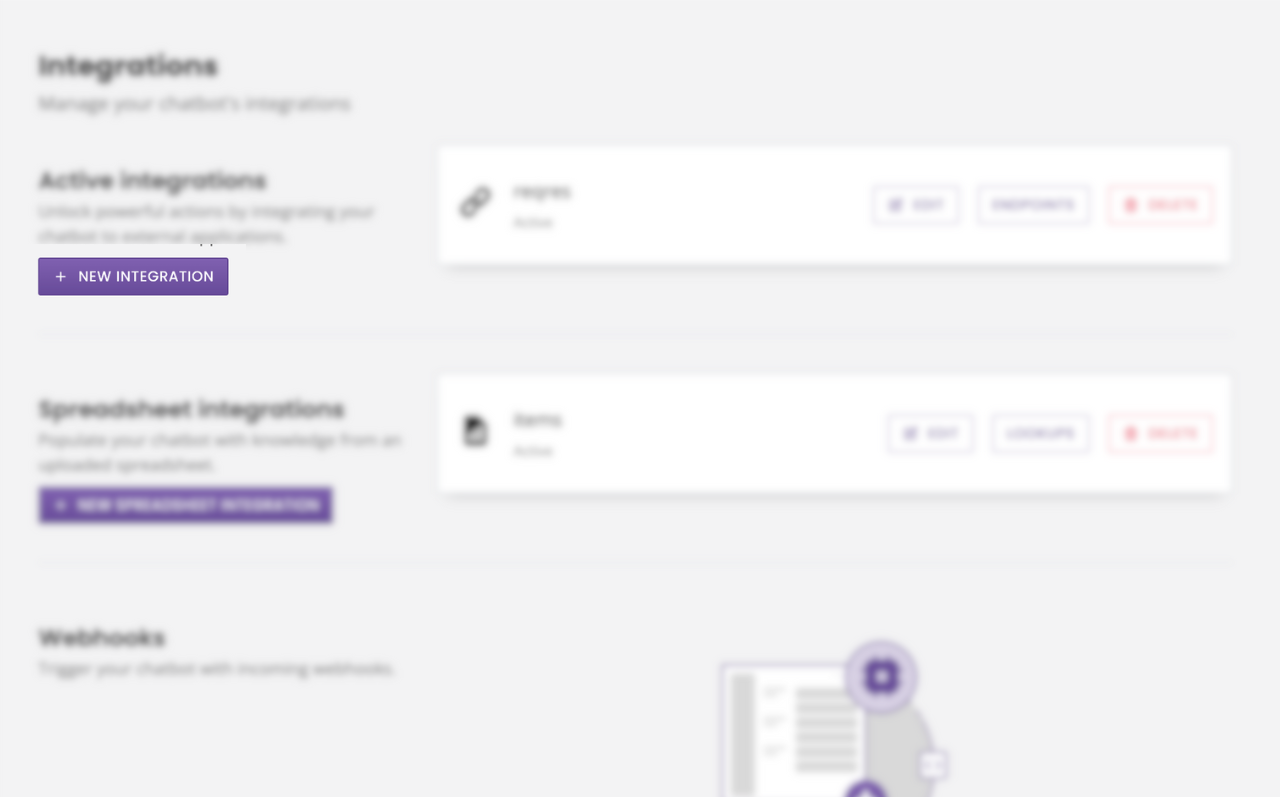
Go to Integrations. Under Active Integrations, click + New integration.
Integration details
Give your integration a name and a base URL. For Reqres, our base URL is https://reqres.in/api and we’re using a REST API.
Set up your authorization and any headers you might need to add.
Need more info on setting up an API integration? Read this doc.
Reqres make it easy: no authorization or headers are required.

Hit Save.
Endpoint
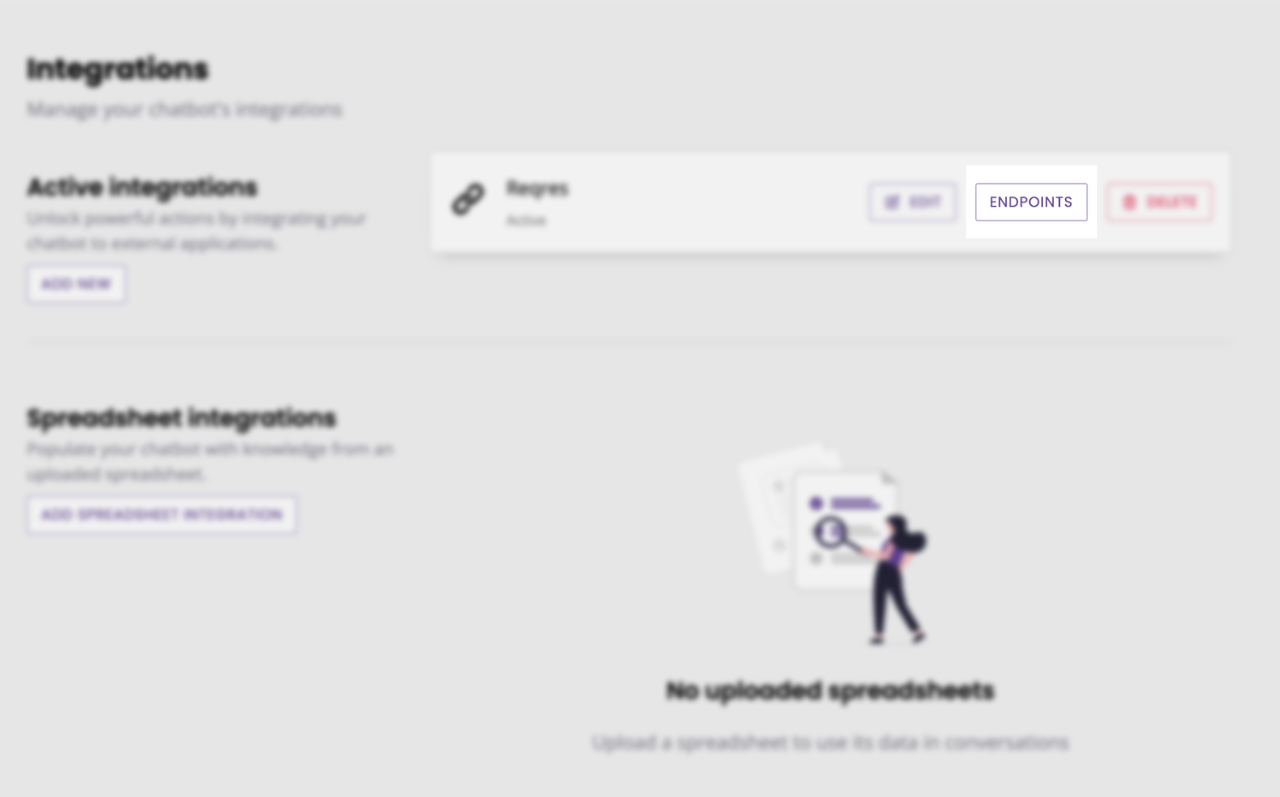
Your integration is now set up. All we need to do is create the endpoint.
On the Integrations page, click Endpoints.
Give your endpoint a name, a request type, and a target. In our example, we’ll simply target the array of users Reqres make available:
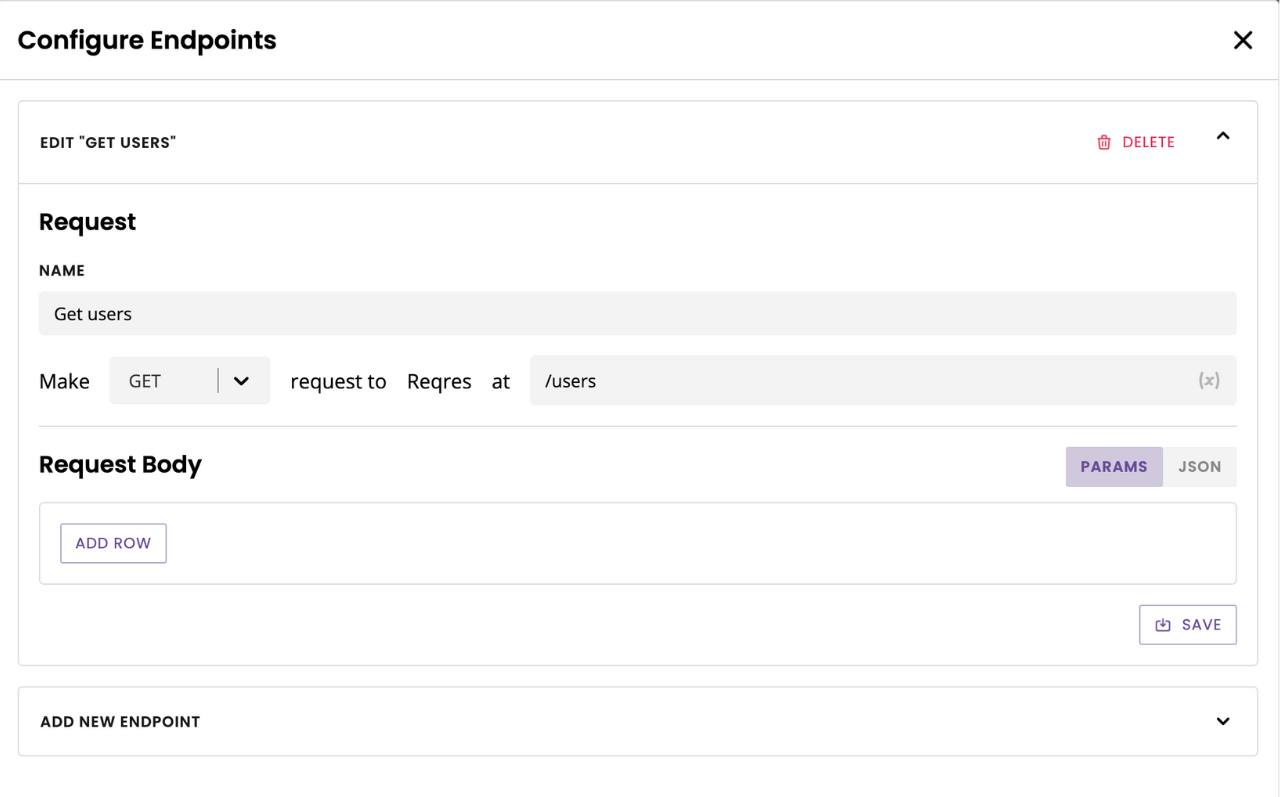
Hit Save.
This request will return this entire array:
{
    "page": 2,
    "per_page": 6,
    "total": 12,
    "total_pages": 2,
    "data": [
        {
            "id": 7,
            "email": "michael.lawson@reqres.in",
            "first_name": "Michael",
            "last_name": "Lawson",
            "avatar": "https://reqres.in/img/faces/7-image.jpg"
        },
        {
            "id": 8,
            "email": "lindsay.ferguson@reqres.in",
            "first_name": "Lindsay",
            "last_name": "Ferguson",
            "avatar": "https://reqres.in/img/faces/8-image.jpg"
        },
        {
            "id": 9,
            "email": "tobias.funke@reqres.in",
            "first_name": "Tobias",
            "last_name": "Funke",
            "avatar": "https://reqres.in/img/faces/9-image.jpg"
        },
        {
            "id": 10,
            "email": "byron.fields@reqres.in",
            "first_name": "Byron",
            "last_name": "Fields",
            "avatar": "https://reqres.in/img/faces/10-image.jpg"
        },
        {
            "id": 11,
            "email": "george.edwards@reqres.in",
            "first_name": "George",
            "last_name": "Edwards",
            "avatar": "https://reqres.in/img/faces/11-image.jpg"
        },
        {
            "id": 12,
            "email": "rachel.howell@reqres.in",
            "first_name": "Rachel",
            "last_name": "Howell",
            "avatar": "https://reqres.in/img/faces/12-image.jpg"
        }
    ],
    "support": {
        "url": "https://reqres.in/#support-heading",
        "text": "To keep ReqRes free, contributions towards server costs are appreciated!"
    }
}
Step 3: Set up your message advanced settings
Great, we’ve got an integration set up. We also know the array it returns.
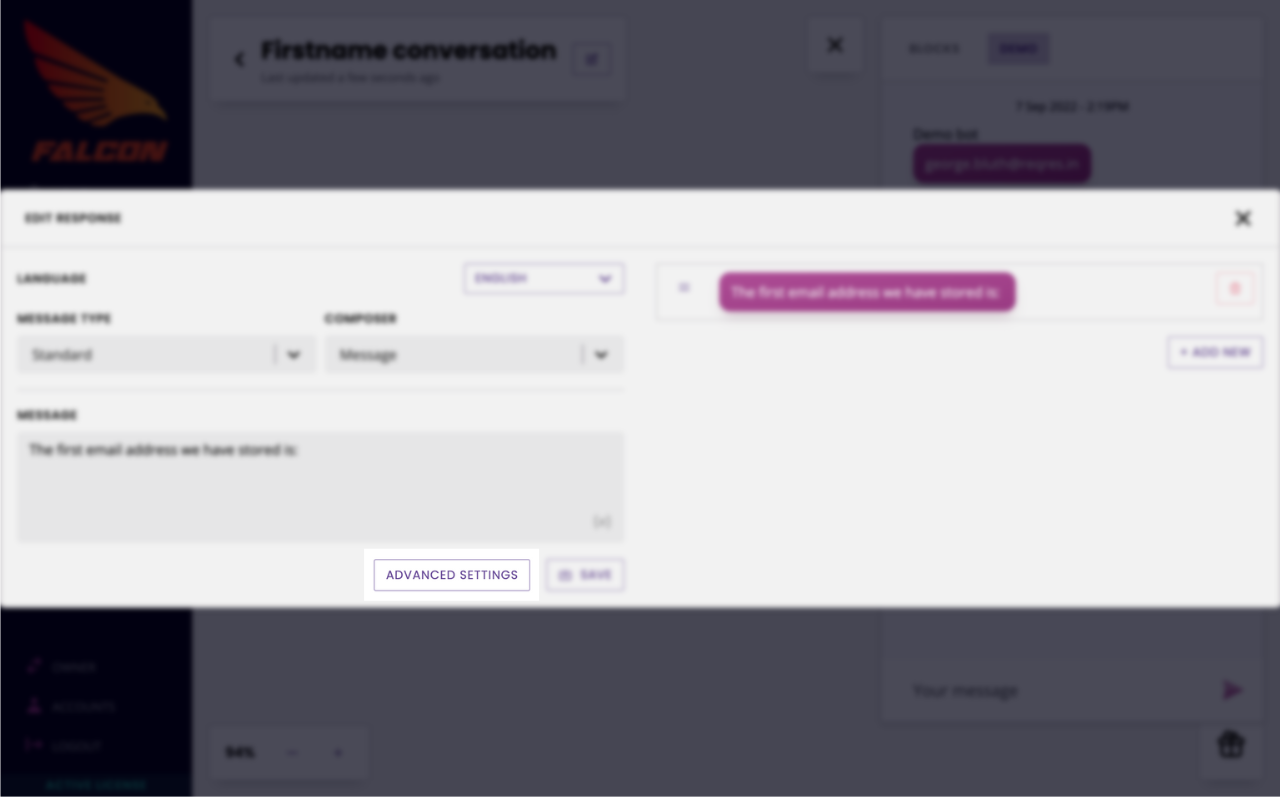
Go back to the Builder and find your conversation. Edit your message.
Click Advanced settings.
Using these advanced settings, we’ll dictate that at this very specific step of the conversation, we want to perform an integration to our third-party source and return the array of data.
Under Data type, select Use API request response then select your integration and endpoint.
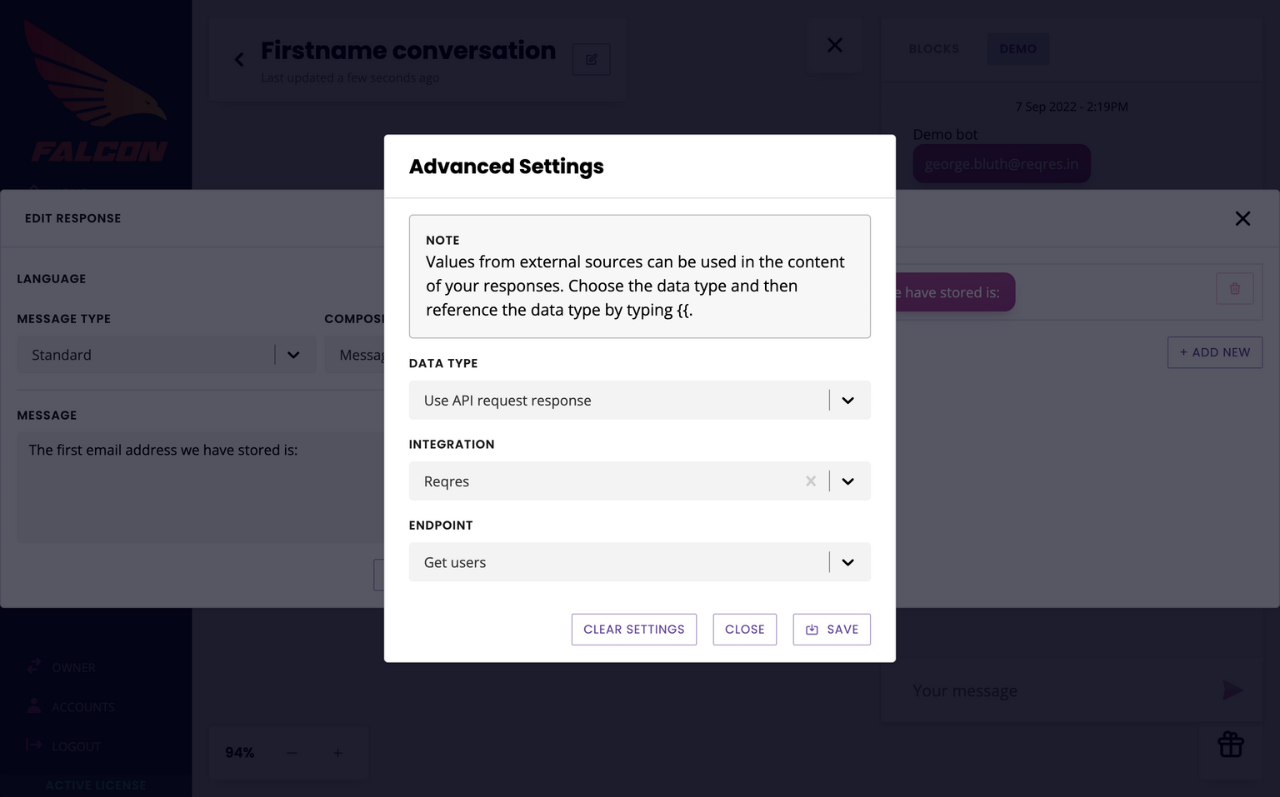
Hit Save.
Step 4: Enter your variable
We’ve now associated this specific message with our integration. All we need to do is bring the value from the third-party software into the copy.
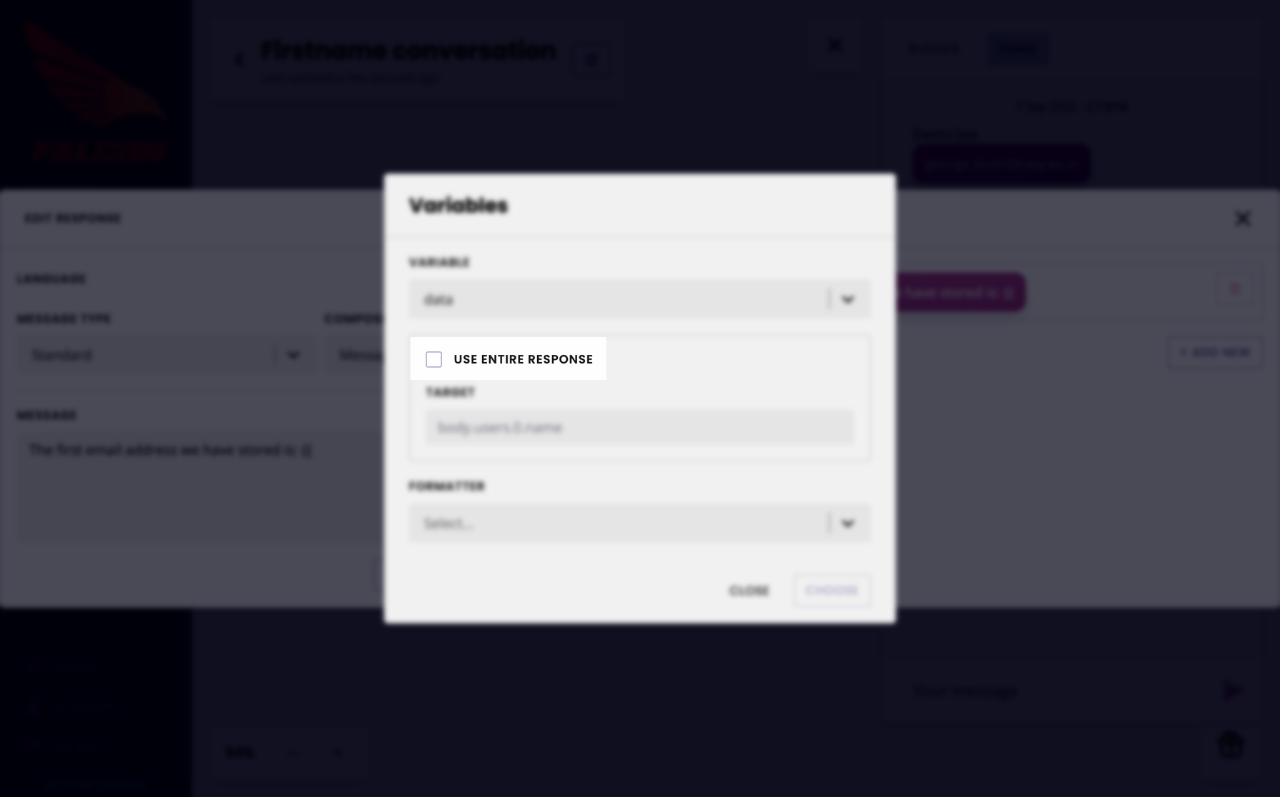
Type {{ to bring up the variable box.
In the search box, type Integration and select Data.
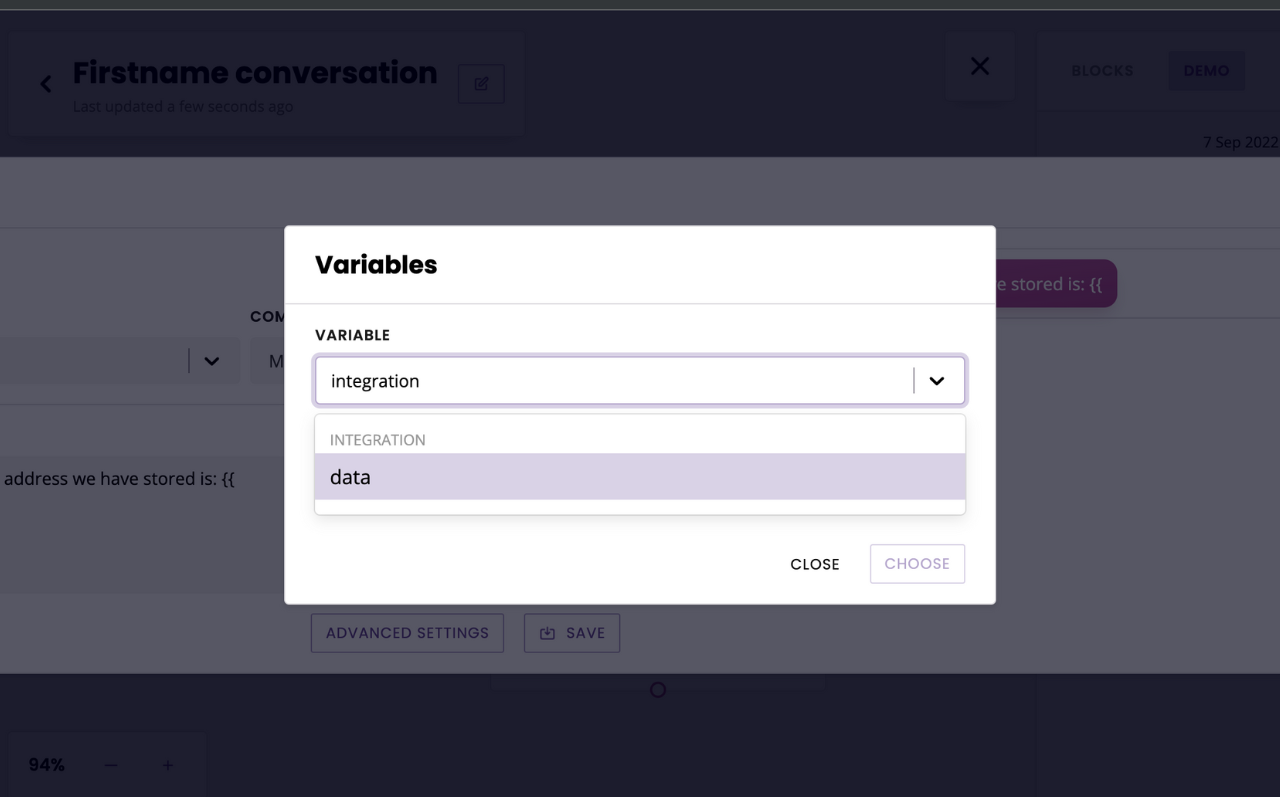
On this dialog box, you have the choice of returning the entire response or a specific target. As we know this integration will return an array, we obviously don’t want to return that whole thing; so we untick Use entire response.
This enables us to type in the Target field. A quick look at the array (pasted above) shows us email addresses are stored within data then email.
For simplicity, we’ll return the first email from the list. This gives us the following target:
data.0.email
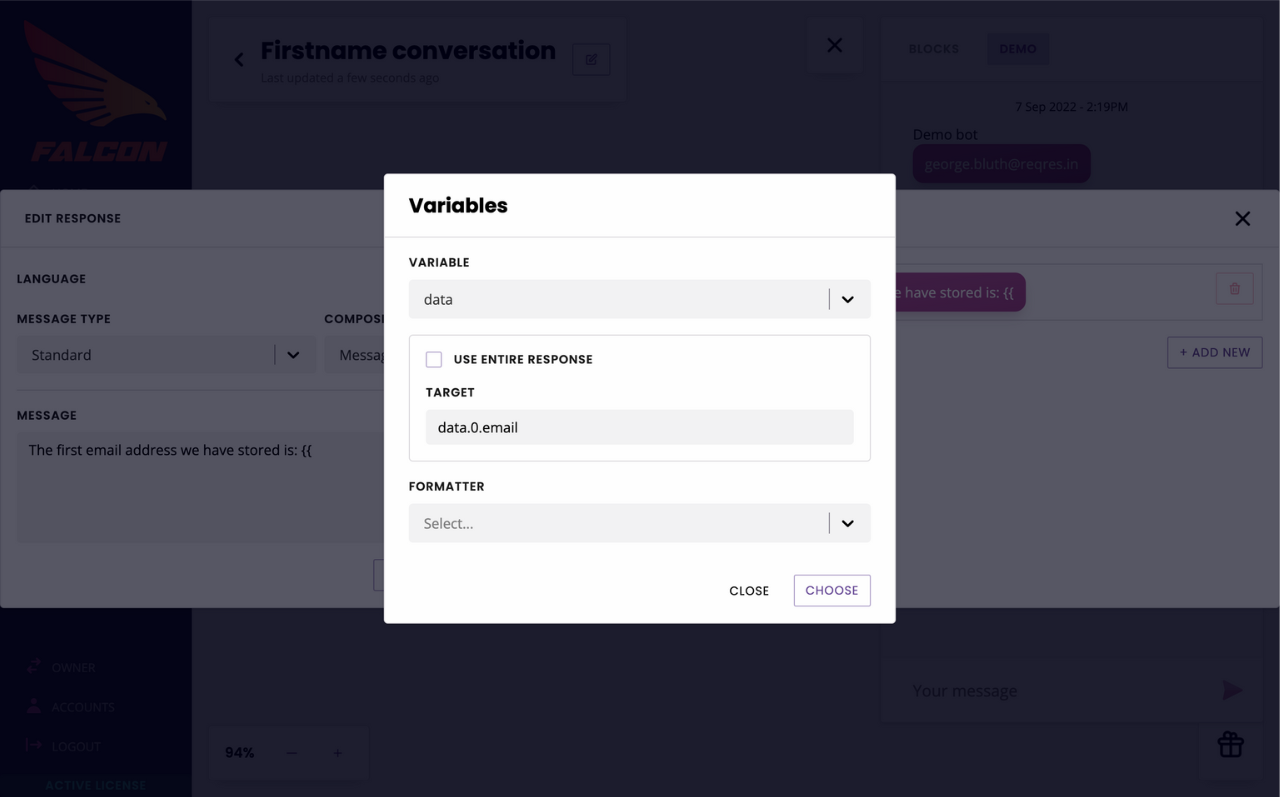
Click Choose.
Use the Formatters to change the format of the data returned from your API. Learn more.
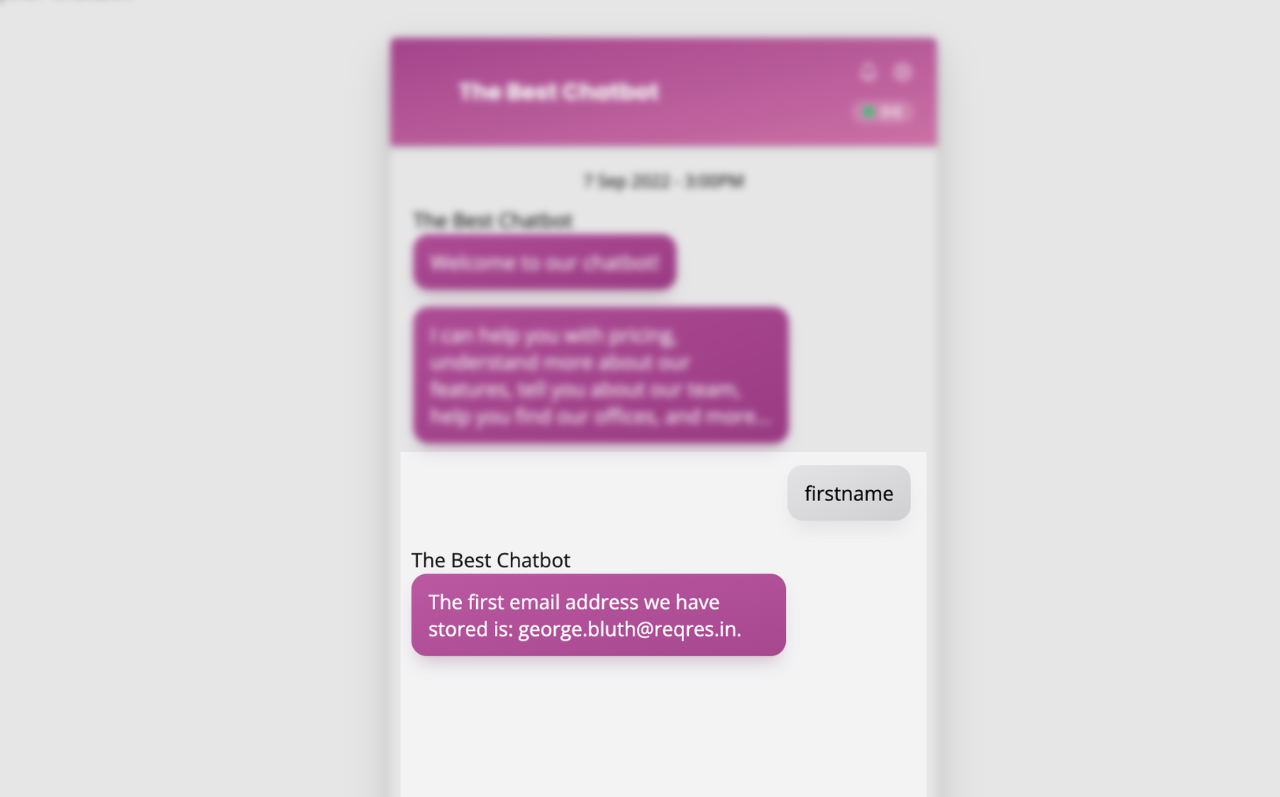
Your temporary variable is added to your chatbot copy. Go and test your chatbot. If you followed our example, it should return the first email address:
Tips and best practices
There are different ways to bring third-party data into your chatbot’s copy. Above is one solution. Another solution is to store the third-party data into a new variable on your platform. This solution is explained in more details here. The key difference between the two is what you’d like to do with this data after it’s been pulled. If it’s single use, the approach above is suitable. If you need to use this data for anything else, the other approach is best.
You can, of course, apply the process above to as many messages as you’d like on your platform. It would mean setting up the advanced settings on every single message every time.