
How to store an API response into a variable
Last updated: 20 May 2024
The most common use case for variables inside your chatbot platform is to collect data sent by your users to the chatbot. For example, you might create a variable called firstname, ask a user to tell you their name, and store it against that variable.
There are, however, more advanced ways of using variables.
In this tutorial, we will look at how you can store the response of an API call into a variable and use it inside a conversation. This variable can subsequently be used in other conversations, integrations, etc.
If you wish to only display a value returned from an API into a message copy once (and not use it anywhere else), you can do so using this simplified process: How to bring data from third-party software into a chatbot message.
Step 1: Create a conversation
Go to the Builder and create a new conversation.
Give it a name, a description, and a trigger. The trigger can be whatever you’d like; for example Message equals firstname.
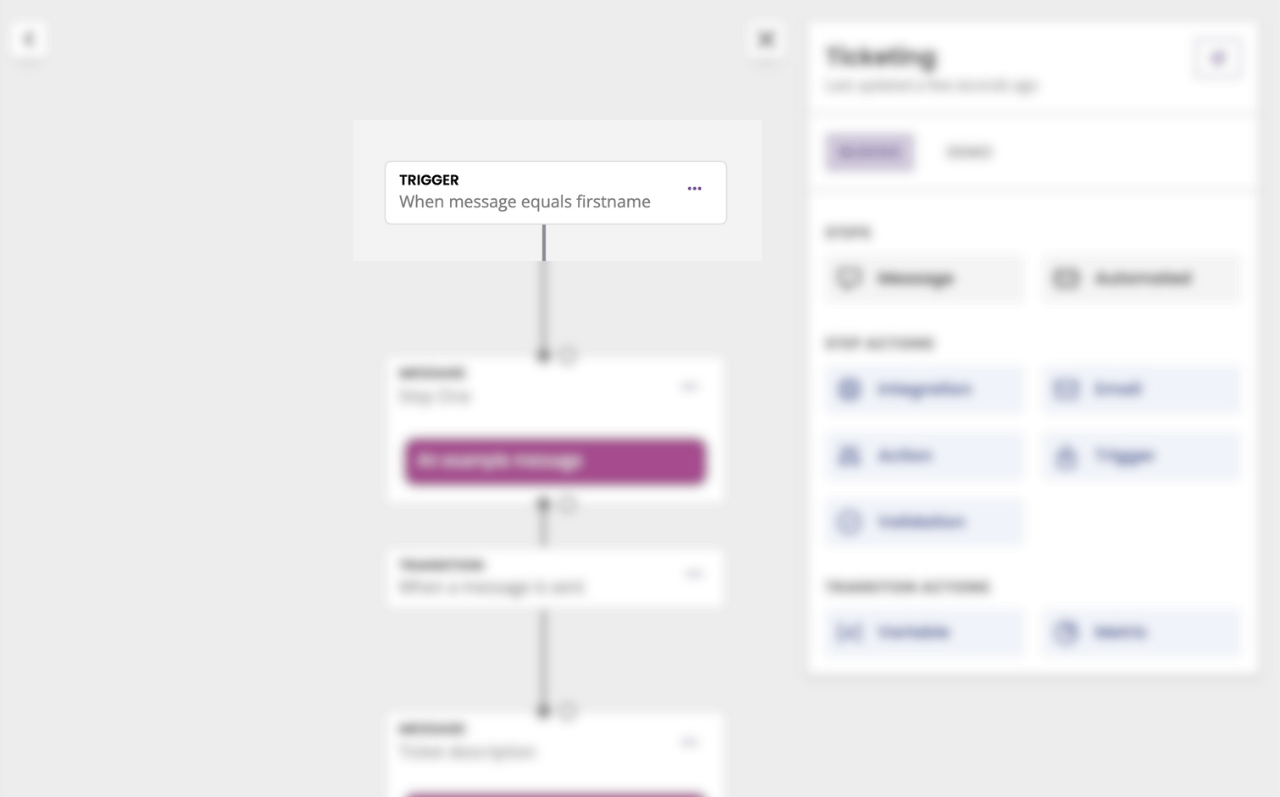
To return the value of an API response into a message, our conversation needs two steps. It is in transition between the two steps that we will perform the API call that will return the value.
In this scenario, we’re going to call an API to find and store a user’s first name into a variable on our platform. So, our two steps could be:
Confirm the user wants to pull the first name from the external database.
Display the first name back to the user.
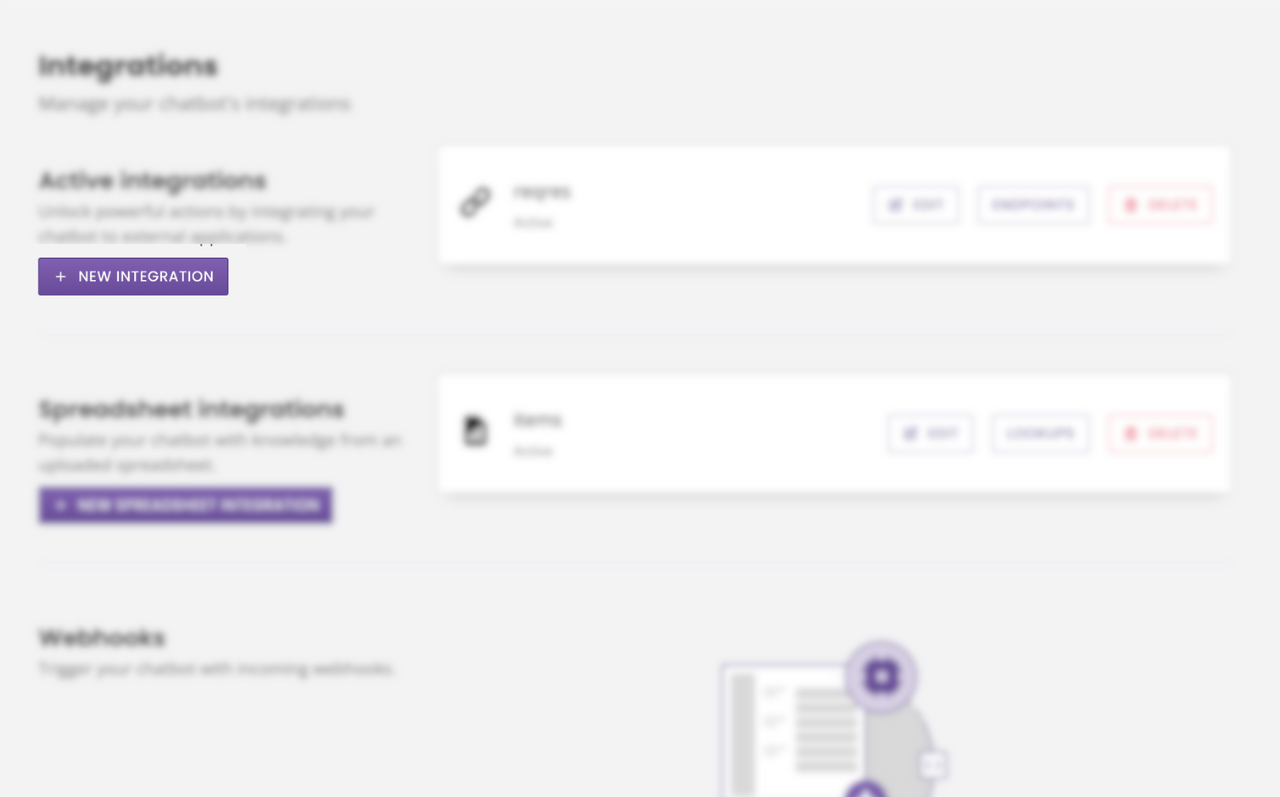
Step 2: Create an integration
For the purpose of this example, we’ll use the free API https://reqres.in. Of course, the same process will work using any API you may have available.
Reqres gives us access to an array of user information, including their ID, first name, last name, email address, etc. We’ll create an integration that returns that array; we don’t worry yet about targeting the specific information we need out of that array.
Go to Integrations. Under Active Integrations, click + New integration.
Integration details
Give your integration a name and a base URL. For Reqres, our base URL is https://reqres.in/api and we’re using a REST API. This integration requires no authorization and no headers.
Need more info on setting up an API integration? Read this doc.
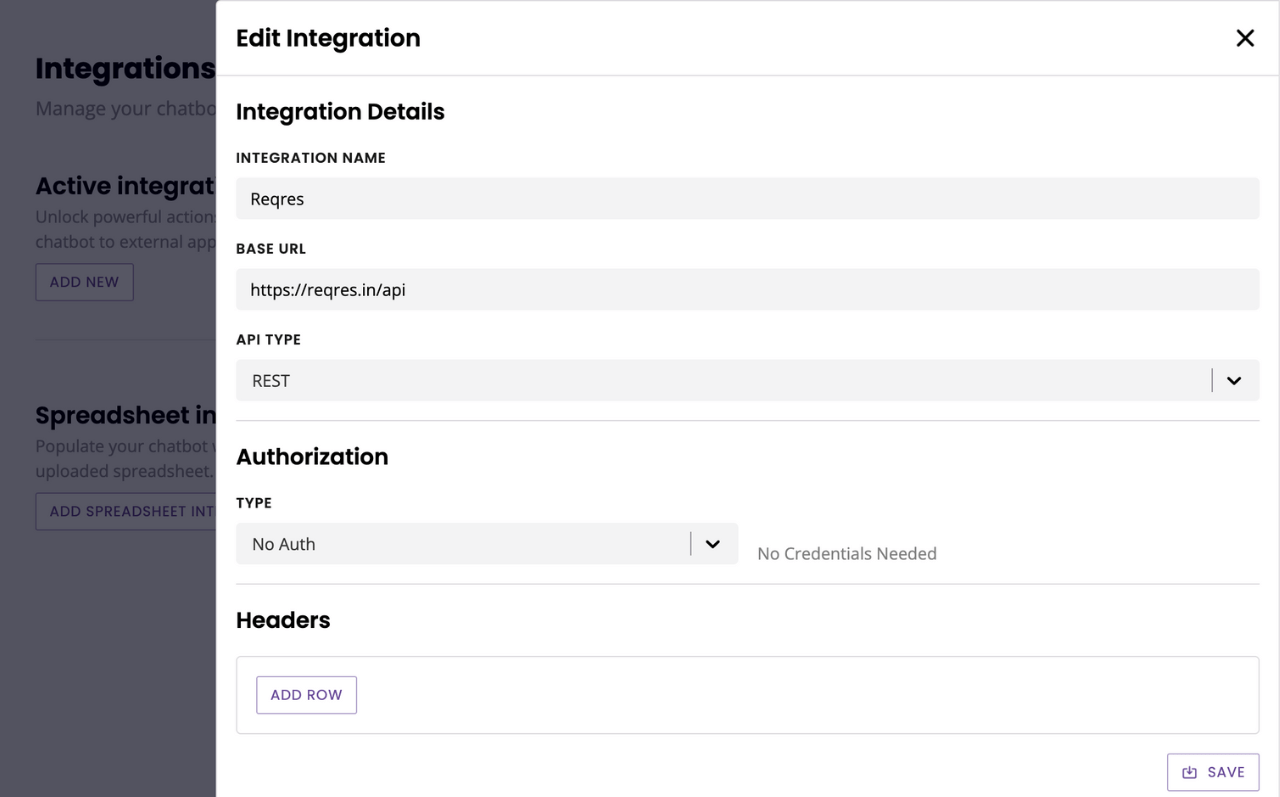
Hit Save.
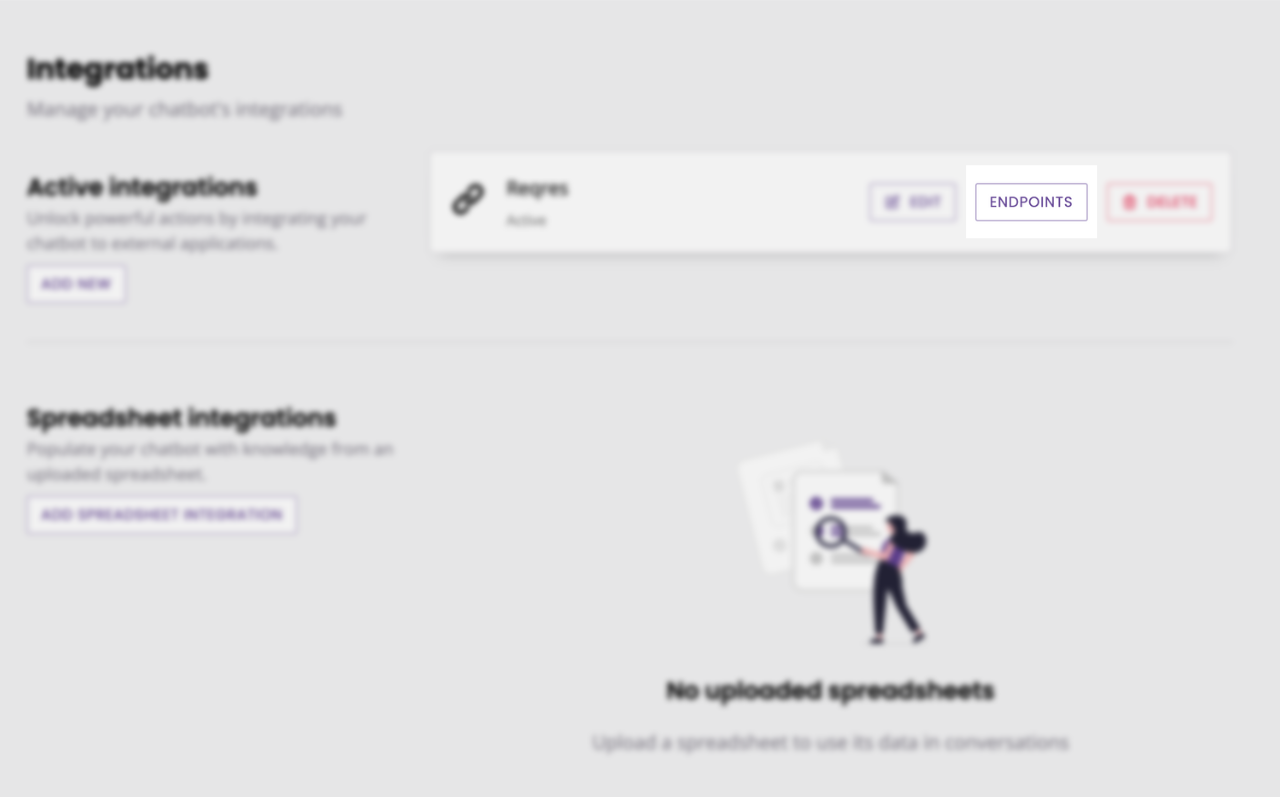
Endpoint
Your integration is now set up. All we need to do is create the endpoint.
On the Integrations page, click Endpoints.
Give your endpoint a name, a request type, and a target. In our example, we’ll simply target the array of users Reqres make available:
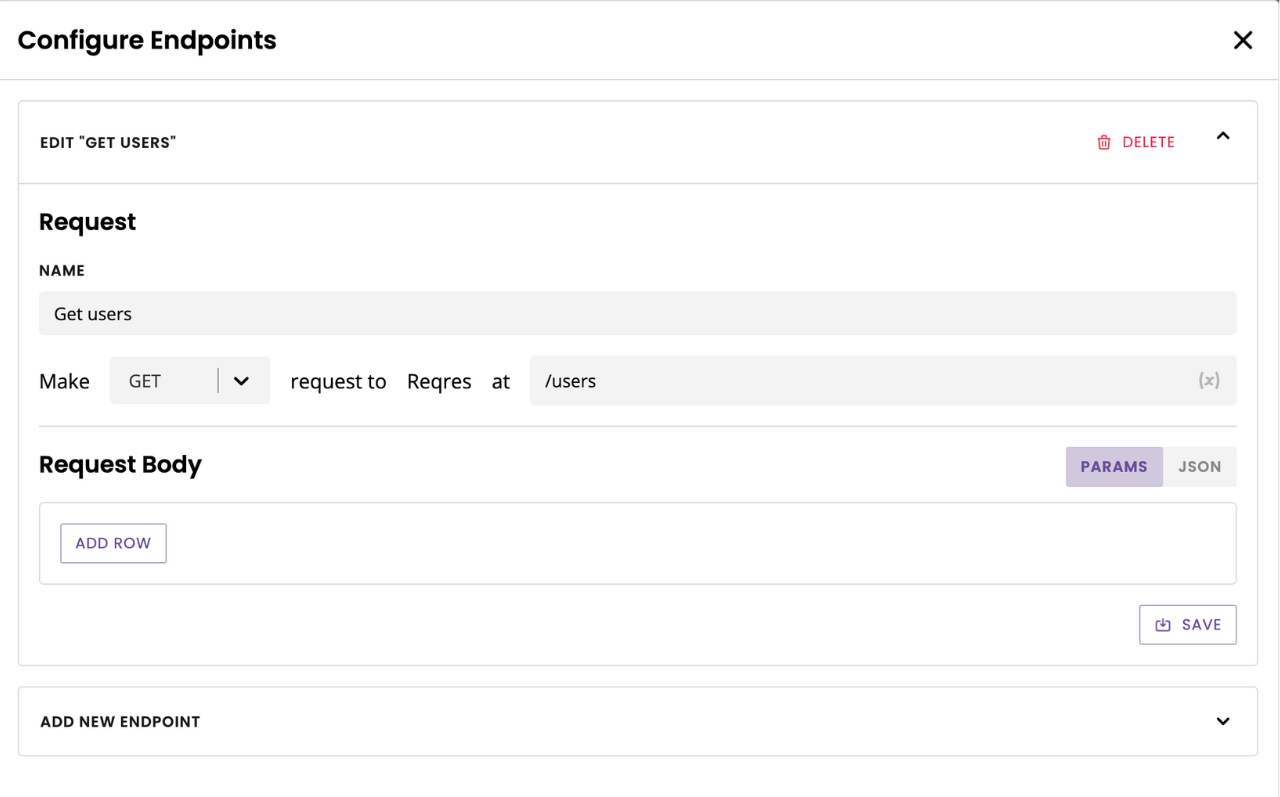
Hit Save.
This request will return this entire array:
{
    "page": 2,
    "per_page": 6,
    "total": 12,
    "total_pages": 2,
    "data": [
        {
            "id": 7,
            "email": "michael.lawson@reqres.in",
            "first_name": "Michael",
            "last_name": "Lawson",
            "avatar": "https://reqres.in/img/faces/7-image.jpg"
        },
        {
            "id": 8,
            "email": "lindsay.ferguson@reqres.in",
            "first_name": "Lindsay",
            "last_name": "Ferguson",
            "avatar": "https://reqres.in/img/faces/8-image.jpg"
        },
        {
            "id": 9,
            "email": "tobias.funke@reqres.in",
            "first_name": "Tobias",
            "last_name": "Funke",
            "avatar": "https://reqres.in/img/faces/9-image.jpg"
        },
        {
            "id": 10,
            "email": "byron.fields@reqres.in",
            "first_name": "Byron",
            "last_name": "Fields",
            "avatar": "https://reqres.in/img/faces/10-image.jpg"
        },
        {
            "id": 11,
            "email": "george.edwards@reqres.in",
            "first_name": "George",
            "last_name": "Edwards",
            "avatar": "https://reqres.in/img/faces/11-image.jpg"
        },
        {
            "id": 12,
            "email": "rachel.howell@reqres.in",
            "first_name": "Rachel",
            "last_name": "Howell",
            "avatar": "https://reqres.in/img/faces/12-image.jpg"
        }
    ],
    "support": {
        "url": "https://reqres.in/#support-heading",
        "text": "To keep ReqRes free, contributions towards server costs are appreciated!"
    }
}
Step 3: Create a variable
Now that we have an integration set up, we can create the variable that will eventually store the value we want returned from the integration.
Go to Settings → Variables. Click +Variable in the top right.
Give your variable a name. We’re going to store a first name from Reqres, so perhaps reqres_firstname will do.
Click Advanced Settings.
In the advanced settings is where we will tell the variable to go fetch the value from the API.
Select a variable type. For this example, we’ll store a first name so text will do.
Optionally, enter a default value. The default value would be returned in case the variable has not managed to store anything else. For this example, we know we’ll always return some value so we won’t enter a default value.
Pick a variable scope. Learn how to decide if you need a Subscriber or Account scope. For this example, we’ll use a subscriber scope.
Select a data type. We’ll of course pick Store API response with:
our Reqres integration, and,
our Reqres endpoint.
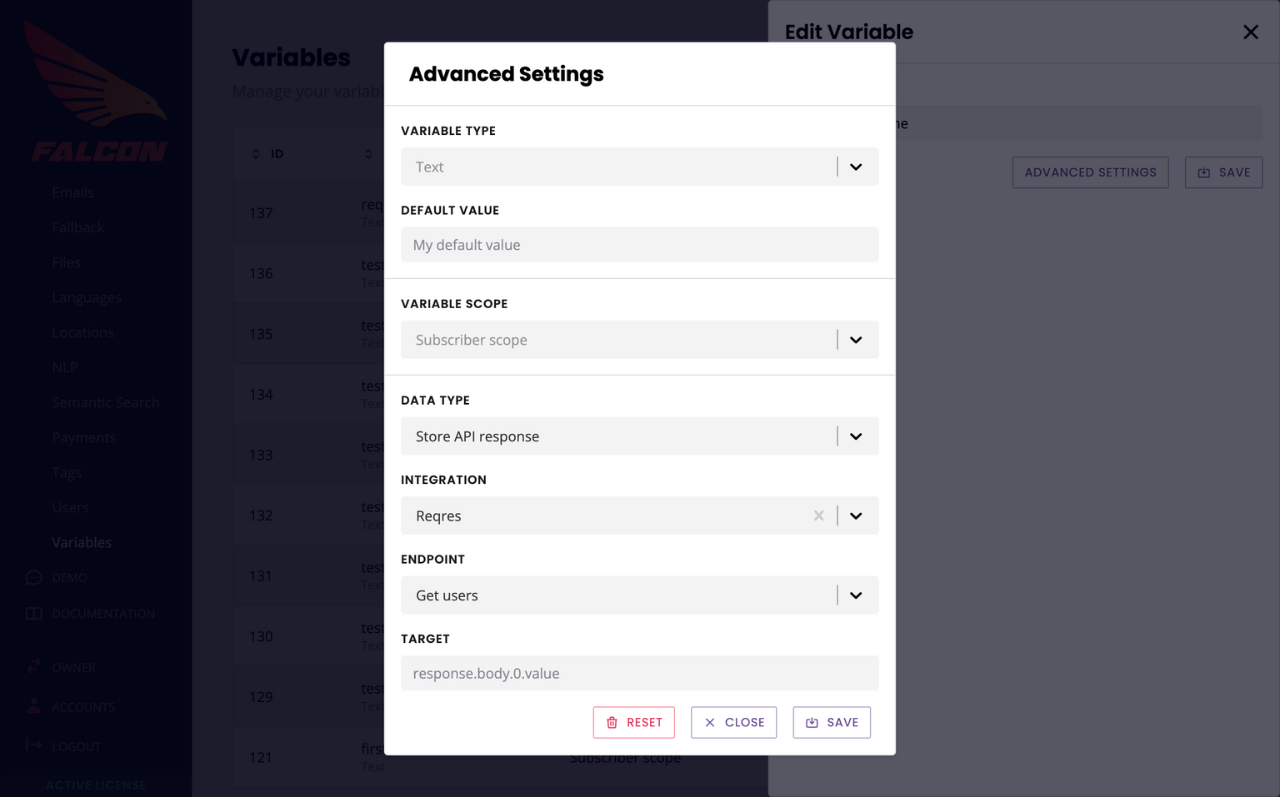
Finally, we need to enter our target; which part of the array response we’ll get from the API call we want to return. This field uses the standard array conventions, including zero-indexing.
A quick look at the array (pasted above) shows us first names are stored within data then first_name.
For simplicity, we’ll return the first first name of the list. This gives us the following target:
data.0.first_name
Remember: you must adapt your target to the API response you are using. data.0. in this example only works because the API response follows this specific sequence of arrays and values.
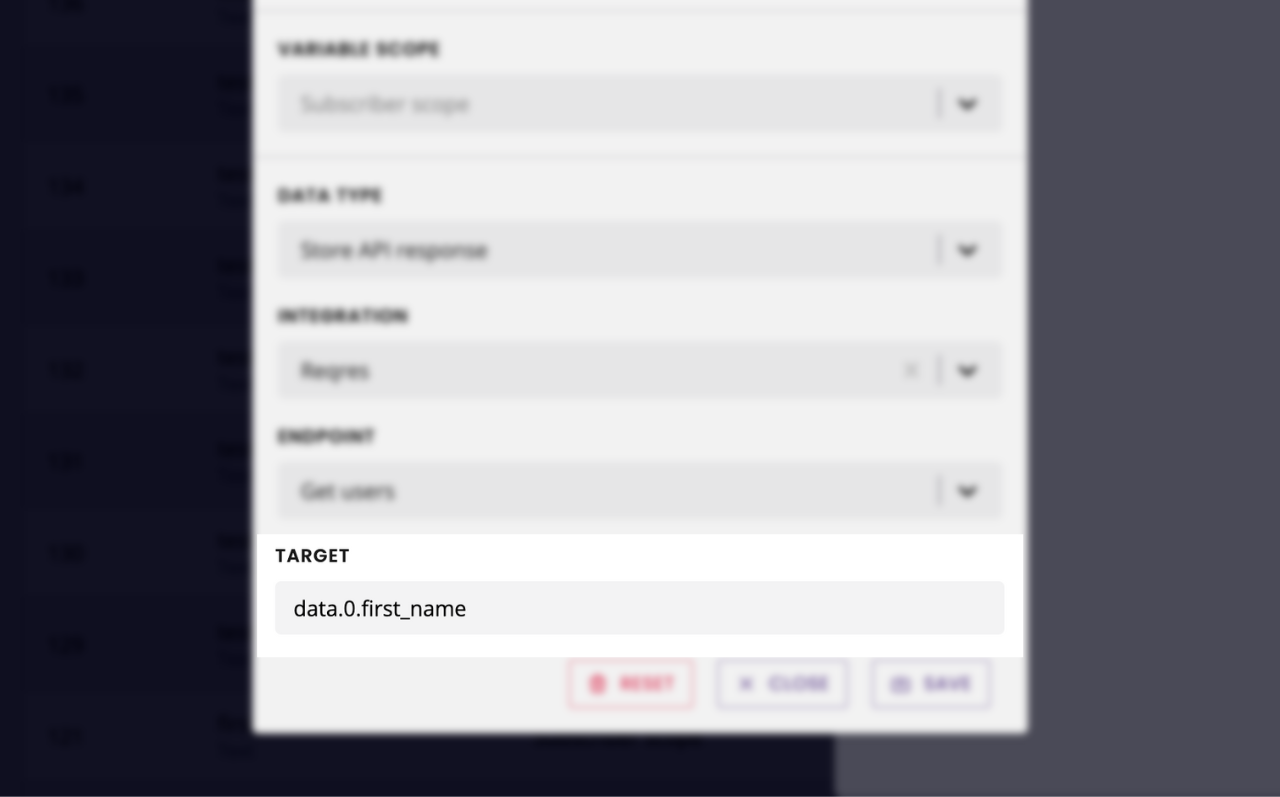
Hit Save.
Step 4: Store your variable in transition
We’ve got an integration. We’re calling the integration inside a variable. Time to action all this inside the conversation.
Go back to the Builder and find your conversation.
In transition between step one and two, drag and drop your new firstname variable.
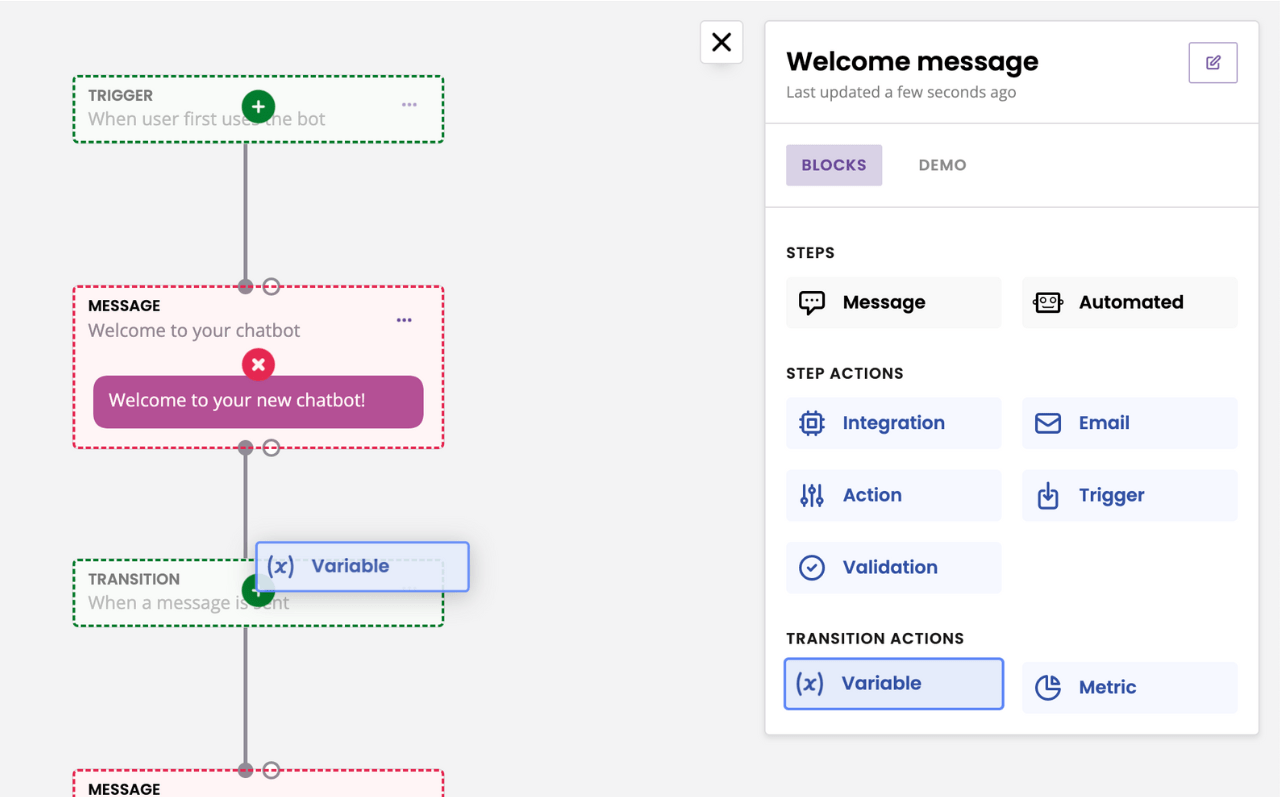
Why in transition?
For the piece of data to be stored inside your variable from the API call, we need the API call to trigger. To do so, your variable must be added into transition between two steps. As the user transitions from step one to step two:
The variable is called, which,
Calls the API, which,
Returns the value from the API call, which,
Stores the value inside the variable.
What we then get is our platform variable firstname populated with the response from the API call.
Step 5: Display the variable in message
Now that all the pieces are put together, we can display the result into a message.
On the second step of the conversation, click the three dots and Edit message.
In the body of the message, enter your firstname variable.
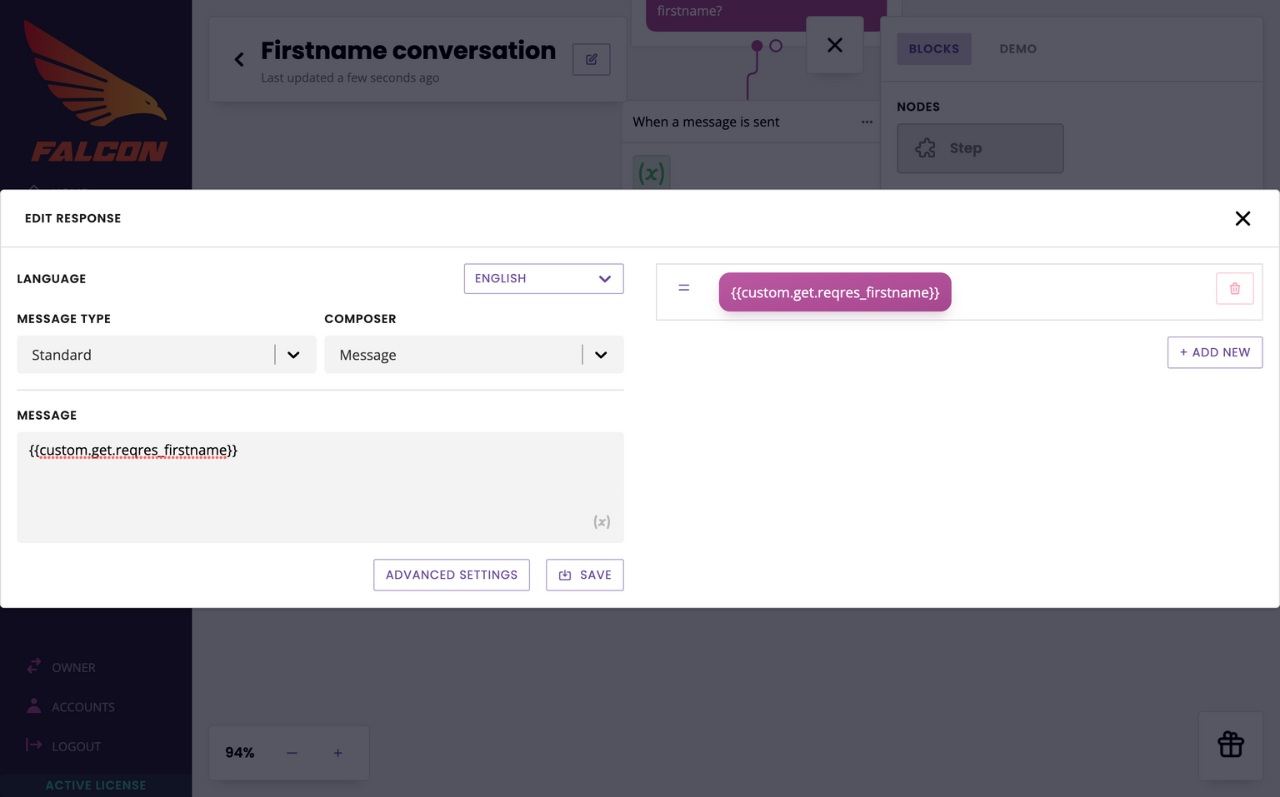
Hit Save.
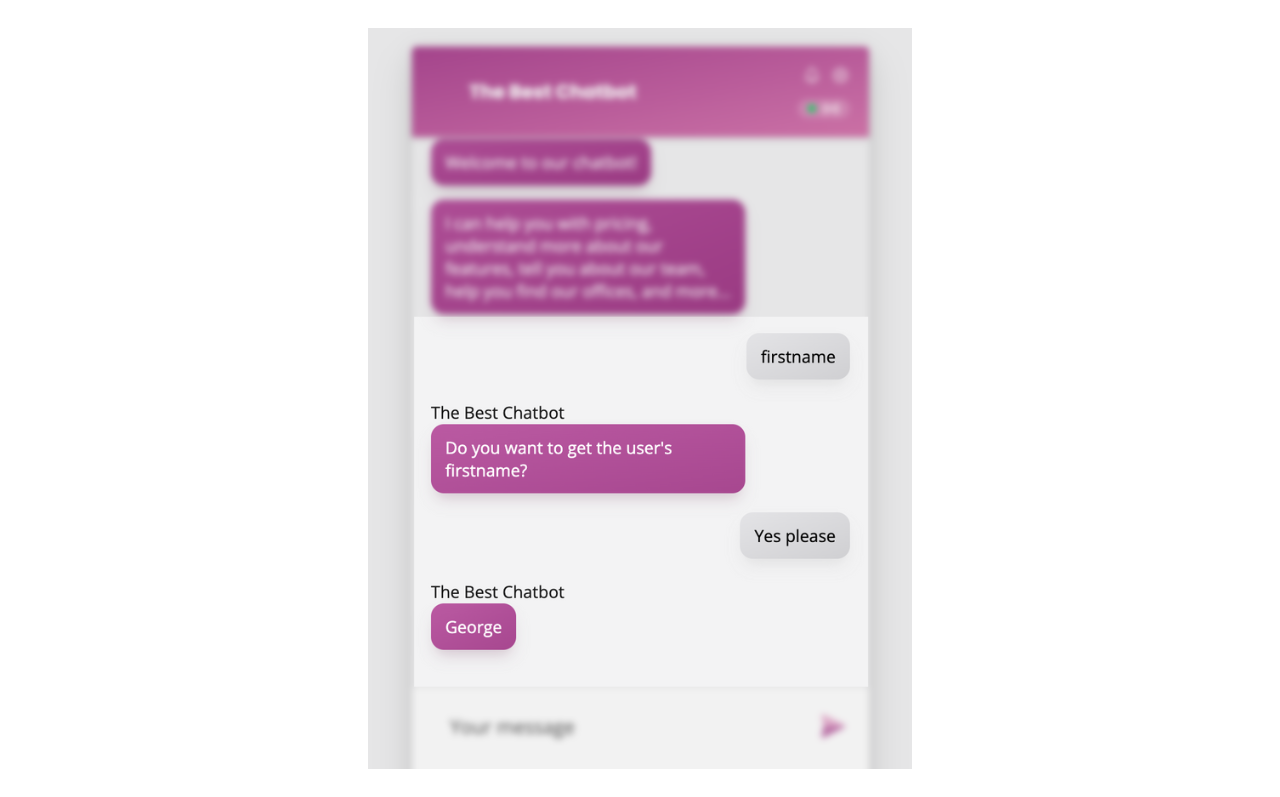
Go and test your conversation. Following our example, it should return the first first name of the array:
Tips and best practices
You can use your new variable anywhere you’d like, once it has been populated with the data. It’s important the variable is first populated (following the steps above), but once it has you can use it inside buttons, any message types, or even integrations.
If you only want to use the data once in a message copy and nowhere else, consider simply bringing the data into your chatbot copy instead of storing it into a variable. Here’s how.
The variable must be stored in transition between two steps. You cannot set it up inside the trigger, it will not work.
It is helpful to follow a naming convention for your variables, to help you differentiate those that contain third-party data from the others. A good example is to add the name of the integration at the start of the variable name, for example
reqres_firstnameorhubspot_email.Need to store a boolean value instead of a string? No problem! When creating your variable and editing its advanced settings, select
True or Falseas the variable type.