
How to create an efficient Alexa chatbot
Last updated: 20 July 2022
Building voice chatbot is a different beast. Even if you’ve had a lot of experience building text chatbot before, creating an efficient and user-friendly voice experience requires a bit of a mind shift.
Below are, in no particular order, a set of best practices to building an Alexa chatbot.
1. Understand the ‘Listening’ action
A key way in which an Alexa chatbot differs from any other text-based chatbot is the ‘listening’ interaction.
When a user engages with a regular text-based chatbot, the chatbot is always on ‘listen’ mode. If the user leaves the conversation and comes back and types again, the chatbot is still geared to understand it and respond.
With voice bots, things are a little different.
Alexa devices are not authorised to keep listening past a certain delay. You can see that by triggering your Alexa and then not saying anything. Eventually, it will stop listening.
This ‘listening’ interaction is incredibly important. It ensures the device doesn’t invade on the user’s privacy. Indeed, if it was constantly listening it would hear and log every interaction happening around the device – not good.
When building your Alexa chatbot, it’s extremely important to know where Alexa should keep listening and where it should stop. By default, Alexa will automatically close its microphone after sending a message unless you programme it otherwise. To keep Alexa listening, use the Listen for response on Alexa action:
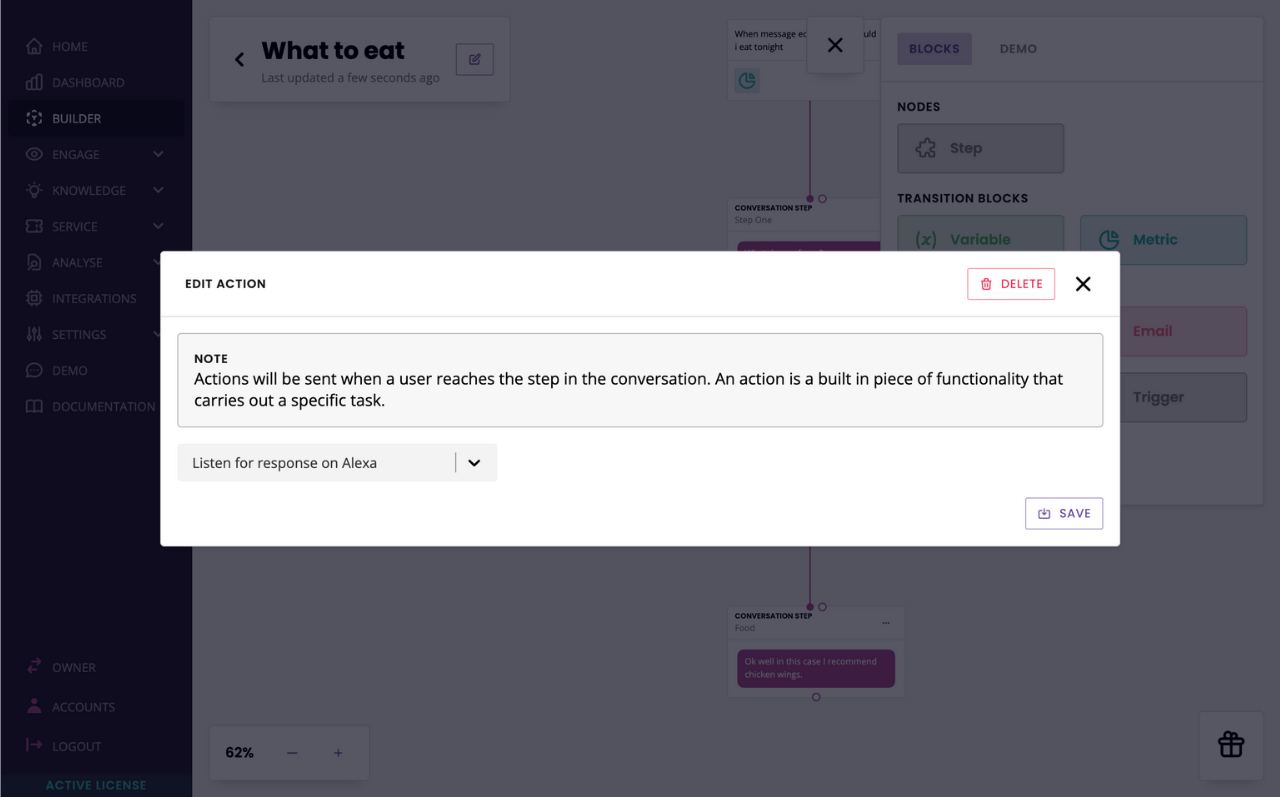
Amazon impose a strict listening rule: your skill may only continue listening if the last message sent by the chatbot was a question. Anything else, the skill must stop listening immediately.
There are legal implications to setting this up the wrong way. This is why, in our platform, we’ve taken the defensive approach of automatically closing the microphone unless you tie the action to the step.
If a user doesn’t respond to Alexa’s question and you have the action set up, your chatbot will re-prompt the user with the same question. Re-prompting will only happen once, after which if the user still doesn’t respond your Alexa chatbot will shut down.
2. Make good use of the three required conversation flows
As you set up your Alexa skill, you are required to create three conversations:
Launch conversation
Stop conversation
Help conversation
It is good practice to make extensive use of these three flows. While you are obligated to create them, you can dictate what each experience looks like.
In the launch conversation, make sure you introduce the skill and what it can do.
In the help conversation, make sure you go through a few examples your users might find handy. Perhaps even expand the conversation beyond that and get to learn the user.
In the stop conversation, make use of the goodbye message to encourage the user to comeback. Just don’t expand on this conversation; the skill will automatically close after the one message.
3. Check message compatibility
This is a good practice for any channel, though even more so for voice.
Go to our message compatibility page. Discover which message types are compatible with Alexa devices and which are not.
As you build your chatbot, make sure you only use compatible message types.
4. Set up a unique license for your Alexa chatbot
Your chatbot platform allows you to create one chatbot and deploy it across multiple channels.
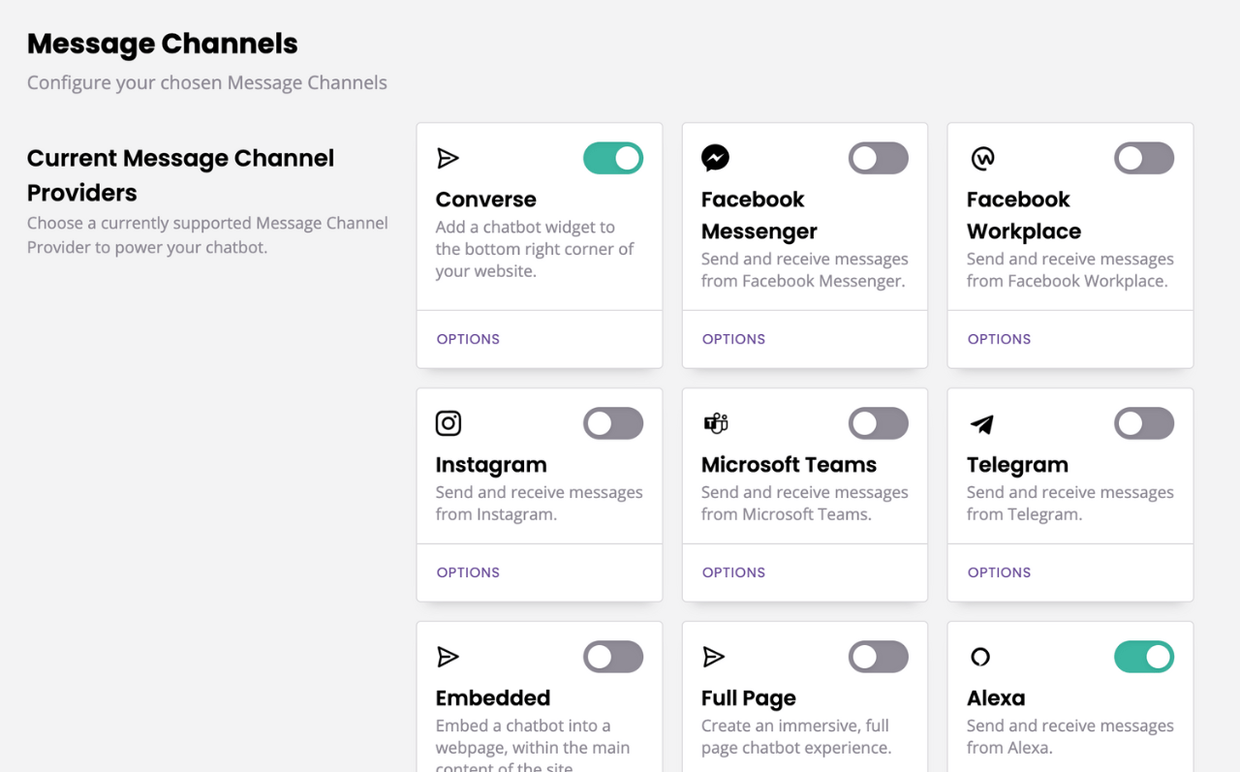
While you can, theoretically, create a chatbot and turn it onto Alexa, Facebook Messenger, and full page at the same time, we wouldn’t recommend it. Voice chatbots are so different from text-based bots that you would end up having to create a very stripped back experience for it to work across all three channels at the same time.
We recommend creating a separate account with its own license for your Alexa chatbot.
5. One message per step (or FAQ answer)
While the platform allows you to add multiple messages on a step or FAQ answer, Alexa will only ever read the first one.
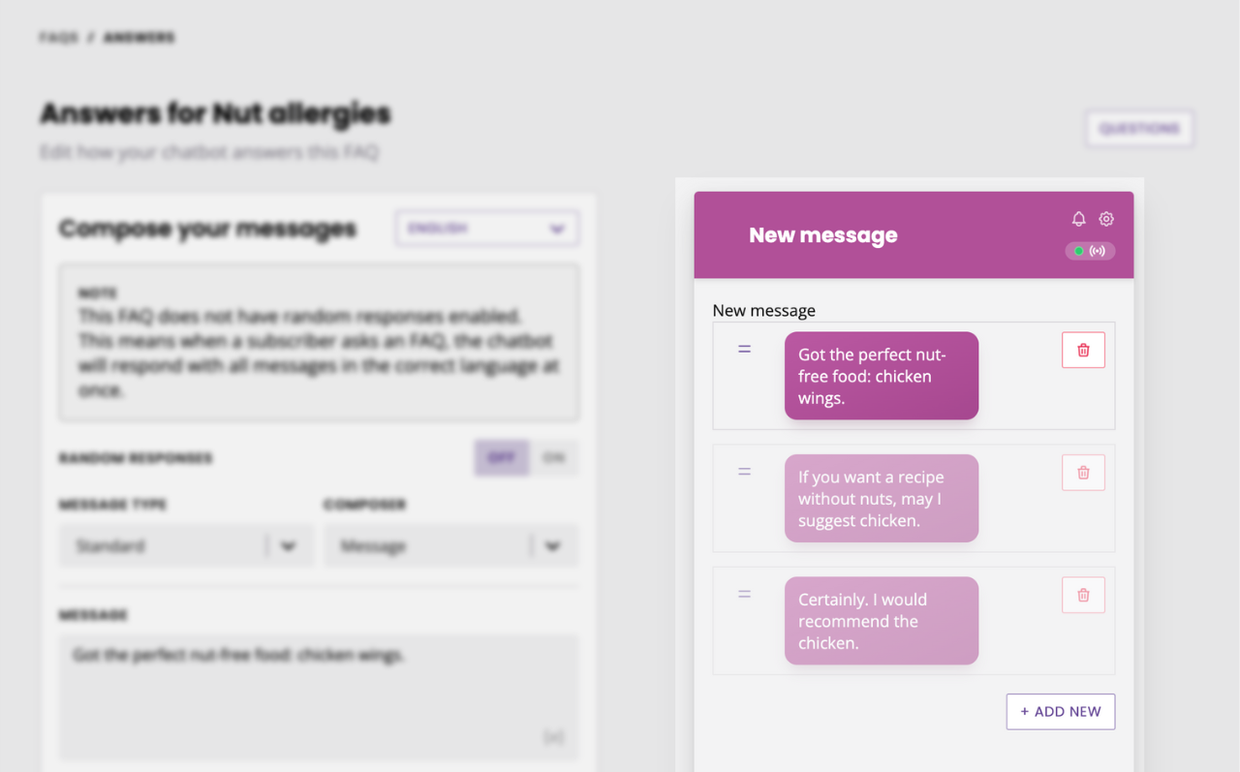
In this example of an FAQ, Alexa would only read out the first message.
6. Avoid buttons
As is evident in the message type compatibility table, Alexa doesn’t do very well with buttons. And it’s no wonder, since it’s a voice-based interaction.
Voice devices that include screens are more and more common, such as the Alexa Show. While we are slowly rolling out compatibility improvements with those devices (which give users the ability to tap buttons on the screen), the best practice is to build for screen-less devices primarily.
7. Test with an Alexa device
Testing your chatbot is an important part of the building process. With an Alexa chatbot, it’s important to test the chatbot in real-life setting; i.e. with an actual Alexa device.
Sure, you can test your chatbot by typing inside the console or even using the text-based demo inside your platform. But nothing will compare to testing with a real device.
Learn how to set up Alexa for testing.
8. Remove flows you don’t need
Each account comes loaded with built-in conversations. These conversations handle things like FAQs, human fallback, feedback gathering, and more.
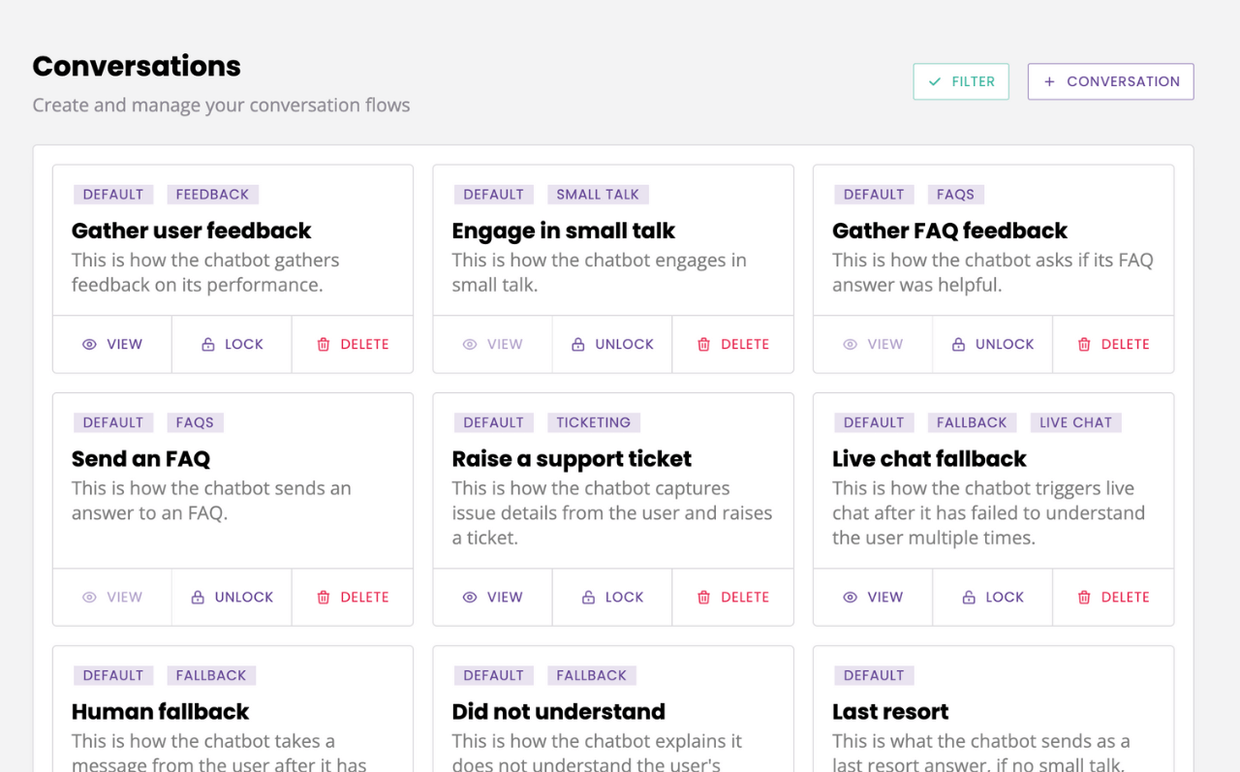
Many of these conversations will be irrelevant for your Alexa chatbot.
We recommend deleting the built-in conversations you know you won’t use. This will clear the space and help prevent contradicting triggers.
Need any help building your Alexa chatbot? Contact your account manager, they’ll be happy to help!