
How to display a different message based on the chatbot's page URL
Last updated: 02 May 2023
This tutorial will only work for platform-owned channels: Converse, Embedded, and Full page.
This is a 2-for-1 tutorial.
The first part covers how to get your chatbot to display a different message based on its page URL in the scenario where you use the Converse channel.
The second part covers how to do this if you are using the Embedded or Full page channel.
The scenario
You’ve built an excellent chatbot and proudly add it to your website.
It’s got a warm, inviting welcome message that triggers the first time someone opens your chatbot, but…
Well, your welcome message needs to work across all the pages of your website. That’s a lot of pages covering very different topics. Because your chatbot needs to cover all the bases, its welcome message is quite bland.
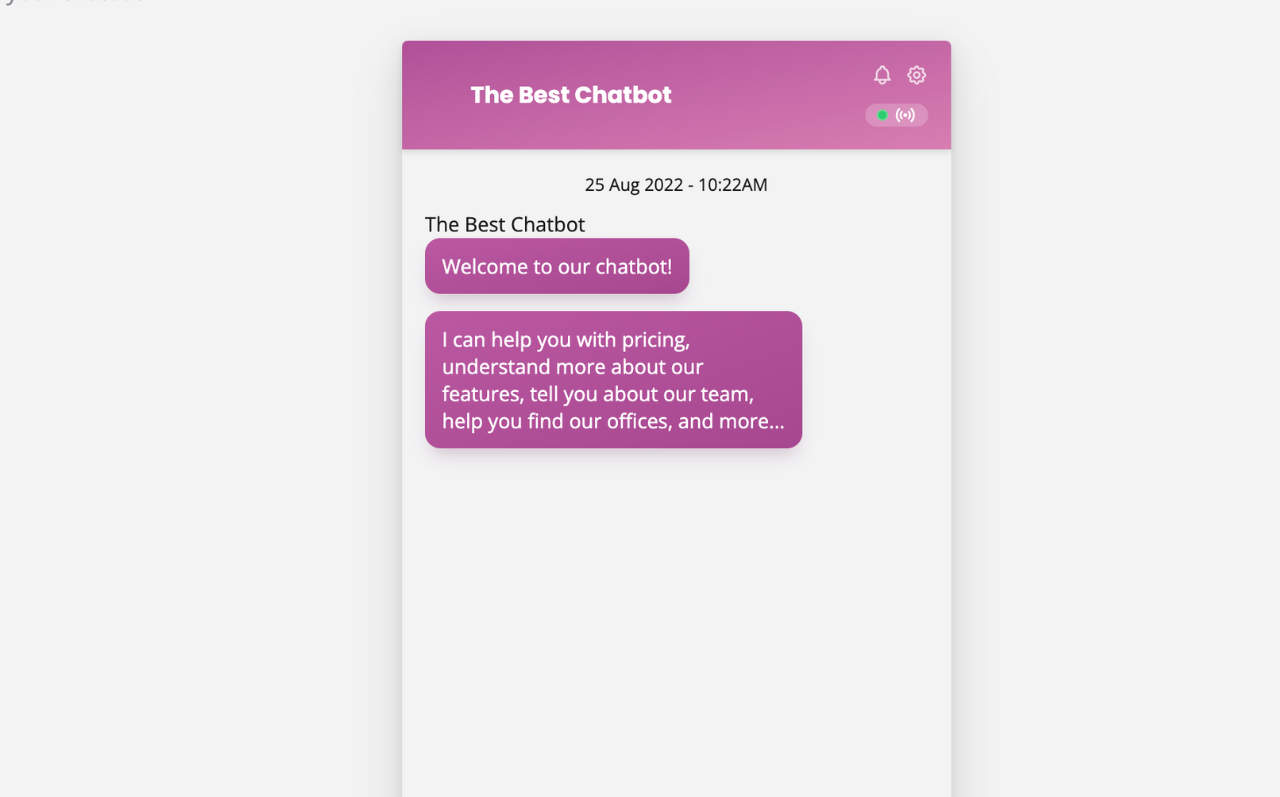
So, you’ve got an idea: what if I presented a custom welcome message to my users if they land on our pricing page (example.com/pricing)?
This tutorial will teach you how to do exactly that.
Part 1: Converse
If you are using the Embedded or Full page channels, refer to part 2.
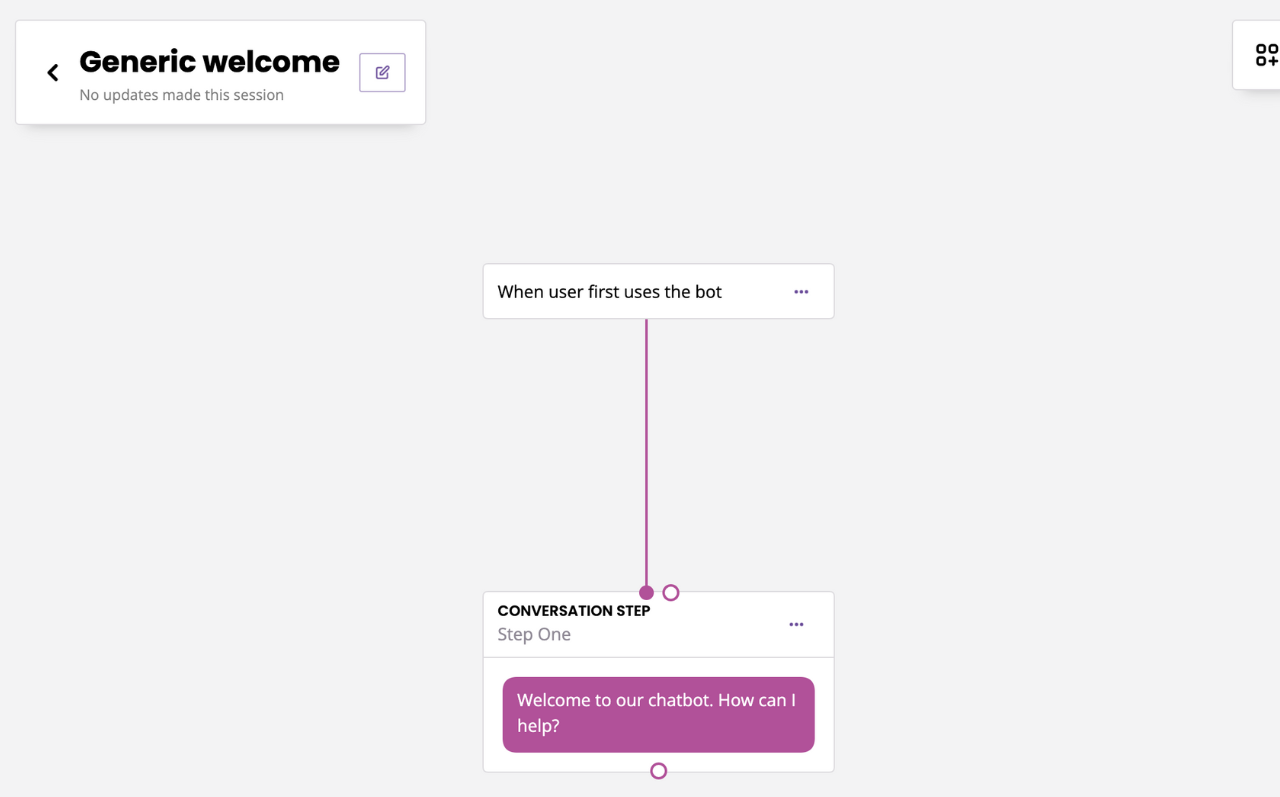
Step 1: Create your generic welcome conversation
Go to the Builder.
Create a new conversation (or edit your existing welcome conversation).
As the trigger, use When user first uses the bot.
Edit your first message and write your copy. Make this version generic enough to work on most pages. Hit Save for now, we will come back to edit this conversation in a minute.
Step 2: Create your custom welcome conversation
Stay in the Builder and create a new conversation.
As the trigger, use When user first uses the bot AND Page URL ends with /pricing .
Hit Save and edit your first message. Write the copy you would like your users to see when they open your chatbot on your pricing page.
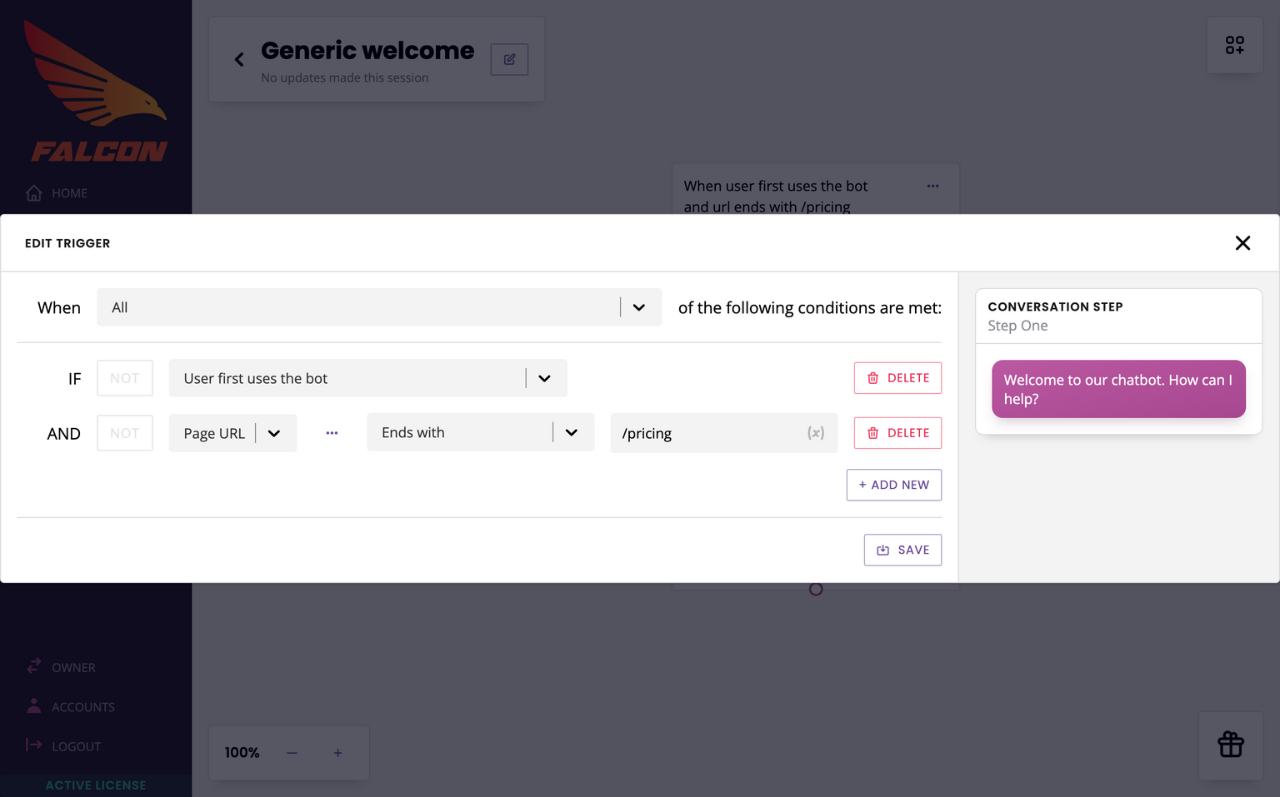
You can make clever use of the events inside the Page URL trigger. For example, here we use ends with but you can also use equals, starts with, contains, etc.
Step 3: Edit your generic conversation
Now that we’ve created our new custom conversation, we need to let our original generic conversation know NOT to trigger if the user is NOT on /pricing.
Easy as pie.
Edit your generic conversation.
Edit the trigger to When user first uses the bot AND NOT Page URL ends with /pricing.

Hit Save.
All done! Make sure you read our tips below before you go.
Part 2: Embedded or Full page
If you are using the Embedded or Full page channels, setting this up is a little bit different.
Why? (Skip if not interested)
The Converse channel is a widget placed on your website. The widget itself is URL-aware, meaning whenever a user talks to the widget, the widget knows which page this interaction is happening on.
The Full page and Embedded channels however are wrapped in iframes. These iframes ‘section off’ the chatbot from the page they’re on, meaning it doesn’t know which page it is on as it’s being used.
There are many ways to set this up using our platform. Below is the most straight-forward. If you need more flexibility or help setting a more complex version of this up, please reach out to your account manager.
For the purpose of this tutorial, let’s imagine you are using the Embedded channel. It works the same way using the Full page channel.
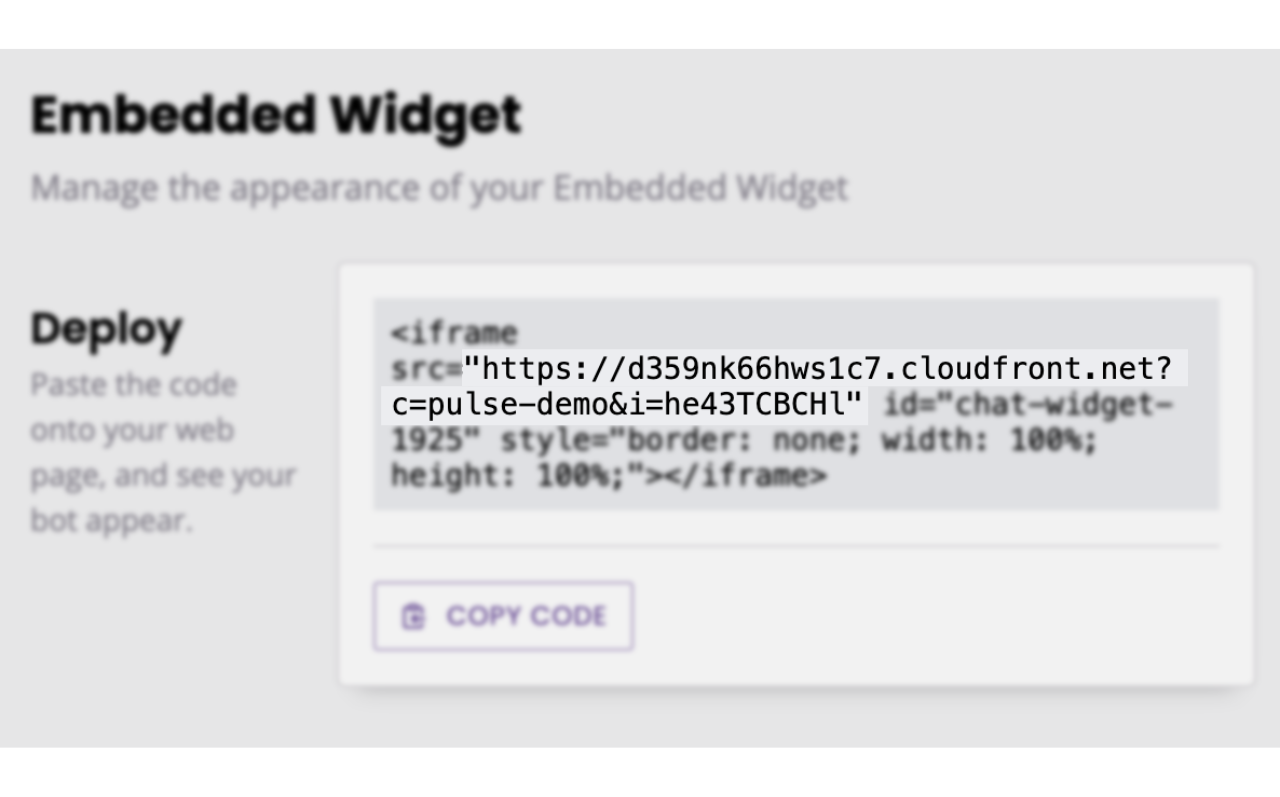
Step 1: Add a custom parameter to your chatbot script
If you are unfamiliar with this, read this tutorial: Add custom parameters to your chatbot script
This will be our example Embedded script:
<iframe src="https://embed.website.io?c=bots&i=2z3kNZy9Yo" id="chat-widget-1925" style="border: none; width: 100%; height: 100%;"></iframe>
Your custom parameter can be whatever you want it to be. We will use it to identify which page the chatbot is on, so we recommend using a consistent and evident naming convention.
For this example, we’ll imagine we’re setting up this chatbot on multiple landing pages. We’re going to call our parameter lp (for landing page).
For the attribute, again, make sure you use a consistent convention. Because we’re using this for landing pages, we will use a unique identifier that relates to the different landing pages we’re setting up. Let’s say we’ve got a blue and a red landing page.
We’ll produce two Embedded script (one for each page):
Blue:
<iframe src="https://embed.website.io?c=bots&i=2z3kNZy9Yo&lp=blue" id="chat-widget-1925" style="border: none; width: 100%; height: 100%;"></iframe>
Red:
<iframe src="https://embed.website.io?c=bots&i=2z3kNZy9Yo&lp=red" id="chat-widget-1925" style="border: none; width: 100%; height: 100%;"></iframe>
Step 2: Add your scripts to the pages
Simply add your scripts to the appropriate pages (blue with blue, red with red). To learn how to do this, please read the following doc: Add an embedded chatbot to your website
Step 3: Create your first welcome conversation
Go to the Builder.
Create a new conversation; we will start with the conversation that will trigger on the red page.
As trigger, use: When user first uses the bot AND Variable {{account.chatbot_url}} contains lp=red.
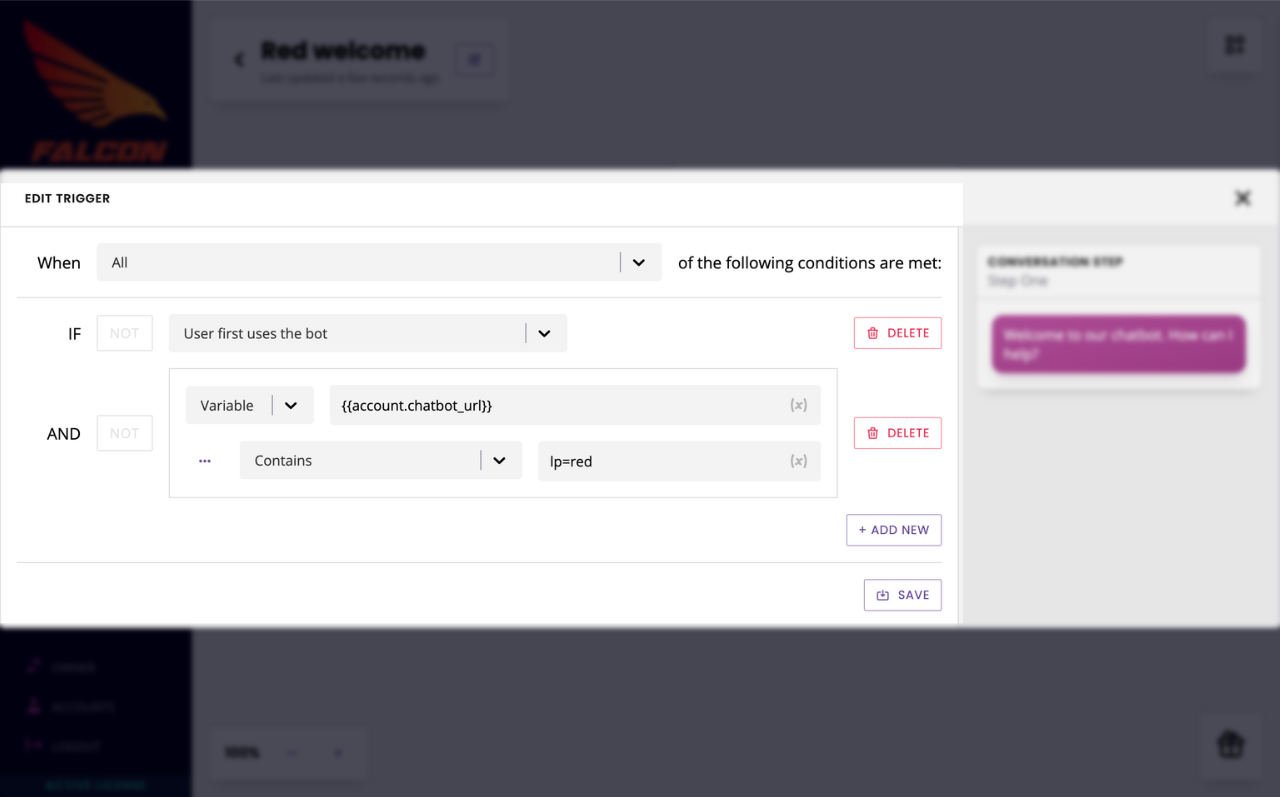
This does two things:
It ensures the conversation triggers for new chatbot users.
It checks the chatbot URL (in this case
https://embed.website.io?c=bots&i=2z3kNZy9Yo&lp=red) for thelp=red. If it finds a match, it will trigger this conversation.
You can now edit your first message and write your red chatbot copy.
Why? (Skip if not interested)
As mentioned earlier, Embedded and Full page chatbots don’t know which page they’re on. This is why we can’t use the Page URL conditional we used for Converse. Instead, we use Chatbot URL, which is the actual URL of the chatbot, not the URL on which the chatbot is hosted.
In the case of an Embedded (and Full page) chatbot, the Chatbot URL is inside its script.
Step 4: Create your second welcome conversation
As you may have expected, we need to perform the same tasks for the blue conversation. Follow the exact same steps, except instead of lp=red make sure you enter lp=blue.

Step 5: Avoid conflicts
We now have two conversations, one for each landing page.
The final step of this process ensures there will be no ambiguity when it comes to loading the right conversation. We have, so far, used Chatbot URL contains lp=[colour]. To strengthen this, we will also add on each trigger that Chatbot URL does not contain lp=[other colour].
Open your blue conversation.
Add a new trigger below the existing two (make sure they’re AND) and enter NOT {{account.chatbot_url}} contains lp=red.
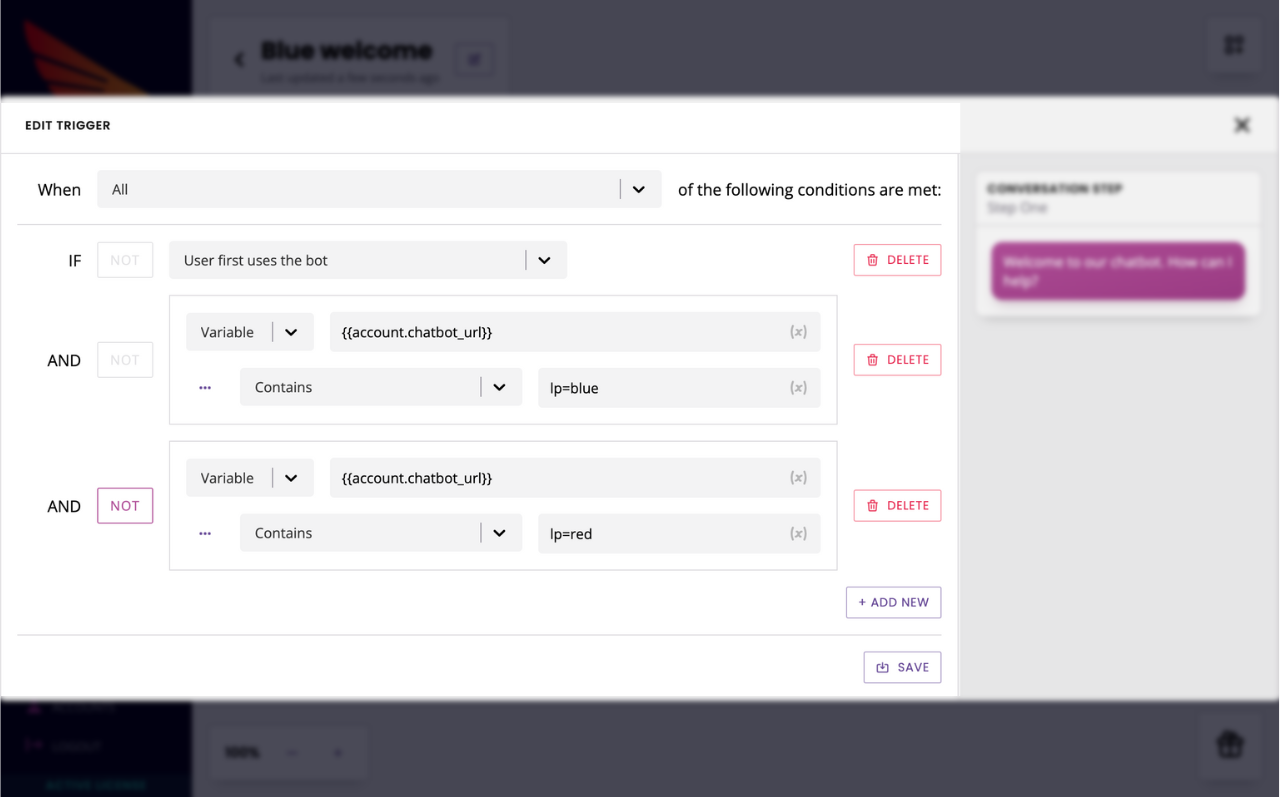
Save, and do the same for the other conversation.
All done!
FAQs
Can I use this technique to trigger different conversations based on URL?
Absolutely! Both the approaches above can be used to trigger a conversation based on the page URL. All you need to do is carry on building your conversation after the trigger point.