
Grab Amazon Alexa user information with an integration
Last updated: 05 December 2023
Amazon Alexa devices store a myriad of information about their users, such as their name, location, email address, and so on. As you publish your Alexa chatbot, you can (assuming you have the right permissions turned on) tap into this information to enhance your chatbot experience.
While grabbing this information from the device themselves, i.e. automatically instead of asking the user, requires a bit of work. Follow the steps closely and you’ll be done in no time.
We’re going to rely on Amazon Alexa documentation to make this work within your chatbot platform. If you need more help from Amazon, read their developer docs here: https://developer.amazon.com/en-US/docs/alexa/custom-skills/request-customer-contact-information-for-use-in-your-skill.html.
Our team is also available to create the exact experience you need. Contact your account manager for help.
Step 1: Create your Alexa chatbot
The first step is obvious: you need a chatbot. If you aren’t set up yet, please read the following docs in that order:
All done? Great!
Step 2: Turn on the right permissions
For obvious privacy reasons, you can’t simply go and grab any user information you’d like without asking for their permissions first.
If you don’t want to grab any personal information from your users, you can simply notify Alexa that you’re not collecting any personal information.
But if you want any personal info, you will need to notify Alexa which will notify your potential users at the time of enabling your skill.
This step is in two parts.
Part 1: Privacy policy
All published Alexa chatbots must have associated privacy policies. These can be hosted on your website and should include the way you collect, use, and store users' personal information.
Go to https://developer.amazon.com/alexa/console/ask → Distribution. Scroll down to the Privacy Policy URL field and paste your privacy policy link.
Part 2: Personal information
You now need to notify Amazon that your skill will connect personal information.
Go to https://developer.amazon.com/alexa/console/ask → Distribution → Privacy & Compliance. Under Does this Alexa skill collect users' personal information? select Yes.
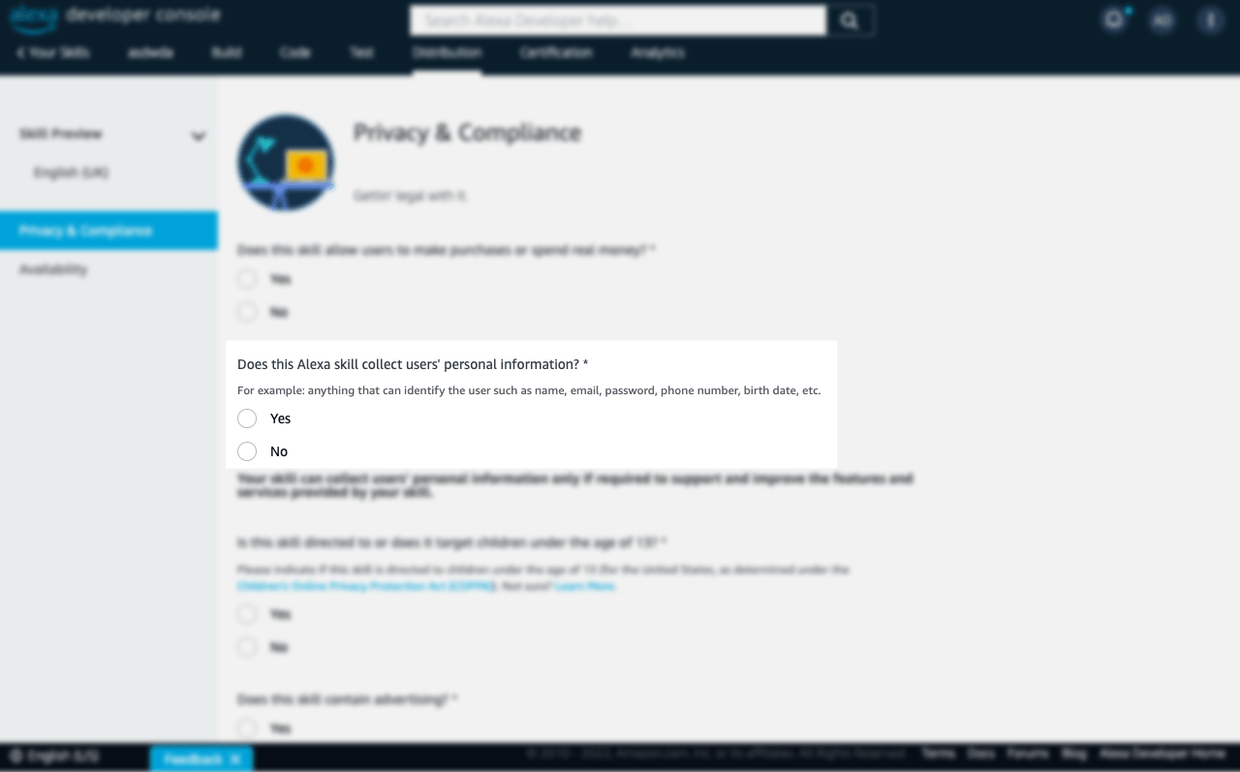
Hit Save and Continue.
Now that you’ve notified Amazon you are going to collect personal information, you need to specify which ones.
It is up to you how much or how little you want to collect from your users. It is a best practice to only collect the information you intend on using. Remember that every new user of your Alexa chatbot will have to agree to sharing this information as they enable your skill.
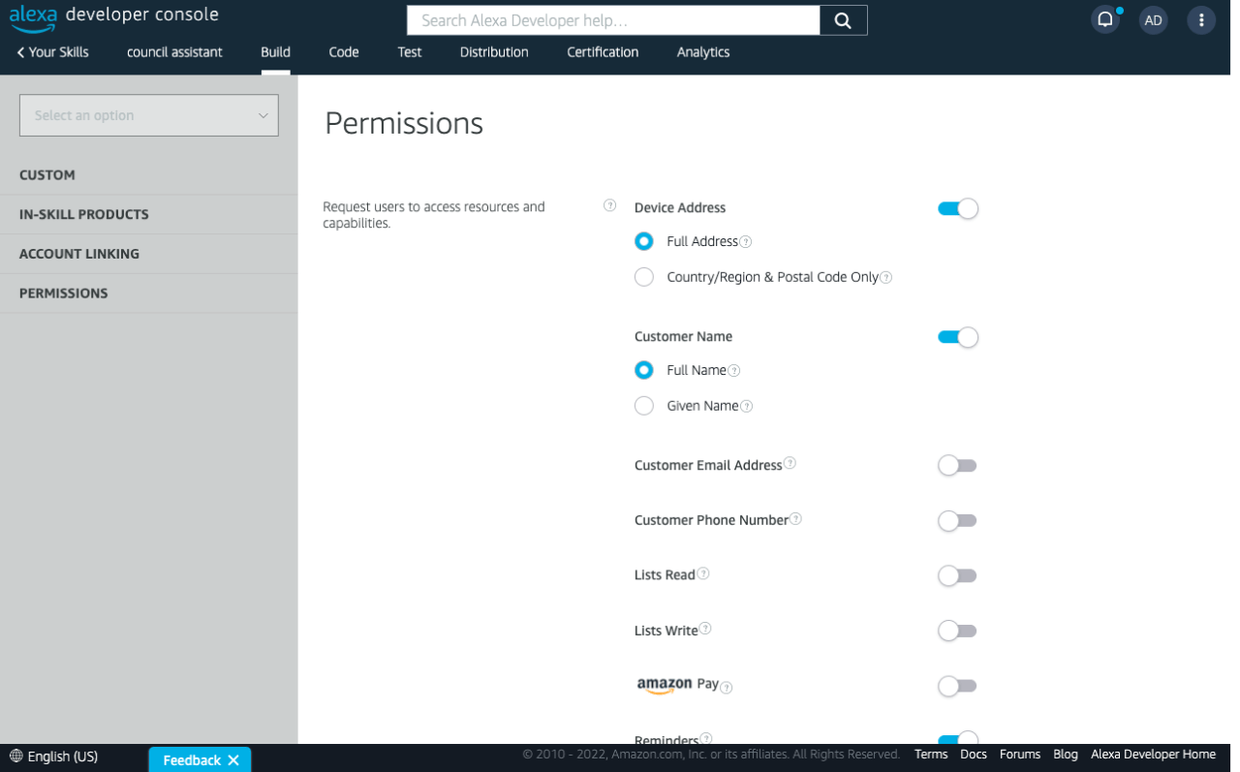
Go to https://developer.amazon.com/alexa/console/ask → Build → Models → Permissions and turn on every piece of information you’d like to be able to use.
Step 3: Set up the integration
Now that we are collecting this information, we can set up the integration that will allow our chatbot to connect to Alexa and grab it.
Go to your chatbot platform → Integrations.
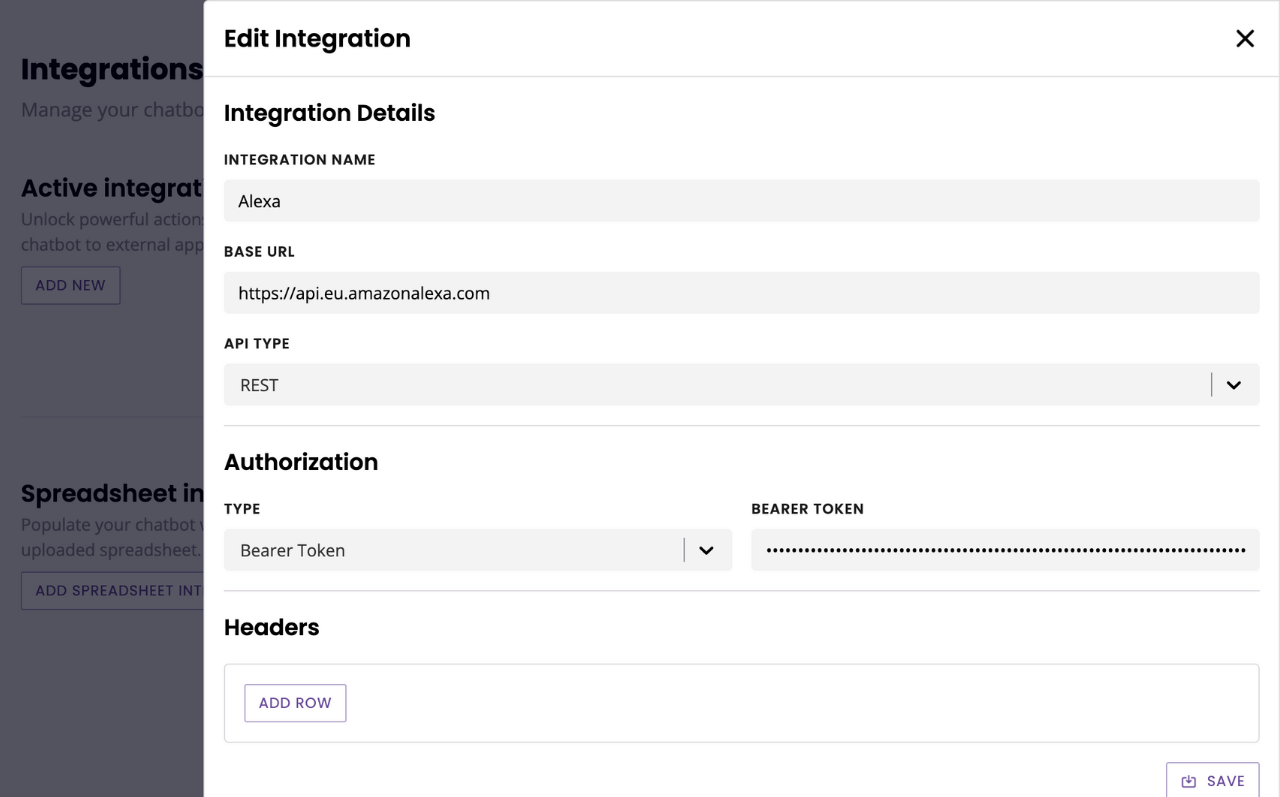
In the Active integrations section, click + New integration.
Give your integration a name (e.g. Alexa) and the Base URL https://api.eu.amazonalexa.com.
Select REST.
Under Authorization, select Bearer token. Your token is saved under the variable {{alexa.api_access_token}}. Simply paste this variable inside the bearer token field and hit Save.
Step 4: Create your endpoints
As we’ve seen, your skill can collect a myriad of data from its users. Because of this, we won’t go through every single use case – they all work in a similar way anyway.
Instead, we’ll focus on three:
Use case #1 - Getting a user’s name
This use case relies heavily on Amazon’s API. Find more information here: https://developer.amazon.com/en-US/docs/alexa/custom-skills/request-customer-contact-information-for-use-in-your-skill.html.
Go to Integrations. Find your previously set up Alexa integration and click Endpoints.
Give your request a name (e.g. Get name). Make sure it is a GET request and enter the following path: v2/accounts/~current/settings/Profile.name.
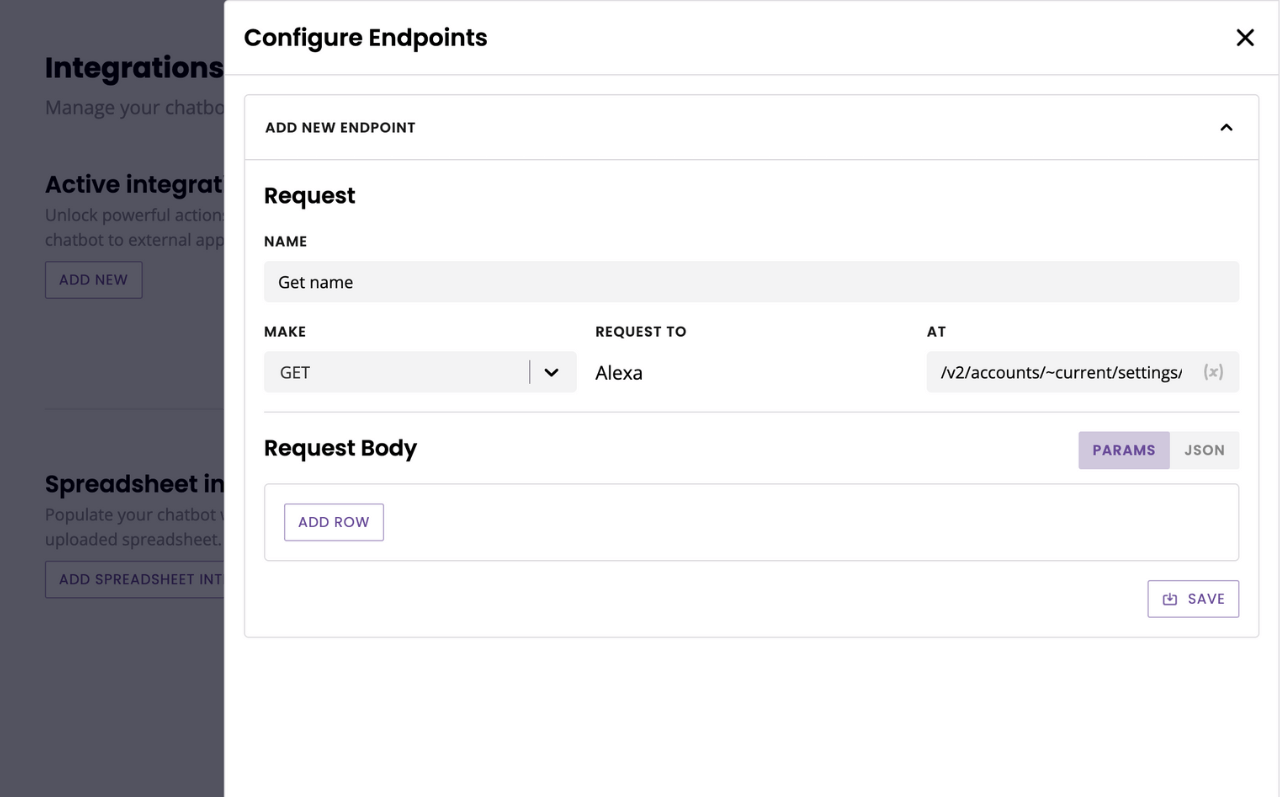
Hit Save.
Now that we have the integration set up, we can get its response into a conversation.
Go to Builder. Open or create a conversation.
Edit a step (three dots in the top right). Hit Advanced Settings.
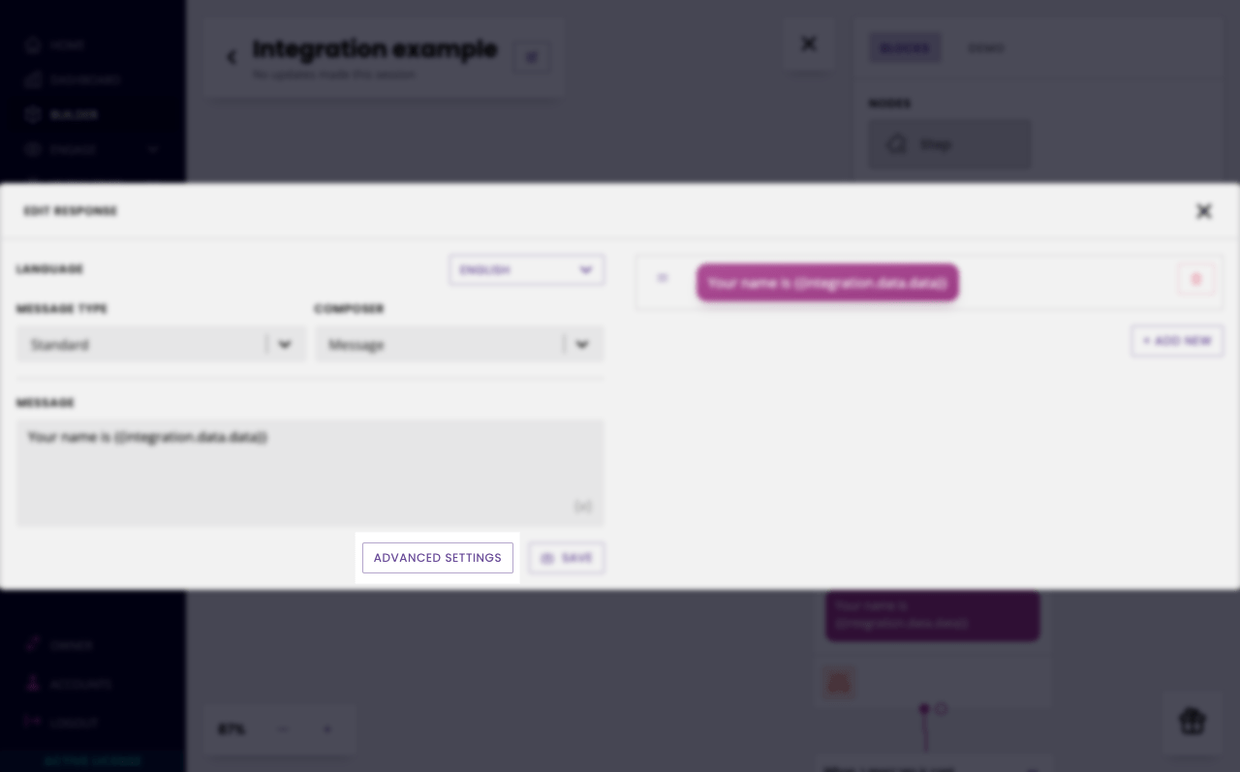
Select Use API request response, then find your integration (Alexa) and your endpoint (Get name).
Hit Save. You can now surface information from the integration inside your chatbot copy. In this instance, use the following variable: {{integration.data.data}}.
Why {{integration.data.data}}? You can learn more about variables here. The short explanation is that the integration you’ve set up, when called, returns
{
    "data": "firstname lastname"
}
We can then use the {{integration.data format to tell our chatbot “go look for data inside this integration” then the second .data is the name of the variable Amazon sends us (see above).
Don’t worry, you don’t need to know all this to make it work.
Hit Save.
Done! Next time one of your Alexa chatbot users reach this step (or FAQ), your chatbot will automatically swap this variable for the first name and last name they have stored on their device.
Use case #2 - Getting a user’s email address
This use case relies heavily on Amazon’s API. Find more information here: https://developer.amazon.com/en-US/docs/alexa/custom-skills/request-customer-contact-information-for-use-in-your-skill.html.
Go to Integrations. Find your previously set up Alexa integration and click Endpoints.
Give your request a name (e.g. Get email). Make sure it is a GET request and enter the following path: v2/accounts/~current/settings/Profile.email.
Hit Save.
Now that we have the integration set up, we can get its response into a conversation.
Go to Builder. Open or create a conversation.
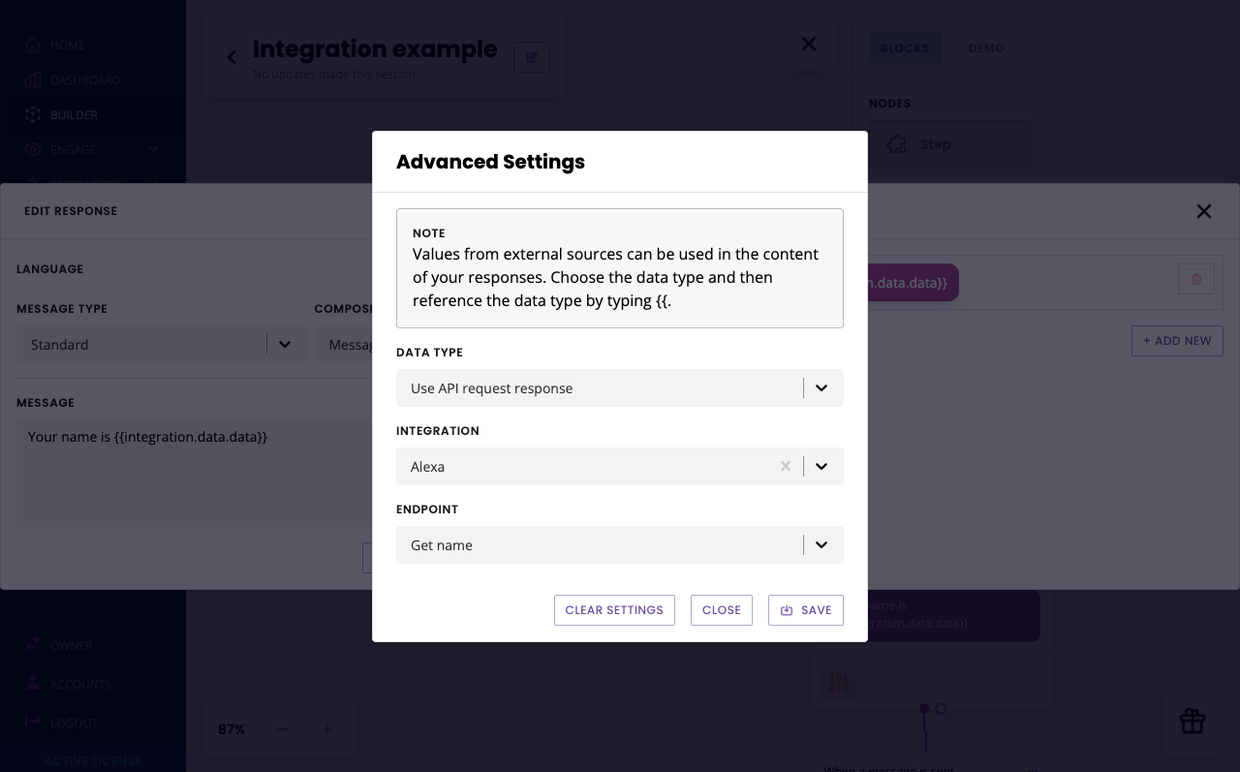
Edit a step (three dots in the top right). Hit Advanced Settings.
Select Use API request response, then find your integration (Alexa) and your endpoint (Get email).
Hit Save. You can now surface information from the integration inside your chatbot copy. In this instance, use the following variable: {{integration.data.data}}.
Why {{integration.data.data}}? You can learn more about variables here. The short explanation is that the integration you’ve set up, when called, returns
{
    "data": "my@email.com"
}
We can then use the {{integration.data format to tell our chatbot “go look for data inside this integration” then the second .data is the name of the variable Amazon sends us (see above).
Don’t worry, you don’t need to know all this to make it work.
Hit Save.
Done! Next time a user reaches this step, Alexa will read out their email address.
Use case #3 - Getting a user’s (device) location
This use case relies heavily on Amazon’s API. Find more information here: https://developer.amazon.com/en-US/docs/alexa/smapi/alexa-reminders-api-reference.html#timezones-work.
For our final use case, we’ll grab the user’s device location.
It’s important to remember the device location the user has manually entered in their Amazon Alexa profile. It may not reflect their actual location (e.g. they may have physically moved house but not changed their address on their Alexa profile).
Go to Integrations. Find your previously set up Alexa integration and click Endpoints.
Give your request a name (e.g. Get address). Make sure it is a GET request and enter the following path: v1/devices/{{alexa.device_id}}/settings/address.
Hit Save.
Now that we have the integration set up, we can get its response into a conversation.
Go to Builder. Open or create a conversation.
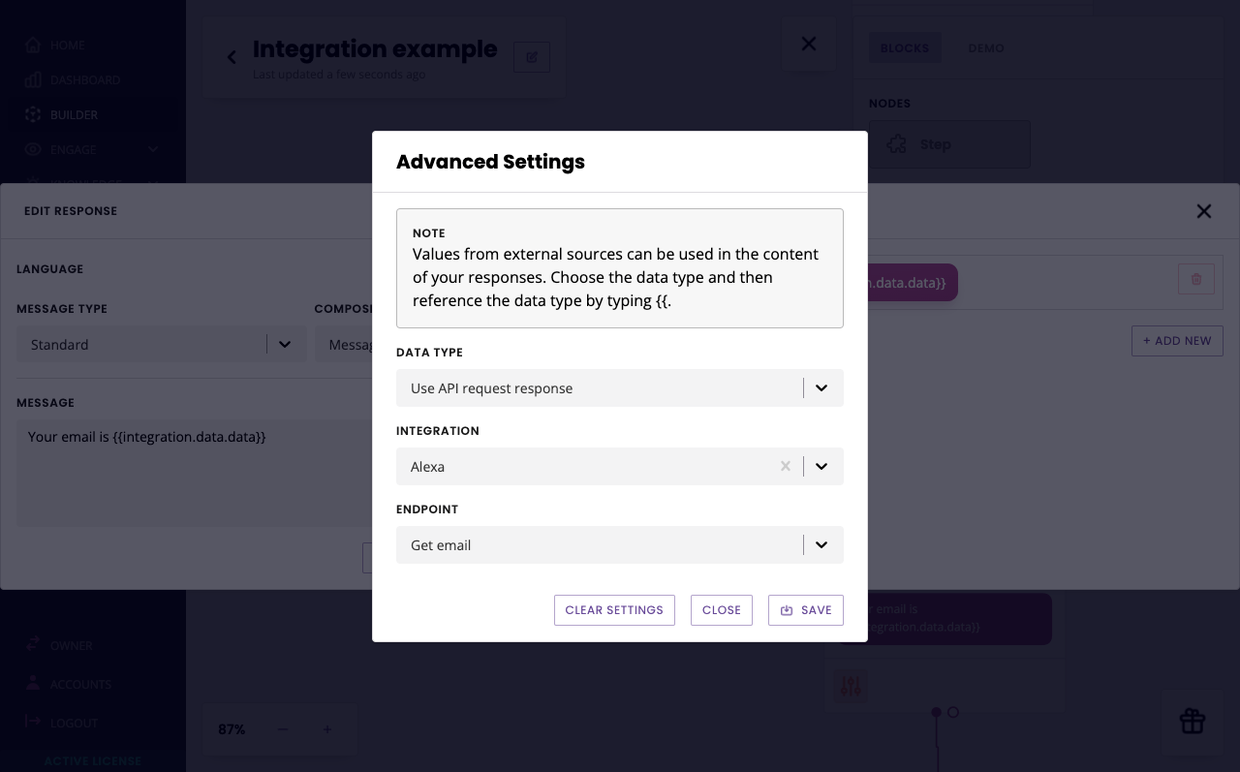
Edit a step (three dots in the top right). Hit Advanced Settings.
Select Use API request response, then find your integration (Alexa) and your endpoint (Get address).
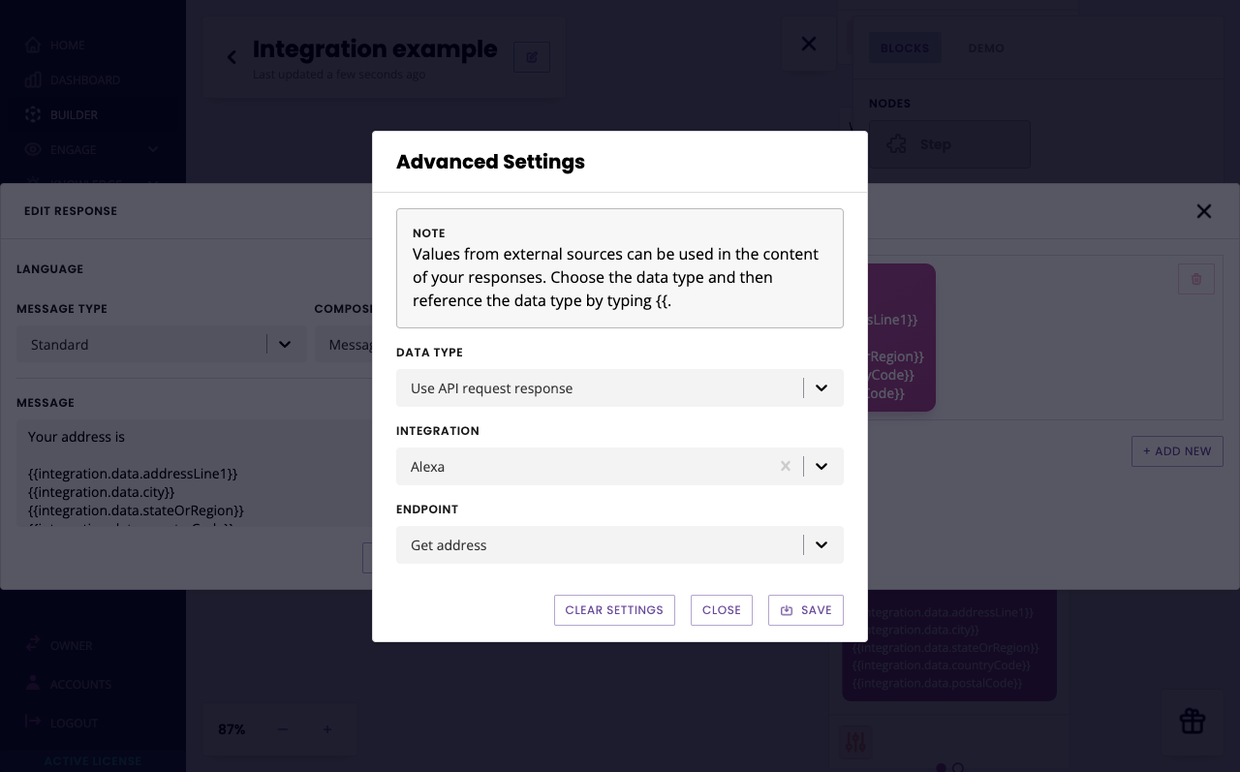
Hit Save. You can now surface information from the integration inside your chatbot copy.
When called, this integration returns the following example:
{
    "addressLine1": "18 The Street",
    "addressLine2": null,
    "addressLine3": null,
    "city": "London",
    "stateOrRegion": "London",
    "districtOrCounty": null,
    "countryCode": "GB",
    "postalCode": "SW1V 3NS"
}
Any of these pieces of information can be accessed using our {{integration.data format. For example, if we wanted to pull out the city, we would enter {{integration.data.city}}.